Cisco SGE2000 Configuration Guide - Page 44
What to Do Next, Rack-Mounting a SCE 2000 Platform, DETAILED STEPS - rack kit
 |
View all Cisco SGE2000 manuals
Add to My Manuals
Save this manual to your list of manuals |
Page 44 highlights
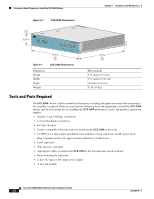
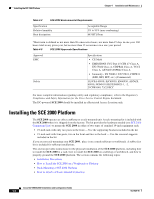
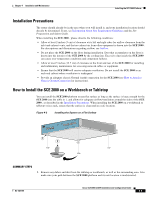
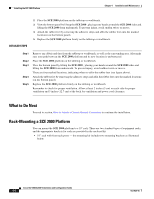
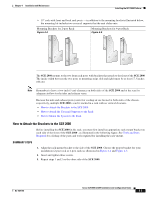
Installing the SCE 2000 Platform Chapter 4 Installation and Maintenance DETAILED STEPS 2. Place the SCE 2000 platform on the tabletop or workbench. 3. View the bottom panel by lifting the SCE 2000 , placing your hands around the SCE 2000 sides and lifting the SCE 2000 from underneath. To prevent injury, avoid sudden twists or moves. 4. Attach the rubber feet by removing the adhesive strips and affix the rubber feet onto the marked locations (on the bottom panel). 5. Replace the SCE 2000 platform firmly on the tabletop or workbench. Step 1 Step 2 Step 3 Step 4 Step 5 Remove any debris and dust from the tabletop or workbench, as well as the surrounding area. Also make sure your path between the SCE 2000 platform and its new location is unobstructed. Place the SCE 2000 platform on the tabletop or workbench. View the bottom panel by lifting the SCE 2000 , placing your hands around the SCE 2000 sides and lifting the SCE 2000 from underneath. To prevent injury, avoid sudden twists or moves. There are four marked locations, indicating where to affix the rubber feet (see figure above). Attach the rubber feet by removing the adhesive strips and affix the rubber feet onto the marked locations (on the bottom panel). Replace the SCE 2000 platform firmly on the tabletop or workbench. Remember to check for proper ventilation. Allow at least 2 inches (5 cm) on each side for proper ventilation and 5 inches (12.7 cm) at the back for ventilation.and power cord clearance. What to Do Next Proceed to section, How to Attach a Chassis Ground Connection to continue the installation. Rack-Mounting a SCE 2000 Platform You can mount the SCE 2000 platform to a 19" rack. There are two standard types of equipment racks, and the appropriate brackets for each are provided in the enclosed kit. • 19" rack with front rack posts - the mounting kit includes two mounting brackets as illustrated below. Cisco SCE 2000 4xGBE Installation and Configuration Guide 4-6 OL-7824-06
-
 1
1 -
2
-
3
-
4
-
5
-
6
-
7
-
8
-
9
-
10
-
11
-
12
-
13
-
14
-
15
-
16
-
17
-
18
-
19
-
20
-
21
-
22
-
23
-
24
-
25
-
26
-
27
-
28
-
29
-
30
-
31
-
32
-
33
-
34
-
35
-
36
-
37
-
38
-
 39
39 -
 40
40 -
 41
41 -
 42
42 -
 43
43 -
 44
44 -
 45
45 -
 46
46 -
 47
47 -
 48
48 -
 49
49 -
50
-
51
-
52
-
53
-
54
-
55
-
56
-
57
-
58
-
59
-
60
-
61
-
62
-
63
-
64
-
65
-
66
-
67
-
68
-
69
-
70
-
71
-
72
-
73
-
74
-
75
-
76
-
77
-
78
-
79
-
80
-
81
-
82
-
83
-
84
-
85
-
86
-
87
-
88
-
89
-
90
-
91
-
92
-
93
-
94
-
95
-
96
-
97
-
98
-
99
-
100
-
101
-
102
-
103
-
104
-
105
-
106
-
107
-
108
-
109
-
110
-
111
-
112
-
113
-
114
-
115
-
116
-
117
-
118
-
119
-
120
-
121
-
122
-
123
-
124
-
125
-
126
-
127
-
128
-
129
-
130
-
131
-
132
-
133
-
134
-
135
-
136
-
137
-
138
-
139
-
140
-
141
-
142
 |
 |
