Cisco SGE2000 Configuration Guide - Page 45
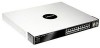
How to Attach the Brackets to the SCE 2000 - parts list
 |
View all Cisco SGE2000 manuals
Add to My Manuals
Save this manual to your list of manuals |
Page 45 highlights
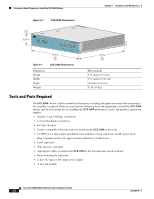
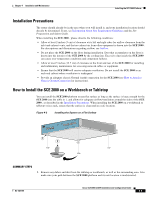
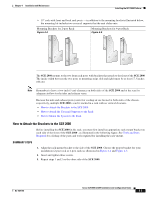
Chapter 4 Installation and Maintenance Installing the SCE 2000 Platform • 19" rack with front and back rack posts - in addition to the mounting brackets illustrated below, the mounting kit includes two crossrail supports that the unit slides onto. Mounting Brackets for 2-post Rack Figure 4-4 Mounting Brackets for 4-post Rack Figure 4-5 210429 210430 The SCE 2000 mounts to the two front rack posts with brackets that attach to the front of the SCE 2000 The inside width between the two posts or mounting strips (left and right) must be at least 17.3 inches (44 cm). Note Remember to leave a two-inch (5 cm) clearance on both sides of the SCE 2000 and at the rear for adequate airflow for the inlet and exhaust vents. Because the inlet and exhaust ports (vents) for cooling air are located at both sides of the chassis, respectively, multiple SCE 2000 s can be stacked in a rack with no vertical clearance. • How to Attach the Brackets to the SCE 2000 • How to Attach the Crossrail Supports to the Rack • How to Mount the System to the Rack How to Attach the Brackets to the SCE 2000 Before installing the SCE 2000 in the rack, you must first install an appropriate rack-mount bracket on each side of the front of the SCE 2000 , as illustrated in the following figure. See Tools and Parts Required for a listing of the parts and tools required for installing the rack-mount. SUMMARY STEPS 1. Align the rack-mount bracket to the side of the SCE 2000. Choose the proper bracket for your installation (2-post rack or 4-post rack) as illustrated in Figure 4-4 and Figure 4-5. 2. Insert and tighten three screws. 3. Repeat steps 1 and 2 on the other side of the SCE 2000. OL-7824-06 Cisco SCE 2000 4xGBE Installation and Configuration Guide 4-7
-
 1
1 -
2
-
3
-
4
-
5
-
6
-
7
-
8
-
9
-
10
-
11
-
12
-
13
-
14
-
15
-
16
-
17
-
18
-
19
-
20
-
21
-
22
-
23
-
24
-
25
-
26
-
27
-
28
-
29
-
30
-
31
-
32
-
33
-
34
-
35
-
36
-
37
-
38
-
39
-
 40
40 -
 41
41 -
 42
42 -
 43
43 -
 44
44 -
 45
45 -
 46
46 -
 47
47 -
 48
48 -
 49
49 -
 50
50 -
51
-
52
-
53
-
54
-
55
-
56
-
57
-
58
-
59
-
60
-
61
-
62
-
63
-
64
-
65
-
66
-
67
-
68
-
69
-
70
-
71
-
72
-
73
-
74
-
75
-
76
-
77
-
78
-
79
-
80
-
81
-
82
-
83
-
84
-
85
-
86
-
87
-
88
-
89
-
90
-
91
-
92
-
93
-
94
-
95
-
96
-
97
-
98
-
99
-
100
-
101
-
102
-
103
-
104
-
105
-
106
-
107
-
108
-
109
-
110
-
111
-
112
-
113
-
114
-
115
-
116
-
117
-
118
-
119
-
120
-
121
-
122
-
123
-
124
-
125
-
126
-
127
-
128
-
129
-
130
-
131
-
132
-
133
-
134
-
135
-
136
-
137
-
138
-
139
-
140
-
141
-
142
 |
 |
