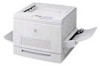
Epson ColorPage 8000 User Manual - Page 67
Replacing the Fuser Oil Roll, When you see
 |
View all Epson ColorPage 8000 manuals
Add to My Manuals
Save this manual to your list of manuals |
Page 67 highlights
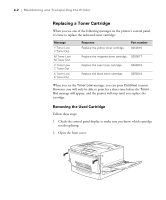
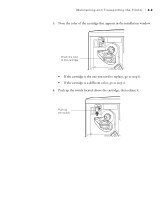
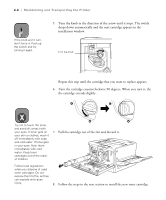
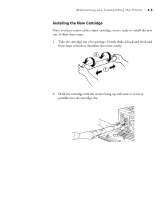
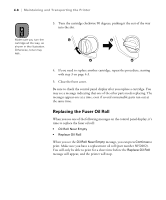
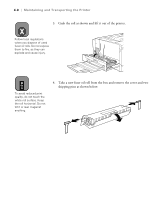
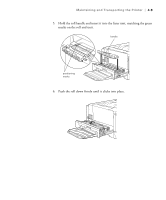
4-6 | Maintaining and Transporting the Printer Caution 3. Turn the cartridge clockwise 90 degrees, pushing it the rest of the way into the slot. Make sure you turn the cartridge all the way, as shown in the illustration. Otherwise, toner may leak. 4. If you need to replace another cartridge, repeat the procedure, starting with step 3 on page 4-3. 5. Close the front cover. Be sure to check the control panel display after you replace a cartridge. You may see a message indicating that one of the other parts needs replacing. The messages appear one at a time, even if several consumable parts run out at the same time. Replacing the Fuser Oil Roll When you see one of the following messages on the control panel display, it's time to replace the fuser oil roll: • Oil Roll Near Empty • Replace Oil Roll When you see the Oil Roll Near Empty message, you can press Continue to print. Make sure you have a replacement oil roll (part number S052002). You will only be able to print for a short time before the Replace Oil Roll message will appear, and the printer will stop. 4-6
-
 1
1 -
2
-
3
-
4
-
5
-
6
-
7
-
8
-
9
-
10
-
11
-
12
-
13
-
14
-
15
-
16
-
17
-
18
-
19
-
20
-
21
-
22
-
23
-
24
-
25
-
26
-
27
-
28
-
29
-
30
-
31
-
32
-
33
-
34
-
35
-
36
-
37
-
38
-
39
-
40
-
41
-
42
-
43
-
44
-
45
-
46
-
47
-
48
-
49
-
50
-
51
-
52
-
53
-
54
-
55
-
56
-
57
-
58
-
59
-
60
-
61
-
 62
62 -
 63
63 -
 64
64 -
 65
65 -
 66
66 -
 67
67 -
 68
68 -
 69
69 -
 70
70 -
 71
71 -
 72
72 -
73
-
74
-
75
-
76
-
77
-
78
-
79
-
80
-
81
-
82
-
83
-
84
-
85
-
86
-
87
-
88
-
89
-
90
-
91
-
92
-
93
-
94
-
95
-
96
-
97
-
98
-
99
-
100
-
101
-
102
-
103
-
104
-
105
-
106
-
107
-
108
-
109
-
110
-
111
-
112
-
113
-
114
-
115
-
116
-
117
-
118
-
119
-
120
-
121
 |
 |
