Epson ES-300C User Manual - TWAIN 32
Epson ES-300C Manual
 |
View all Epson ES-300C manuals
Add to My Manuals
Save this manual to your list of manuals |
Epson ES-300C manual content summary:
- Epson ES-300C | User Manual - TWAIN 32 - Page 1
User's Guide for Windows 69 Printed on recycled paper with at least 10% post-consumer content - Epson ES-300C | User Manual - TWAIN 32 - Page 2
other than those designated as Original EPSON products or EPSON Approved Products by Seiko Epson Corporation. EPSON and EPSON Stylus are registered trademarks of Seiko Epson Corporation. ActionScanner is a trademark and EPSON Connection is a service mark of Epson America, Inc. General Notice: Other - Epson ES-300C | User Manual - TWAIN 32 - Page 3
This Manual 3 Warnings, Cautions, Tips, and Notes 4 Where to Get Help 4 Electronic Support Services 5 Scanner 2-3 Exporting a Calibration Chart 2-4 Creating Printer Calibration Profiles 2-6 Scanning Using Calibration 2-8 Chapter 3 Capturing images From with in Applications Accessing EPSON - Epson ES-300C | User Manual - TWAIN 32 - Page 4
Saving and Exporting images Saving a Scanned Image 5-1 Exporting an Image 5-2 Acquiring and Exporting an Image 5-3 Exiting EPSON Scan! II 5-5 Chapter 6 Troubleshooting Problems Using the EPSON Scanning Utilities 6-1 Problems With Image Quality 6-9 Appendix icon Glossary Term Glossary index iv - Epson ES-300C | User Manual - TWAIN 32 - Page 5
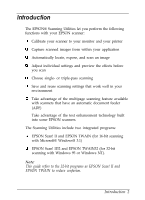
built into some EPSON scanners. The Scanning Utilities include two integrated programs: Q EPSON Scan! II and EPSON TWAIN (for 16-bit scanning with Microsoft@ Windows@ 3.1) Q EPSON Scan! II32 and EPSON TWAIN32 (for 32-bit scanning with Windows 95 or Windows NT). Note: This guide refers to the - Epson ES-300C | User Manual - TWAIN 32 - Page 6
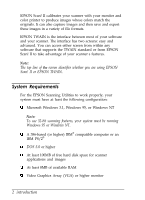
screen from within any software that supports the TWAIN standard or from EPSON Scan! II to take advantage of your scanner's features. Note: The top line of the screen identifies whether you are using EPSON Scan! II or EPSON TWAIN. System Requirements For the EPSON Scanning Utilities to work properly - Epson ES-300C | User Manual - TWAIN 32 - Page 7
Adaptec® SCSI adapter. Note: EPSON supports some Adaptec compatible SCSI adapters. How to Use This Manual This User's Guide contains information you need to install and use the EPSON Scanning Utilities with your EPSON scanner. Chapter 1 describes installing your EPSON Scanning Utilities software. Be - Epson ES-300C | User Manual - TWAIN 32 - Page 8
utilities.- Where to Get Help If you purchased your scanner in the United States or Canada, EPSON provides customer support and service through a network of Authorized EPSON Customer Care Centers. EPSON also provides the following services when you dial (800) 922-8911: cl Technical information - Epson ES-300C | User Manual - TWAIN 32 - Page 9
, or parts for EPSON products from EPSON Accessories at (800) 873-7766 (U.S. sales only). In Canada, call (800) BUY-EPSON. If you purchased your scanner outside the United States or Canada, contact your EPSON dealer or the marketing location nearest you for customer support and service. If you need - Epson ES-300C | User Manual - TWAIN 32 - Page 10
To download the latest TWAIN drivers from the BBS, use the Drivers library. CompuServe on line support CompuServe® members can call the Epson America Forum on CompuServe. If you are already a member, simply type GO EPSON at the menu prompt to reach the Forum. If you are not currently a member, you - Epson ES-300C | User Manual - TWAIN 32 - Page 11
settings, such as SCSI IDS and terminators, are set properly. Then follow the instructions below to install your software. Installing the Scanning Utilities Follow the steps in this section to install EPSON Scanning Utilities for Windows 3.1 or Windows 95. The installer program automatically detects - Epson ES-300C | User Manual - TWAIN 32 - Page 12
files to your hard disk drive and prompts you for diskette 2 as necessary. 8. Then you see the EPSON Scanner Setup dialog box. From the Interface pull-down menu, choose SCSI if your scanner is connected to a SCSI interface or BID Parallel if it is connected to a bidirectional parallel interface. The - Epson ES-300C | User Manual - TWAIN 32 - Page 13
folder in Windows. Before you can acquire an image from within your application the first time, you need to select EPSON Scanners as your TWAIN data source; see your application documentation for instructions. Note: If you are using Adobe® Photoshop™ 3.0.4 with Windows 95, see the next section for - Epson ES-300C | User Manual - TWAIN 32 - Page 14
87-ADOBE for more information. Once you have the patch files, follow these instructions to install them: 1. Install Photoshop 3.0.4, if you have not done so File menu, select Acquire. 8. Choose Select TWAIN-32 Source. 9. Choose EPSON Scanners (32bit) and click Select. 10. When you're ready to scan, - Epson ES-300C | User Manual - TWAIN 32 - Page 15
to: 0 Calibrate your monitor to your scanner Q Calibrate your printer to your scanner 0 Use the calibration profiles when you scan an image. Calibrating Your Monitor to Your Scanner To calibrate your monitor, you first need to perform a screen calibration using EPSON Scan! II and then enable screen - Epson ES-300C | User Manual - TWAIN 32 - Page 16
calibration: 1. From the Windows 3.1 Program Manager, double-click on the EPSON Scan! II icon in the EPSON Scanner program group. From Windows 95, click Start and select Programs; then select EPSON Scan! II from the EPSON Scanner folder. 2. Choose Screen Calibration from the Calibrate menu. You see - Epson ES-300C | User Manual - TWAIN 32 - Page 17
need to make sure screen calibration is enabled. Follow these steps: 1. Start EPSON Scan! II, if necessary. 2. From the File menu, choose Acquire. scans images until you change this setting. Calibrating Your Printer to Your Scanner If you are printing color images on a color printer, you must choose - Epson ES-300C | User Manual - TWAIN 32 - Page 18
. See "Scanning Using Calibration" on page 2-8. If you have a color printer that is not a color EPSON Stylus, you must create a printer calibration profile using the instructions in this section. To create a printer calibration profile, you must perform these operations: Q Export a calibration - Epson ES-300C | User Manual - TWAIN 32 - Page 19
(.BMP, .TIF, .EPS) you assign corresponds to the file format type you've selected. 5. Choose OK to export the calibration chart. 6. Exit EPSON Scan! II. 7. Start your image editing application. 8. Open the calibration chart file you just created. The chart contains nine blocks of color gradations - Epson ES-300C | User Manual - TWAIN 32 - Page 20
printing press that requires a four color separation, you'll need to ask your service bureau or printer to create a color sample using your calibration chart. You can Start EPSON Scan! II, if necessary. 2. Place the printed calibration chart face down on the glass surface of your scanner and close - Epson ES-300C | User Manual - TWAIN 32 - Page 21
. 8. Choose Calibration Profile from the Destination pull-down menu. 9. Click Scan. The program scans the calibration chart and creates a calibration profile. Then you see the EPSON Scan! II program screen. Calibrating Your System 2-7 - Epson ES-300C | User Manual - TWAIN 32 - Page 22
one of the predefined printer calibration profiles, such as one of the EPSON Stylus printer profiles, or you have created a custom calibration profile for the name of your output device. If you have one of the EPSON Stylus printers listed on page 2-4, select the printer from the Destination Name - Epson ES-300C | User Manual - TWAIN 32 - Page 23
5. 5. From the Calibration pull-down menu, select the profile name you assigned when you created the profile. 6. Choose Save. 7. Choose OK. You see the EPSON TWAIN advanced screen. You can now preview or scan your image using the calibration profile for your color printer. Tip: If the colors in your - Epson ES-300C | User Manual - TWAIN 32 - Page 24
advanced screen; see page 3-5. (To use the special effects features in the advanced screen, see Chapter 4.) Note: If your application does not support TWAIN, you can use EPSON Scan! II to scan an image and export it in a format your image editing software can use. See Chapter 5 for more information - Epson ES-300C | User Manual - TWAIN 32 - Page 25
Accessing EPSON TWAIN To access EPSON TWAIN, choose Acquire (or Place, or the appropriate command) from the File menu within your application. You may then have to select TWAIN or TWAIN32 - Epson ES-300C | User Manual - TWAIN 32 - Page 26
Feeder (ADF) or the optional Transparency Unit installed on your scanner, you can select the option from the Document Source pull-down table describes the available options: Document Source options Source option Flatbed Automatic Document Feeder Transparency Unit Function Scans the image from - Epson ES-300C | User Manual - TWAIN 32 - Page 27
these options at their defaults, listed in the Appendix. If you have a scanner that supports Text Enhancement Technology, see "Using Text Enhancement Technology" on page 3-9 for additional OCR instructions. Selecting the Destination You must select the appropriate output destination for your image - Epson ES-300C | User Manual - TWAIN 32 - Page 28
for these options at their defaults, listed in the Appendix. If you have a scanner that supports Text Enhancement Technology, see "Using Text Enhancement Technology" on page 3-9 for additional OCR instructions. Using the Advanced Screen The advanced screen allows you to select the same basic - Epson ES-300C | User Manual - TWAIN 32 - Page 29
You see the following screen: 3 Image Type Not all options on this screen are available with all scanners, Image Types, or Pixel Depth settings. The Image Type advanced options are described in the following table. Image Type aodpvtla-nced oRpJtniconnons Black &White Uses a - Epson ES-300C | User Manual - TWAIN 32 - Page 30
tones greens so green areas are w l When possible, let your image editing software perform halftoning. '* The Text Enhancement Technology option does not appear unless your scanner supports this feature. Capturing images From Within Applications 3-7 - Epson ES-300C | User Manual - TWAIN 32 - Page 31
None Red Green Blue None Red Green Blue - - I 1 Pass 1 pass 1 Pass 1 Pass 1 pass 3 Pass** ' Dither options are not available for the ES-3oOC scanner. * * When you choose 3-pass, your application does not use the Calibration, Color Filter, or Saturation features in TWAIN; see Chapter 4 for more - Epson ES-300C | User Manual - TWAIN 32 - Page 32
image type settings are not changed. Using Text Enhancement Technology EPSON's Text Enhancement Technology filters out background "noise" in text images the Destination pull-down menu as well. Note: If your scanner does not support Text Enhancement Technology, the option does not appear or is grayed - Epson ES-300C | User Manual - TWAIN 32 - Page 33
Modifying the Destination The Destination dialog box allows you to define different resolutions for each destination output device. You can also use it to modify, add, or delete a calibration profile for your output device. To modify the Destination, click the Destination button, You see the - Epson ES-300C | User Manual - TWAIN 32 - Page 34
larger the resulting image file. For example, an 8.5 x 11 photograph scanned at 300 dpi can produce a 24MB file. The same photograph scanned at 72 dpi creates of up to 110 with a 300 dpi laser printer and up to 170 with a 600 dpi laser printer. For the color EPSON Stylus printers, choose a resolution - Epson ES-300C | User Manual - TWAIN 32 - Page 35
one. TWAIN can then use the profile as it scans to create the best quality image. EPSON TWAIN provides many predefined printer calibration profiles, including those for the EPSON Stylus color printers, listed below. General Screen Impact dot printer Thermal Printer Inkjet Printer Laser Printer - Epson ES-300C | User Manual - TWAIN 32 - Page 36
document table in the preview window. Click the Zoom Preview icon to see a full-size preview in the selected area. See the next section for instructions on selecting the preview area. Note: If you click the Zoom Preview icon before you select an area, the preview includes the entire document table - Epson ES-300C | User Manual - TWAIN 32 - Page 37
Adjusting the Preview Area Once you see a preview of the image on the screen, you can define the area you want to scan or select the entire image area. To define a specific area, position the mouse pointer at a comer of the area; the pointer changes to a +. Hold down the mouse button as you drag the - Epson ES-300C | User Manual - TWAIN 32 - Page 38
. As you modify your selection area or other image settings, you see the file size of the image in the Size field. Note: Some applications convert the image to full 24-bit data, so the actual size of the image may be larger than the value displayed in Size. Setting the - Epson ES-300C | User Manual - TWAIN 32 - Page 39
If you choose Scan from the easy screen, TWAIN automatically selects the entire image and scans it. If you are scanning from the advanced screen and have not previewed the image or selected a preview area for it, be sure to click the Auto Locate icon before choosing Scan. Otherwise, the entire - Epson ES-300C | User Manual - TWAIN 32 - Page 40
can achieve all of the special effects described in this chapter-and more-using that software. However, if you don't have image editing software, EPSON TWAIN allows you to create a broad range of special effects using these options: Cl TWAIN configuration options Cl Image control settings P Gamma - Epson ES-300C | User Manual - TWAIN 32 - Page 41
have performed a screen calibration (as described in Chapter 2), you can enable it by selecting the Enable Screen Calibration option. Note: 2% ES-300C does not support calibration. In the Configuration dialog box, you can select the number of samples that will simultaneously display in the preview - Epson ES-300C | User Manual - TWAIN 32 - Page 42
in the Image Type dialog box. When Threshold is available, the other image control settings are not available. Note: The ES-300C scanner does not support Contrast, Highlight, Shadow, Sharpness, and Threshold settings. Follow these steps to use the Image Controls: 1. From the advanced screen, choose - Epson ES-300C | User Manual - TWAIN 32 - Page 43
without dramatically changing it. This modifies the contrast in image tones so they reproduce with greater detail. Note: Gamma Correction is not available for the ES-300C. 4-4 Using Special Effects - Epson ES-300C | User Manual - TWAIN 32 - Page 44
After you have previewed an image, choose the Gamma Correction icon, . You see the following dialog box: Linear __ highlights - midtones - shadows Adjust the gamma curve settings using the slide bar. You see the effects of the new settings in the preview window. If you choose the Comparison icon - Epson ES-300C | User Manual - TWAIN 32 - Page 45
you have previewed the image, choose the Color q Adjustment icon, . You see the following dialog box: Note: Color adjustment settings are not available for the ES-300C. 4-6 Using Special Effects - Epson ES-300C | User Manual - TWAIN 32 - Page 46
You can change these settings in the Color Adjustment dialog box, as described in this section: 0 Gray Balance 0 Saturation Cl Color Filter. You can reset any preview image you've modified using the Color Adjustment dialog box by choosing the Reset button just below the Color Adjustment icon. - Epson ES-300C | User Manual - TWAIN 32 - Page 47
To remove color completely from an image, move the Saturation slide bar all the way to the left. Note: The saturation setting is ignored in 3-pass scanning. Using Color Filters Color filters can help eliminate color tinges (or an undesirable overall color tone) that exist in the original. You can - Epson ES-300C | User Manual - TWAIN 32 - Page 48
image, click the Auto Exposure icon, !!#!, to automatically adjust the brightness and contrast in an image. Note: Auto Exposure is not available for the ES-300C. Using Auto Locate q After you preview an image, click the Auto Locate icon, , to crop out everything on the document table except the - Epson ES-300C | User Manual - TWAIN 32 - Page 49
Scan! II. Follow these steps: 1. Start EPSON Scan! II, if necessary. 2. Select Acquire from the File menu. 3. Select Scan to scan your image. 4. Choose Save AS from the File menu. You see the following dialog box: File Name: Rlrectorles: i c3epscan2 rlzll D&es: EC: dlskl~vdl 1 Cancel 1 Saving - Epson ES-300C | User Manual - TWAIN 32 - Page 50
a file format your application software can use. For information on file formats your software can open, see your software manual. Note Your application software cannot open images saved in the EPSON Scan! II file format and EPSON Scan! II cannot open an exported image file. Always save an image in - Epson ES-300C | User Manual - TWAIN 32 - Page 51
is saved in the selected file format. You can now import this file into your application software; see your software manual for instructions. Acquiring and Exporting an Image EPSON Scan! II allows you to scan and export an image directly into a selected file format, without displaying it on the - Epson ES-300C | User Manual - TWAIN 32 - Page 52
Follow these steps: 1. Start EPSON Scan! II, if necessary. 2. Choose Acquire and Export from the File menu. You see the TWAIN screen. (If you see the easy screen, click Advanced.) 3. - Epson ES-300C | User Manual - TWAIN 32 - Page 53
scanned and exported in the selected file format. You can now import this file into your application software; see your software manual for instructions. Exiting EPSON Scan! II To exit EPSON Scan! II, make sure you have saved or exported your image file. Then choose Exit from the File menu. Saving - Epson ES-300C | User Manual - TWAIN 32 - Page 54
you installed the EPSON Scanning Utilities. Restart Windows 3.1 and try again. The EPSON TWAIN data source file, or the SCSI support software may not be installed correctly. Reinstall the EPSON Scanning Utilities from your installation diskettes; see Chapter 1 for instructions. Troubleshooting 6-1 - Epson ES-300C | User Manual - TWAIN 32 - Page 55
Utilities using the EZ-SCSI Setup software when you were using an interface card that does not support EZ-SCSI. The EPSON Scanning Utilities supports only SCSI host adapter interface cards which support EZ-SCSI, or are Adaptec compatible. An error condition may have caused your application or the - Epson ES-300C | User Manual - TWAIN 32 - Page 56
are using a system with the minimum requirements for the EPSON Scanning Utilities. See the Introduction in this manual. Check that the system requirements are correct for your application software and that your software supports your scanner model. Be sure that you have correctly installed and set - Epson ES-300C | User Manual - TWAIN 32 - Page 57
full width you selected in the preview area. The EPSON ES-300C and ES-600C scanners restrict the scan width to 4096 pixels at high resolutions converting the image to full 24-bit data, which requires more disk space. See your application software manual for more information. An error in the scanner - Epson ES-300C | User Manual - TWAIN 32 - Page 58
EPSON TWAIN screen. This is normal. You must first connect an optional Automatic Document Feeder or a Transparency Unit to the scanner for any Document Source option other than Flatbed the scanner data; check with your application's manufacturer for an updated program version. Troubleshooting 6-5 - Epson ES-300C | User Manual - TWAIN 32 - Page 59
3 of this manual. The Halftone setting in the Image Type dialog box is grayed out. Halftone and dither settings on most EPSON scanners are only available a scan manager feature, you may have closed it before closing the EPSON TWAIN screen. Scan your image again, but close the TWAIN screen before - Epson ES-300C | User Manual - TWAIN 32 - Page 60
Display. You may be using an outdated video display driver. Check with your computer manufacturer for an updated driver. After changing video display resolutions, the computer display seems smaller or different. You need to adjust your monitor; see the manual that came with it. Troubleshooting 6-7 - Epson ES-300C | User Manual - TWAIN 32 - Page 61
you are scanning with the Automatic Document Feeder. After closing the EPSON TWAIN screen, a partial image of the screen appears over the then convert the image to the desired number of colors or grays within the Image-In applications. Make sure you have an updated TWAIN driver 6-8 Troubleshooting - Epson ES-300C | User Manual - TWAIN 32 - Page 62
Photoshop to allow the program to use the 32-bit TWAIN data source. See the instructions at the end of Chapter 1. Problems With Image Quality The entire image is distorted or blurred. Make sure that the document 's position so that the image comes inside the readable area. Troubleshooting 6-9 - Epson ES-300C | User Manual - TWAIN 32 - Page 63
setting. Make the Brightness setting darker. Make sure you have calibrated your monitor and printer to your scanner, and that you are using the resulting calibration profile. See Chapter 2 for more information. The are carefully aligned with the rulers on the document table. 6-10 Troubleshooting - Epson ES-300C | User Manual - TWAIN 32 - Page 64
If this happens on your printed image, your printer or its print head may have a problem or need cleaning; see your printer manual. If this happens on both your screen and printout, the scanner's sensor may be malfunctioning. Consult your dealer. Using halftoning, textured dot patterns appear in the - Epson ES-300C | User Manual - TWAIN 32 - Page 65
have correctly performed the calibration process in EPSON Scan! II. Recalibrate and try again. Check your scanner settings-such as Pixel Depth, Gamma see your printer manual. Check that your software is properly installed and set up for your printer; see your software manual. 6-12 Troubleshooting - Epson ES-300C | User Manual - TWAIN 32 - Page 66
dots appear in the scanned image. Try different EPSON TWAIN settings. Be aware that some settings disable others for a particular effect. Also, depending on your scanner, some features may not be available. Set the Gray as a Pixel Depth setting and try scanning your image again. Troubleshooting 6-13 - Epson ES-300C | User Manual - TWAIN 32 - Page 67
Check your printer driver settings. If the paper size is set larger than Letter or A4, select a smaller paper size or the maximum paper size your scanner can support. See your scanner documentation for more display setting, make sure to perform another screen calibration. 6-14 Troubleshooting - Epson ES-300C | User Manual - TWAIN 32 - Page 68
lists the default settings for the Image Type and Destination options in EPSON TWAIN. Default Image Type settings l&million colors, best quality. images, 120 dpi resolution for photos, and calibration for Inkjet printers 300 dpi resolution for line drawings and halftone images, 100 dpi resolution - Epson ES-300C | User Manual - TWAIN 32 - Page 69
Fax Default setting 200 dpi resolution for line drawings and halftone images, 200 dpi resolution for photos, and calibration for Inkjet printers OCR 300 dpi resolution for line drawings, halftone images, and photos, with General calibration Laser 600 dpi Stylus COLOR 600 dpi resolution for line - Epson ES-300C | User Manual - TWAIN 32 - Page 70
Icon Glossary This glossary describes the TWAIN icons. If you want to know what a specific icon does, locate the icon in this glossary; then read its description. Some icons open dialog boxes which contain more icons. Preview. Allows you to see your entire image before scanning it. Once an image is - Epson ES-300C | User Manual - TWAIN 32 - Page 71
Auto Locate. Allows you to automatically select just the image. If your preview window contains more than one image and you only need one, roughly select the image you want by dragging the mouse pointer and clicking the Auto Locate icon. When you select Scan from the easy screen, TWAIN uses this - Epson ES-300C | User Manual - TWAIN 32 - Page 72
Shadow Comparison. Allows you to compare three or five image samples of varying shadow intensity or color. The middle sample reflects the current shadowsetting. Sharpness Comparison. Allows you to compare three or five image samples of varying sharpness. The middle sample reflects the current - Epson ES-300C | User Manual - TWAIN 32 - Page 73
Color Adjustment. Opens the Color Adjustment dialog box, which lets you adjust colors in an image using the settings described below. Gray Balance Comparison. Allows you to compare three or five varying casts of gray in image samples so you can select the most neutral gray. Saturation Comparison. - Epson ES-300C | User Manual - TWAIN 32 - Page 74
Automatic Document Feeder A scanner accessory that automatically feeds a stack of paper into the scanner. Bidirectional Parallel Interface An colors. Color Filter An EPSON TWAIN setting that lets you modify the color of an entire image. Color Separation A process to convert full-color images into a - Epson ES-300C | User Manual - TWAIN 32 - Page 75
final output device. EPSON TWAIN provides several Destination scanner. Also called a peripheral. Device Driver A file containing instructions scanner software setting which lets you instruct your scanner to ignore a color. EPSF Encapsulated PostScript File. An industry standard file format supported - Epson ES-300C | User Manual - TWAIN 32 - Page 76
sizes of the dots printed. Halftoning A process of converting continuous tones into digital data so that the output data Type The way an image will be scanned or reproduced. EPSON TWAIN provides Pixel Depth, Halftone, Dropout, and Quality settings to supported by many applications. Term Glossary 3 - Epson ES-300C | User Manual - TWAIN 32 - Page 77
may be C:\WINDOWS\TWAIN. Pixel Picture Element. Each image is composed of a number of pixels. Pixels are sometimes called dots. Pixel Depth An EPSON TWAIN setting that lets you select the amount of color information in a file. Port An interface channel through which data is transmitted between - Epson ES-300C | User Manual - TWAIN 32 - Page 78
scan An operation performed by the sensor and the carriage of a scanner. The image is divided into pixels be scanned by the scanner. SCSI Small Computer System Interface. EPSON scanners may use the Adaptec TIFF is an industrystandard file format supported by many applications. TIFF6.0(JPEG) Tagged - Epson ES-300C | User Manual - TWAIN 32 - Page 79
which shows the contrast ratio between the input (original image) and output (image data) in image processing. Transparency Unit A scanner accessory which allows the scanner to use materials such as transparencies. TWAIN An open industry interface allowing you to acquire image data directly from - Epson ES-300C | User Manual - TWAIN 32 - Page 80
Index A Accessories, purchasing, Intro-4 to Intro-5 Acquire Bulletin Board Service, EPSON, Intro-5 C Calibration chart, 2-4 to 2-7 monitor, 2-1 to 2-3, 4-2 printer, 2-3 to 2-9 problems, 6-7, 6- 4-2 to 4-4, 6-7 Create Calibration Profile option, 2-6 to 2-8 Customer support, Intro-4 to Intro-6 Index 1 - Epson ES-300C | User Manual - TWAIN 32 - Page 81
introduction, Intro-1 to Intro-2 problems, 6-1 to 6-9 requirements, system, Intro-2 to Intro-3 saving images, 5-1 to 5-2 testing 1-3 EPSON TWAIN, see TWAIN Errors, 6-2, 6-4, 6-6 ES-300C scanner restrictions, 3-8, 4-2 to 4-4, 4-6, 4-9, 6-4 ES-600C scanner restrictions, 6-4 Export Calibration Chart - Epson ES-300C | User Manual - TWAIN 32 - Page 82
6-6, A-1 easy screen, 3-4 Installation, EPSON Scanning Utilities, 1-1 to 1-4, 6-1 compression scheme, 5-3, 5-5 M Manual, how to use, Intro-3 option, 3-4 to 3-5, 3-9 Online support, Intro-5 to Intro-6 Optimum resolutions, 4-9, 6-4 icon, 3-13, 4-3, 6-4 problems, 6-4, 6-14 saving image, 4-1 to 4-2 zoom, - Epson ES-300C | User Manual - TWAIN 32 - Page 83
Scan manager, 6-6 Scanners compatible, Intro-3 ES300C, 3-8, 4-2 to 4-4, 4-6, 4-9, 6-4 ES-600C, 6-4 Scanning EPSON, see EPSON Scan! II and TWAIN Screen calibration, see Calibration SCSI problems, 6-1 to 6-3 settings, 1-1 to 1-2 Selection matrix, 3-8 Service bureau, printer, 2-6 Service, EPSON - Epson ES-300C | User Manual - TWAIN 32 - Page 84
see Easy screen installing 1-1 to 1-4 introduction, Intro-1 to Intro-2 problems, 6-1 to 6-9 requirements, system, Intro-2 to Intro-3 scanning using 4-1 to 4-9 testing 1-3 U Units, measurement, 3-14 Utilities, EPSON Scanning, see EPSON Scan! II and TWAIN V Variations between samples option, 4-2 Video - Epson ES-300C | User Manual - TWAIN 32 - Page 85
User's Guide for Windows 69 Printed on recycled paper with at least 10% post-consumer content - Epson ES-300C | User Manual - TWAIN 32 - Page 86
other than those designated as Original EPSON fioduck or EPSON Approved Products by Seiko Epson Corporation. EPSON and EPSON Stylus are registered trademarks of Seiko Epson Corporation. ActionScanner is a trademark and EPSON Connection is a service mark of Epson America, Inc. General Notice: Other
-
 1
1 -
 2
2 -
 3
3 -
 4
4 -
 5
5 -
 6
6 -
 7
7 -
8
-
9
-
10
-
11
-
12
-
13
-
14
-
15
-
16
-
17
-
18
-
19
-
20
-
21
-
22
-
23
-
24
-
25
-
26
-
27
-
28
-
29
-
30
-
31
-
32
-
33
-
34
-
35
-
36
-
37
-
38
-
39
-
40
-
41
-
42
-
43
-
44
-
45
-
46
-
47
-
48
-
49
-
50
-
51
-
52
-
53
-
54
-
55
-
56
-
57
-
58
-
59
-
60
-
61
-
62
-
63
-
64
-
65
-
66
-
67
-
68
-
69
-
70
-
71
-
72
-
73
-
74
-
75
-
76
-
77
-
78
-
79
-
80
-
81
-
82
-
83
-
84
-
85
-
86
 |
 |

User’s Guide
for Windows
69
Printed on recycled paper with at least 10% post-consumer content