Epson ES-300C User Manual - TWAIN 32 - Page 43
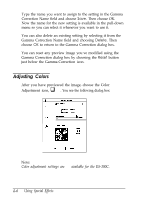
Adjusting Gamma Correction, Gamma Correction is not available for the ES-300C., Using Special Effects
 |
View all Epson ES-300C manuals
Add to My Manuals
Save this manual to your list of manuals |
Page 43 highlights
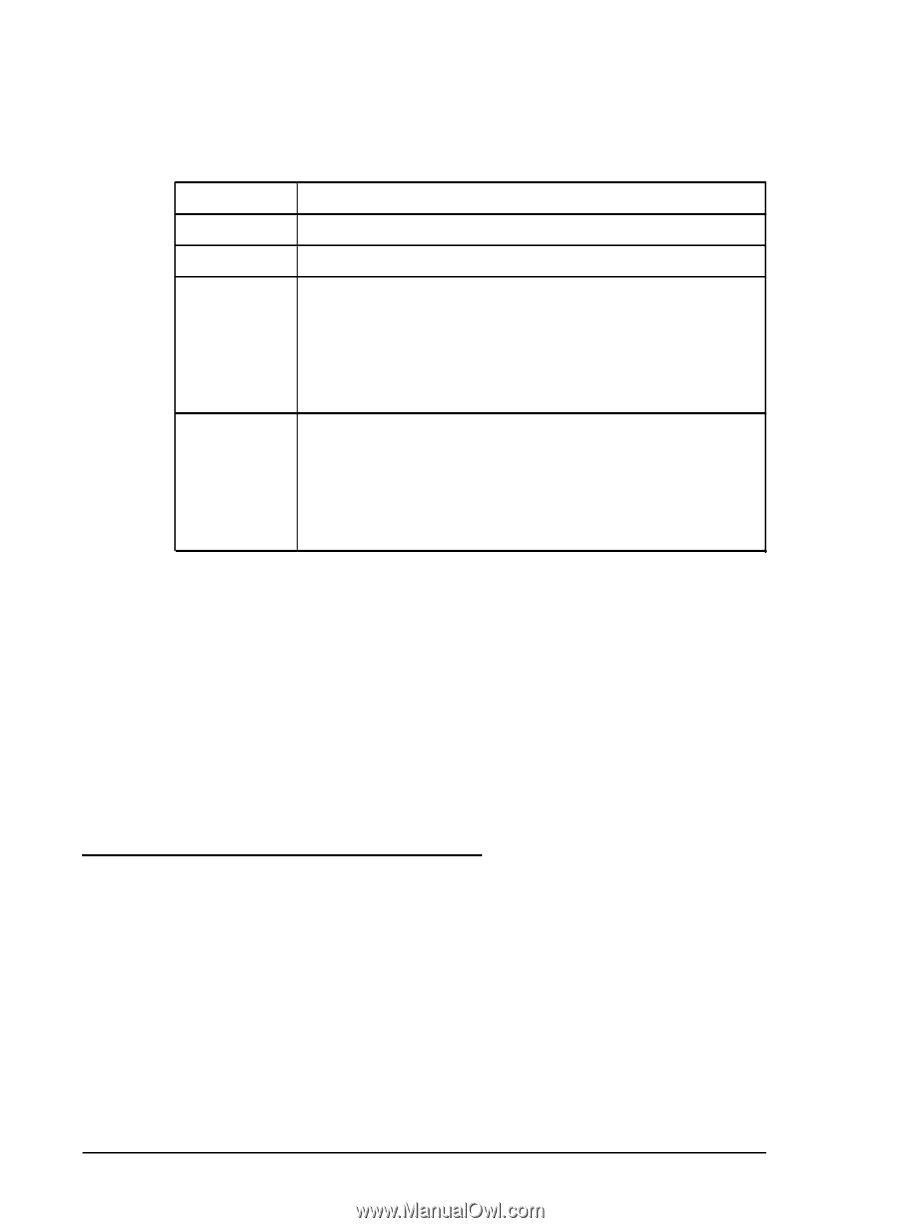
3. Adjust the settings until the image in the preview window looks the way you want it to look. See the following table for guidelines on changing these settings. Method Value fields Slide bars Comparison icons Highlight and Shadow Color buttons l Description Type in the value you want for the setting in the field, Move the slide bar until the preview looks correct. Click the Comparison icon next to the slide bar to display 3 or 5 comparison samples using different settings, In the preview window, click the sample that most closely reflects the image you want. That sample is then highlighted and placed in the middle position. Click the sample again: it reappears alone. Click the Color button below the slide bar; the mouse pointer changes to an eyedropper. Select the color you want to represent the highlights or shadows from the preview image. When you select the color in the preview window. the button turns that color. l You cannot choose the Highlight and Shadow color buttons when comparison samples are displayed in the preview window. 4. When the image in the preview window looks the way you want, choose OK. 5. You can now scan the image into your application. You can reset any preview image you've modified by choosing the Reset button just below the Image Controls icon. Adjusting Gamma Correction Adjusting the gamma levels lets you change the pixel brightness in the midtones, highlights, and shadows of an image without dramatically changing it. This modifies the contrast in image tones so they reproduce with greater detail. Note: Gamma Correction is not available for the ES-300C. 4-4 Using Special Effects
-
 1
1 -
2
-
3
-
4
-
5
-
6
-
7
-
8
-
9
-
10
-
11
-
12
-
13
-
14
-
15
-
16
-
17
-
18
-
19
-
20
-
21
-
22
-
23
-
24
-
25
-
26
-
27
-
28
-
29
-
30
-
31
-
32
-
33
-
34
-
35
-
36
-
37
-
 38
38 -
 39
39 -
 40
40 -
 41
41 -
 42
42 -
 43
43 -
 44
44 -
 45
45 -
 46
46 -
 47
47 -
 48
48 -
49
-
50
-
51
-
52
-
53
-
54
-
55
-
56
-
57
-
58
-
59
-
60
-
61
-
62
-
63
-
64
-
65
-
66
-
67
-
68
-
69
-
70
-
71
-
72
-
73
-
74
-
75
-
76
-
77
-
78
-
79
-
80
-
81
-
82
-
83
-
84
-
85
-
86
 |
 |