Epson ES-300C User Manual - TWAIN 32 - Page 22
Scanning Using Calibration, setting, and 180 for both
 |
View all Epson ES-300C manuals
Add to My Manuals
Save this manual to your list of manuals |
Page 22 highlights
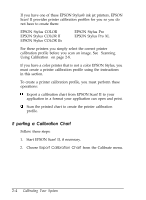
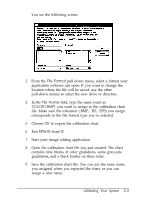
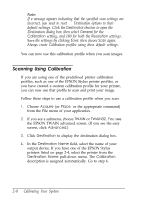
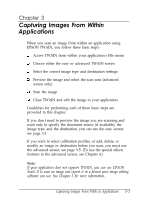
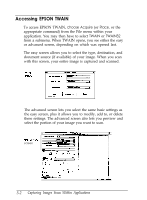
Note: If a message appears indicating that the specified scan settings are incorrect, you need to reset the Destination options to their default settings. Click the Destination button to open the Destination dialog box; then select General for the Calibration setting, and 180 for both the Resolution settings. Save the settings by clicking Save; then choose Scan again. Always create Calibration profiles using these default settings. You can now use this calibration profile when you scan images. Scanning Using Calibration If you are using one of the predefined printer calibration profiles, such as one of the EPSON Stylus printer profiles, or you have created a custom calibration profile for your printer, you can now use that profile to scan and print your image. Follow these steps to use a calibration profile when you scan: 1. Choose Acquire (or Place, or the appropriate command) from the File menu of your application. 2. If you see a submenu, choose TWAIN or TWAIN32. You see the EPSON TWAIN advanced screen. (If you see the easy screen, click Advanced.) 3. Click Destination to display the destination dialog box. 4. In the Destination Name field, select the name of your output device. If you have one of the EPSON Stylus printers listed on page 2-4, select the printer from the Destination Name pull-down menu. The Calibration description is assigned automatically. Go to step 6. 2-8 Calibrating Your System
-
 1
1 -
2
-
3
-
4
-
5
-
6
-
7
-
8
-
9
-
10
-
11
-
12
-
13
-
14
-
15
-
16
-
 17
17 -
 18
18 -
 19
19 -
 20
20 -
 21
21 -
 22
22 -
 23
23 -
 24
24 -
 25
25 -
 26
26 -
 27
27 -
28
-
29
-
30
-
31
-
32
-
33
-
34
-
35
-
36
-
37
-
38
-
39
-
40
-
41
-
42
-
43
-
44
-
45
-
46
-
47
-
48
-
49
-
50
-
51
-
52
-
53
-
54
-
55
-
56
-
57
-
58
-
59
-
60
-
61
-
62
-
63
-
64
-
65
-
66
-
67
-
68
-
69
-
70
-
71
-
72
-
73
-
74
-
75
-
76
-
77
-
78
-
79
-
80
-
81
-
82
-
83
-
84
-
85
-
86
 |
 |
