Epson ES-300C User Manual - TWAIN 32 - Page 11
CHAP 1-INSTALLING YOUR SOFTWARE, Installing the Scanning Utilities
 |
View all Epson ES-300C manuals
Add to My Manuals
Save this manual to your list of manuals |
Page 11 highlights
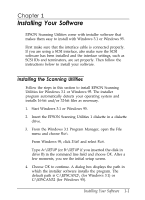
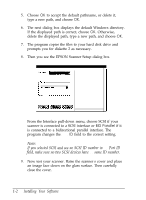
Chapter 1 Installing Your Software EPSON Scanning Utilities come with installer software that makes them easy to install with Windows 3.1 or Windows 95. First make sure that the interface cable is connected properly. If you are using a SCSI interface, also make sure the SCSI software has been installed and the interface settings, such as SCSI IDS and terminators, are set properly. Then follow the instructions below to install your software. Installing the Scanning Utilities Follow the steps in this section to install EPSON Scanning Utilities for Windows 3.1 or Windows 95. The installer program automatically detects your operating system and installs 16-bit and/or 32-bit files as necessary. 1. Start Windows 3.1 or Windows 95. 2. Insert the EPSON Scanning Utilities 1 diskette in a diskette drive. 3. From the Windows 3.1 Program Manager, open the File menu and choose Run. From Windows 95, click Start and select Run. Type A:\SETUP (or B:\SETUP if you inserted the disk in drive B) in the command line field and choose OK. After a few moments, you see the initial setup screen. 4. Choose OK to continue. A dialog box displays the path in which the installer software installs the program. The default path is C:\EPSCAN2\ (for Windows 3.1) or C:\EPSCAN32 (for Windows 95). Installing Your Software 1-1
-
 1
1 -
2
-
3
-
4
-
5
-
 6
6 -
 7
7 -
 8
8 -
 9
9 -
 10
10 -
 11
11 -
 12
12 -
 13
13 -
 14
14 -
 15
15 -
 16
16 -
17
-
18
-
19
-
20
-
21
-
22
-
23
-
24
-
25
-
26
-
27
-
28
-
29
-
30
-
31
-
32
-
33
-
34
-
35
-
36
-
37
-
38
-
39
-
40
-
41
-
42
-
43
-
44
-
45
-
46
-
47
-
48
-
49
-
50
-
51
-
52
-
53
-
54
-
55
-
56
-
57
-
58
-
59
-
60
-
61
-
62
-
63
-
64
-
65
-
66
-
67
-
68
-
69
-
70
-
71
-
72
-
73
-
74
-
75
-
76
-
77
-
78
-
79
-
80
-
81
-
82
-
83
-
84
-
85
-
86
 |
 |