Epson ES-300C User Manual - TWAIN 32 - Page 51
Acquiring and Exporting an Image, for the Pixel Depth
 |
View all Epson ES-300C manuals
Add to My Manuals
Save this manual to your list of manuals |
Page 51 highlights
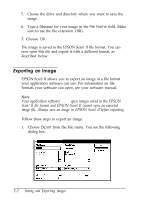
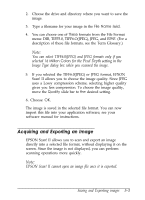
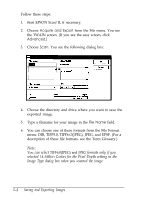
2. Choose the drive and directory where you want to save the image. 3. Type a filename for your image in the File Name field. 4. You can choose one of these formats from the File Format menu: DIB, TIFF5.0, TIFF6.O(JPEG), JPEG, and EPSF. (For a description of these file formats, see the Term Glossary.) Note: You can select TIFF6.0(JPEG) and JPEG formats only if you selected 16 Million Colors for the Pixel Depth setting in the Image Type dialog box when you scanned the image. 5. If you selected the TIFF6.0(JPEG) or JPEG format, EPSON Scan! II allows you to choose the image quality. Since JPEG uses a Lossy compression scheme, selecting higher quality gives you less compression. To choose the image quality, move the Quality slide bar to the desired setting. 6. Choose OK. The image is saved in the selected file format. You can now import this file into your application software; see your software manual for instructions. Acquiring and Exporting an Image EPSON Scan! II allows you to scan and export an image directly into a selected file format, without displaying it on the screen. Since the image is not displayed, you can perform scanning operations more quickly. Note: EPSON Scan! II cannot open an image file once it is exported. Saving and Exporting images 5-3
-
 1
1 -
2
-
3
-
4
-
5
-
6
-
7
-
8
-
9
-
10
-
11
-
12
-
13
-
14
-
15
-
16
-
17
-
18
-
19
-
20
-
21
-
22
-
23
-
24
-
25
-
26
-
27
-
28
-
29
-
30
-
31
-
32
-
33
-
34
-
35
-
36
-
37
-
38
-
39
-
40
-
41
-
42
-
43
-
44
-
45
-
 46
46 -
 47
47 -
 48
48 -
 49
49 -
 50
50 -
 51
51 -
 52
52 -
 53
53 -
 54
54 -
 55
55 -
 56
56 -
57
-
58
-
59
-
60
-
61
-
62
-
63
-
64
-
65
-
66
-
67
-
68
-
69
-
70
-
71
-
72
-
73
-
74
-
75
-
76
-
77
-
78
-
79
-
80
-
81
-
82
-
83
-
84
-
85
-
86
 |
 |