Epson Expression 636 User Manual - TWAIN 32 - Page 19
Remove the EPSON Scan! II program diskette from the, If you are using Windows 3.1
 |
View all Epson Expression 636 manuals
Add to My Manuals
Save this manual to your list of manuals |
Page 19 highlights
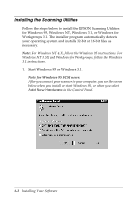
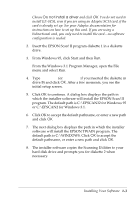
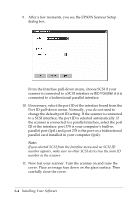
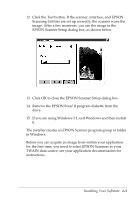
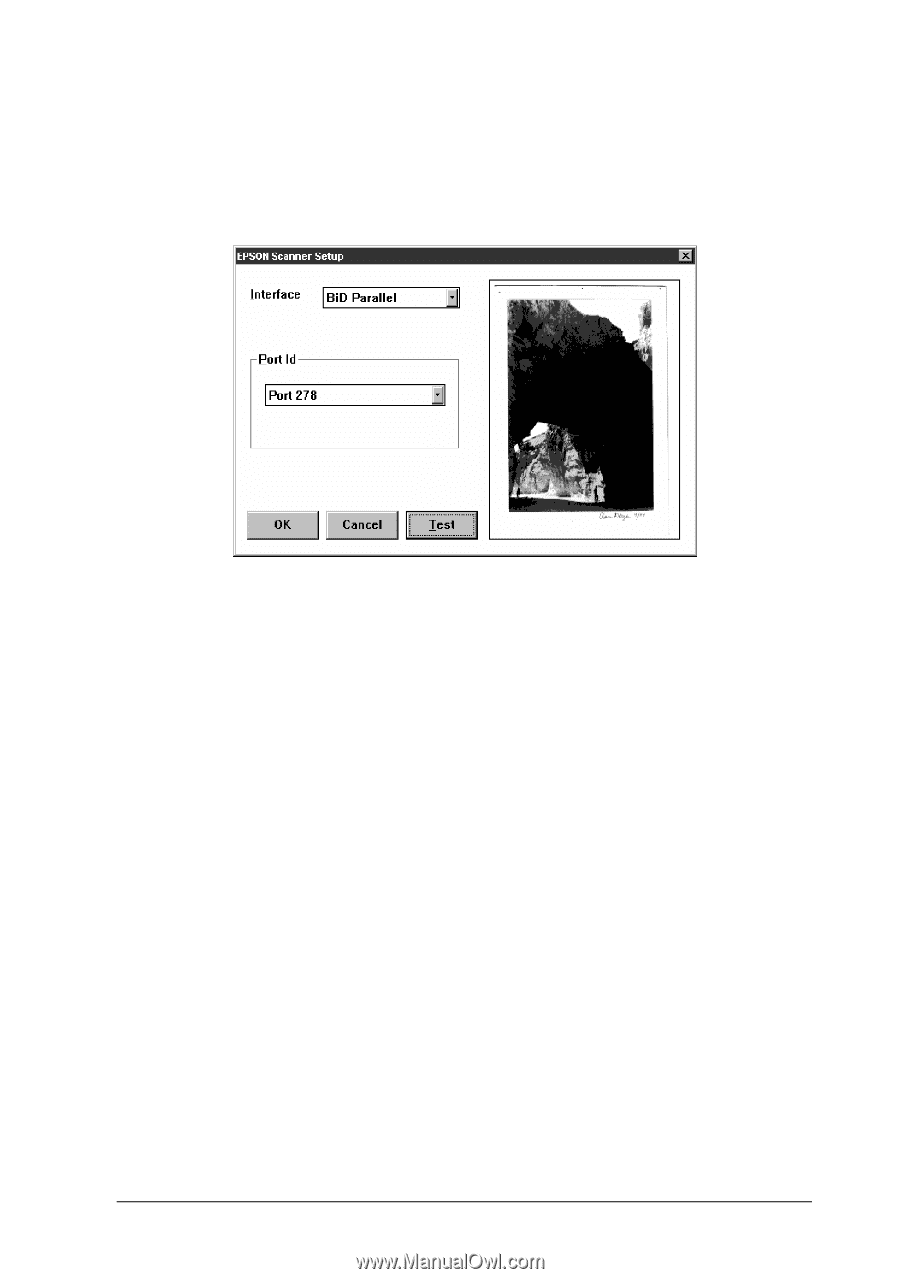
12. Click the Test button. If the scanner, interface, and EPSON Scanning Utilities are set up correctly, the scanner scans the image. After a few moments, you see the image in the EPSON Scanner Setup dialog box, as shown below. Photograph by Claire Bergen 13. Click OK to close the EPSON Scanner Setup dialog box. 14. Remove the EPSON Scan! II program diskette from the drive. 15. If you are using Windows 3.1, exit Windows and then restart it. The installer creates an EPSON Scanner program group or folder in Windows. Before you can acquire an image from within your application for the first time, you need to select EPSON Scanners as your TWAIN data source; see your application documentation for instructions. Installing Your Software 1-5
-
 1
1 -
2
-
3
-
4
-
5
-
6
-
7
-
8
-
9
-
10
-
11
-
12
-
13
-
 14
14 -
 15
15 -
 16
16 -
 17
17 -
 18
18 -
 19
19 -
 20
20 -
 21
21 -
 22
22 -
 23
23 -
 24
24 -
25
-
26
-
27
-
28
-
29
-
30
-
31
-
32
-
33
-
34
-
35
-
36
-
37
-
38
-
39
-
40
-
41
-
42
-
43
-
44
-
45
-
46
-
47
-
48
-
49
-
50
-
51
-
52
-
53
-
54
-
55
-
56
-
57
-
58
-
59
-
60
-
61
-
62
-
63
-
64
-
65
-
66
-
67
-
68
-
69
-
70
-
71
-
72
-
73
-
74
-
75
-
76
-
77
-
78
-
79
-
80
-
81
-
82
-
83
-
84
-
85
-
86
-
87
-
88
-
89
-
90
-
91
-
92
-
93
-
94
-
95
-
96
-
97
-
98
-
99
-
100
-
101
-
102
-
103
-
104
-
105
-
106
-
107
-
108
-
109
-
110
-
111
-
112
-
113
-
114
-
115
-
116
-
117
-
118
-
119
-
120
-
121
-
122
-
123
-
124
-
125
-
126
-
127
-
128
-
129
-
130
 |
 |
Installing Your Software
1-5
12.
Click the Test button. If the scanner, interface, and EPSON
Scanning Utilities are set up correctly, the scanner scans the
image. After a few moments, you see the image in the
EPSON Scanner Setup dialog box, as shown below.
13.
Click OK to close the EPSON Scanner Setup dialog box.
14.
Remove the EPSON Scan! II program diskette from the
drive.
15.
If you are using Windows 3.1, exit Windows and then restart
it.
The installer creates an EPSON Scanner program group or folder
in Windows.
Before you can acquire an image from within your application
for the first time, you need to select EPSON Scanners as your
TWAIN data source; see your application documentation for
instructions.
Photograph by Claire Bergen