Epson Expression 636 User Manual - TWAIN 32 - Page 34
Selecting the Destination, To scan text, select OCR for Optical Character Recognition
 |
View all Epson Expression 636 manuals
Add to My Manuals
Save this manual to your list of manuals |
Page 34 highlights
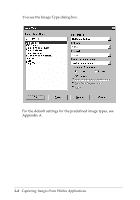
If you haven't changed any of the settings for these options, the image type you select uses the default settings listed in Appendix A. To add a new Image Type option or modify any existing settings, see "Using the Advanced Screen" on page 3-7. To scan text, select OCR (for Optical Character Recognition) from the Image Type pull-down menu. Leave the Image Type settings for the OCR option at their defaults, listed in Appendix A. Selecting the Destination You select the destination or output device to indicate where you want to display or print the scanned image. You can select one of the following options from the Destination pull-down menu: General Screen Impact Dot Printer Thermal Printer Inkjet Printer Laser Printer Laser 600dpi Fax OCR Calibration Profile Stylus COLOR Stylus Pro XL Stylus Pro Stylus COLOR II Stylus COLOR IIs Stylus 1500 Stylus COLOR 500 Stylus COLOR 200 If you haven't changed any of the settings for these options, the destination you select uses the default settings listed in Appendix A. To add a new Destination option or modify any existing settings, see "Using the Advanced Screen" on page 3-7. To scan text, select OCR (for Optical Character Recognition) from the Destination pull-down menu. Leave the Destination settings for the OCR option at their defaults, listed in Appendix A. 3-6 Capturing Images From Within Applications
-
 1
1 -
2
-
3
-
4
-
5
-
6
-
7
-
8
-
9
-
10
-
11
-
12
-
13
-
14
-
15
-
16
-
17
-
18
-
19
-
20
-
21
-
22
-
23
-
24
-
25
-
26
-
27
-
28
-
 29
29 -
 30
30 -
 31
31 -
 32
32 -
 33
33 -
 34
34 -
 35
35 -
 36
36 -
 37
37 -
 38
38 -
 39
39 -
40
-
41
-
42
-
43
-
44
-
45
-
46
-
47
-
48
-
49
-
50
-
51
-
52
-
53
-
54
-
55
-
56
-
57
-
58
-
59
-
60
-
61
-
62
-
63
-
64
-
65
-
66
-
67
-
68
-
69
-
70
-
71
-
72
-
73
-
74
-
75
-
76
-
77
-
78
-
79
-
80
-
81
-
82
-
83
-
84
-
85
-
86
-
87
-
88
-
89
-
90
-
91
-
92
-
93
-
94
-
95
-
96
-
97
-
98
-
99
-
100
-
101
-
102
-
103
-
104
-
105
-
106
-
107
-
108
-
109
-
110
-
111
-
112
-
113
-
114
-
115
-
116
-
117
-
118
-
119
-
120
-
121
-
122
-
123
-
124
-
125
-
126
-
127
-
128
-
129
-
130
 |
 |