Epson Perfection 1200U Scanner Basics - Page 64
Removing the Paper Path Guide, the Paper Path Guide´ below. To reattach
 |
View all Epson Perfection 1200U manuals
Add to My Manuals
Save this manual to your list of manuals |
Page 64 highlights
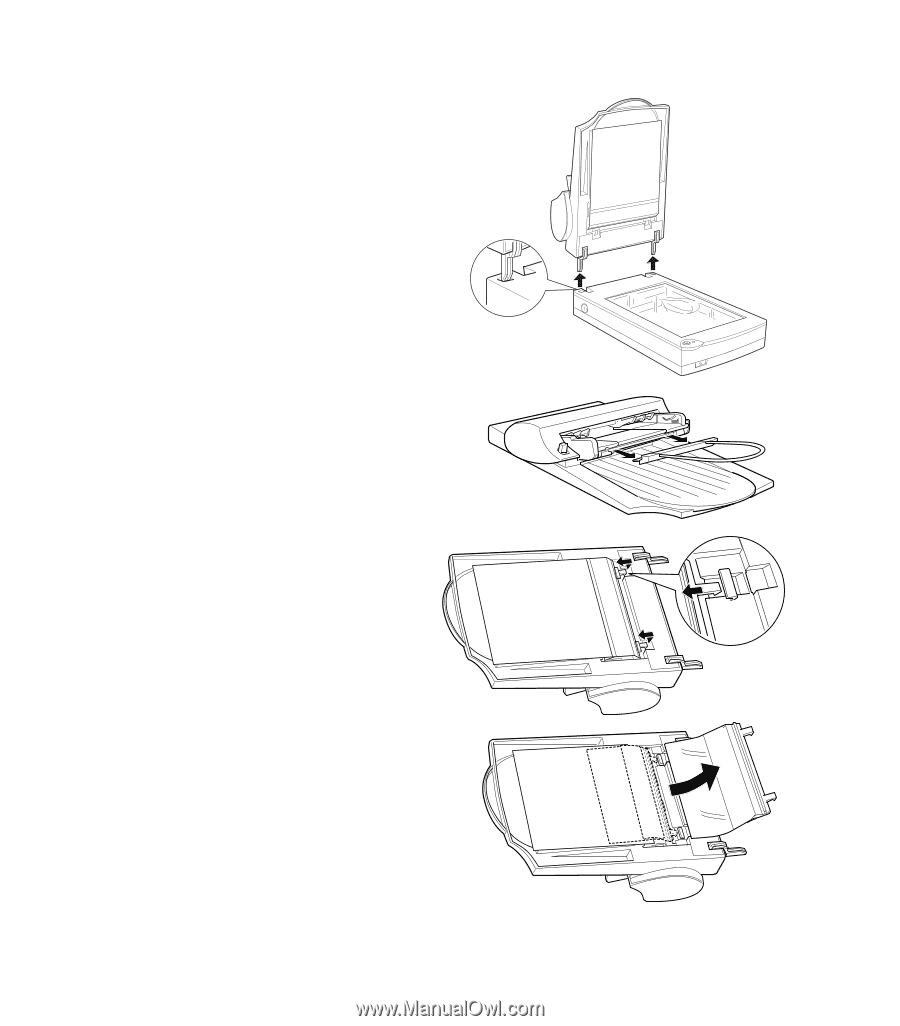
Removing the Paper Path Guide 1. Turn off the scanner. 2. Disconnect the cable and remove the ADF. 3. Gently pull out the paper support. 4. Place the ADF on the document table upside down, with the front of the ADF towards you. 5. Gently pull the two white hooks up, and then push them back down out of the rectangular holes. 6. Pull the paper path guide upwards and out to remove it. To clean the paper path guide, see “Cleaning the Paper Path Guide” below. To reattach the paper path guide, see “Attaching the Paper Path Guide” below. 57
-
 1
1 -
2
-
3
-
4
-
5
-
6
-
7
-
8
-
9
-
10
-
11
-
12
-
13
-
14
-
15
-
16
-
17
-
18
-
19
-
20
-
21
-
22
-
23
-
24
-
25
-
26
-
27
-
28
-
29
-
30
-
31
-
32
-
33
-
34
-
35
-
36
-
37
-
38
-
39
-
40
-
41
-
42
-
43
-
44
-
45
-
46
-
47
-
48
-
49
-
50
-
51
-
52
-
53
-
54
-
55
-
56
-
57
-
58
-
 59
59 -
 60
60 -
 61
61 -
 62
62 -
 63
63 -
 64
64 -
 65
65 -
 66
66 -
 67
67 -
 68
68 -
 69
69 -
70
-
71
-
72
-
73
-
74
-
75
-
76
-
77
-
78
-
79
-
80
-
81
-
82
-
83
-
84
-
85
-
86
-
87
-
88
-
89
-
90
-
91
-
92
-
93
-
94
-
95
-
96
-
97
-
98
-
99
-
100
-
101
-
102
-
103
-
104
-
105
-
106
-
107
-
108
-
109
-
110
-
111
-
112
-
113
 |
 |
57
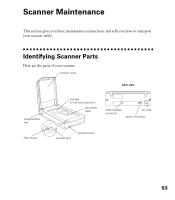
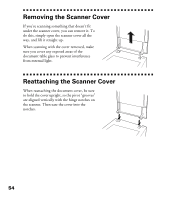
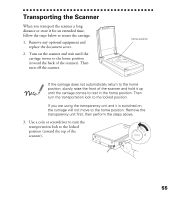
Removing the Paper Path Guide
1.
Turn off the scanner.
2.
Disconnect the cable and remove the
ADF.
3.
Gently pull out the paper support.
4.
Place the ADF on the document
table upside down, with the front
of the ADF towards you.
5.
Gently pull the two white hooks
up, and then push them back down
out of the rectangular holes.
6.
Pull the paper path guide upwards
and out to remove it.
To clean the paper path guide, see ³Cleaning
the Paper Path Guide´ below. To reattach
the paper path guide, see ³Attaching the
Paper Path Guide´ below.