Epson Perfection 1200U Scanner Basics - Page 79
Installing EPSON Instant Photo Print, Windows compatible. To install EPSON Instant Photo Print
 |
View all Epson Perfection 1200U manuals
Add to My Manuals
Save this manual to your list of manuals |
Page 79 highlights
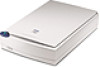
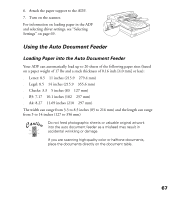
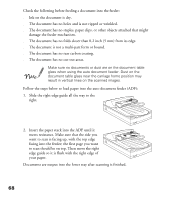
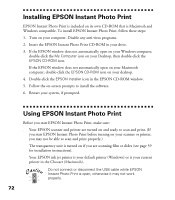
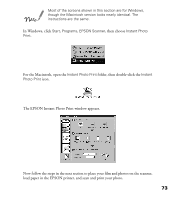
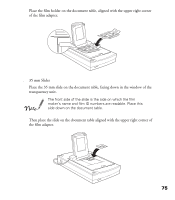
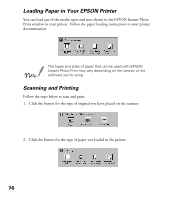
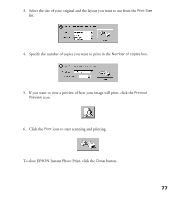
Installing EPSON Instant Photo Print EPSON Instant Photo Print is included on its own CD-ROM that is Macintosh and Windows compatible. To install EPSON Instant Photo Print, follow these steps: 1. Turn on your computer. Disable any anti-virus programs. 2. Insert the EPSON Instant Photo Print CD-ROM in your drive. 3. If the EPSON window does not automatically open on your Windows computer, double-click the My Computer icon on your Desktop, then double-click the EPSON CD-ROM icon. If the EPSON window does not automatically open on your Macintosh computer, double-click the EPSON CD-ROM icon on your desktop. 4. Double-click the EPSON Installer icon in the EPSON CD-ROM window. 5. Follow the on-screen prompts to install the software. 6. Restart your system, if prompted. Using EPSON Instant Photo Print Before you start EPSON Instant Photo Print, make sure: s Your EPSON scanner and printer are turned on and ready to scan and print. (If you start EPSON Instant Photo Print before turning on your scanner or printer, you may not be able to scan and print properly.) s The transparency unit is turned on if you are scanning film or slides (see page 59 for installation instructions). s Your EPSON ink jet printer is your default printer (Windows) or is your current printer in the Chooser (Macintosh). Do not connect or disconnect the USB cable while EPSON Instant Photo Print is open, otherwise it may not work properly. 72
-
 1
1 -
2
-
3
-
4
-
5
-
6
-
7
-
8
-
9
-
10
-
11
-
12
-
13
-
14
-
15
-
16
-
17
-
18
-
19
-
20
-
21
-
22
-
23
-
24
-
25
-
26
-
27
-
28
-
29
-
30
-
31
-
32
-
33
-
34
-
35
-
36
-
37
-
38
-
39
-
40
-
41
-
42
-
43
-
44
-
45
-
46
-
47
-
48
-
49
-
50
-
51
-
52
-
53
-
54
-
55
-
56
-
57
-
58
-
59
-
60
-
61
-
62
-
63
-
64
-
65
-
66
-
67
-
68
-
69
-
70
-
71
-
72
-
73
-
 74
74 -
 75
75 -
 76
76 -
 77
77 -
 78
78 -
 79
79 -
 80
80 -
 81
81 -
 82
82 -
 83
83 -
 84
84 -
85
-
86
-
87
-
88
-
89
-
90
-
91
-
92
-
93
-
94
-
95
-
96
-
97
-
98
-
99
-
100
-
101
-
102
-
103
-
104
-
105
-
106
-
107
-
108
-
109
-
110
-
111
-
112
-
113
 |
 |