HP OmniBook XE2-DE HP OmniBook XE Series - Corporate Evaluators Guide - Page 57
To install video support for Windows 95
 |
View all HP OmniBook XE2-DE manuals
Add to My Manuals
Save this manual to your list of manuals |
Page 57 highlights
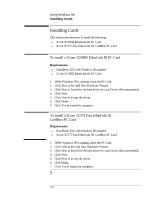
16. The Windows 95 Setup Wizard will now configure hardware, Control Panel, programs on the Start menu, Windows help, the MS-DOS program settings, Time Zone, and Microsoft Exchange. Enter any changes when the system displays the Time Zone screen. If you chose Microsoft Exchange during the installation, enter the information or click Cancel to enter it later. 17. When prompted to set up a printer, install your printer or click Cancel. 18. Click OK to restart the OmniBook. 19. When prompted, click Next to continue Windows 95 Setup. 20. When prompted restart Windows 95. To install video support for Windows 95 If you've installed Windows 95, you'll need to install video support. The driver expands from the web package to its default location in \OMNIBOOK\DRIVERS\VIDEO. 1. From Control Panel, double-click Display, then click Settings. 2. Click Advanced Properties. 3. Click Change. 4. Click Have Disk. 5. Enter the \OMNIBOOK\DRIVERS\VIDEO directory of the video drivers, then click OK. 6. Click OK to select the Silicon Motion LynxEM video driver. 7. Under Monitor, click Change. 8. Choose the appropriate Laptop Display Panel then click OK. • OmniBook XE2 with 14.1" display - Laptop Display Panel (1024 x 768) • OmniBook XE2 with 12.1" display - Laptop Display Panel (800 x 600) 9. Click Close, and then Close again. Click Yes to restart the computer. 10. After reboot, re-enter the Display Properties window and click Settings. 11. Set the appropriate Desktop Area, Screen Area and desired Color Palette. 12. Click OK in Display Properties. 13. Click Yes. 14. From the Start Menu, click Run. 15. Enter \OMNIBOOK\DRIVERS\VIDEO\CONTROL\SETUP and click OK. 16. Click Next at the Welcome Screen. 17. Click Next to accept the default Program Folders. 18. Click Finish. 19. From the Start Menu, click Run. 5-6
-
 1
1 -
2
-
3
-
4
-
5
-
6
-
7
-
8
-
9
-
10
-
11
-
12
-
13
-
14
-
15
-
16
-
17
-
18
-
19
-
20
-
21
-
22
-
23
-
24
-
25
-
26
-
27
-
28
-
29
-
30
-
31
-
32
-
33
-
34
-
35
-
36
-
37
-
38
-
39
-
40
-
41
-
42
-
43
-
44
-
45
-
46
-
47
-
48
-
49
-
50
-
51
-
 52
52 -
 53
53 -
 54
54 -
 55
55 -
 56
56 -
 57
57 -
 58
58 -
 59
59 -
 60
60 -
 61
61 -
 62
62 -
63
-
64
-
65
-
66
-
67
-
68
-
69
-
70
-
71
-
72
-
73
-
74
-
75
-
76
-
77
-
78
-
79
-
80
-
81
-
82
-
83
-
84
-
85
-
86
-
87
-
88
-
89
-
90
-
91
-
92
-
93
-
94
-
95
-
96
-
97
-
98
-
99
-
100
-
101
-
102
-
103
-
104
-
105
-
106
 |
 |