HP OmniBook XE2-DE HP OmniBook XE Series - Corporate Evaluators Guide - Page 67
Installing Windows 2000, To prepare for software installation, To install Windows 2000 - dvd rom driver
 |
View all HP OmniBook XE2-DE manuals
Add to My Manuals
Save this manual to your list of manuals |
Page 67 highlights
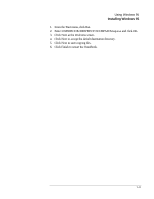
Using Windows 2000 Using Windows 2000 Installing Windows 2000 The following procedure installs a retail version of Windows 2000 and configures the appropriate device drivers. This section describes how to: • Prepare for software installation. • Install retail Windows 2000. • Install video support. • Install audio support. • Install pointing device support. • Install the Hewlett-Packard Configuration Interface (HPCI). • Install Intel® SpeedStep technology applet. • Configure power management. To prepare for software installation It is recommended you repartition your hard disk before installing Windows 2000. Follow the instructions below to repartition your hard disk. Note Windows 2000 natively supports Hibernation. The HP Hibernation partition that is created using the Windows 2000 Recovery CD is only 15MB and contains the HP DiagTools 2.3. This software allows you to run diagnostics by simply pressing F10 during the boot process. This partition is not necessary for Windows 2000. 1. Connect the ac adapter to the Notebook. 2. Insert the bootable Recovery CD into the CD-ROM/DVD drive. 3. Reboot, press ESC twice when you see the HP Notebook logo. 4. Select the "CD-ROM/DVD Drive" as the boot device. 5. Click 2 Continue. 6. Click 2 Advanced. 7. Check "Do not load operating system". 8. Select "Diagnostic partition only". 9. Click 1 Continue. 10. Click Ok. To install Windows 2000 1. Insert the Windows 2000 CD in the CD-ROM drive. 6-3
-
 1
1 -
2
-
3
-
4
-
5
-
6
-
7
-
8
-
9
-
10
-
11
-
12
-
13
-
14
-
15
-
16
-
17
-
18
-
19
-
20
-
21
-
22
-
23
-
24
-
25
-
26
-
27
-
28
-
29
-
30
-
31
-
32
-
33
-
34
-
35
-
36
-
37
-
38
-
39
-
40
-
41
-
42
-
43
-
44
-
45
-
46
-
47
-
48
-
49
-
50
-
51
-
52
-
53
-
54
-
55
-
56
-
57
-
58
-
59
-
60
-
61
-
 62
62 -
 63
63 -
 64
64 -
 65
65 -
 66
66 -
 67
67 -
 68
68 -
 69
69 -
 70
70 -
 71
71 -
 72
72 -
73
-
74
-
75
-
76
-
77
-
78
-
79
-
80
-
81
-
82
-
83
-
84
-
85
-
86
-
87
-
88
-
89
-
90
-
91
-
92
-
93
-
94
-
95
-
96
-
97
-
98
-
99
-
100
-
101
-
102
-
103
-
104
-
105
-
106
 |
 |