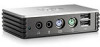
HP t150 Maintenance & Service Guide: HP MultiSeat 6000 Desktop, HP MultiSe - Page 160
Create an Administrative User Account, Users, Account Type, administrator, Add Account, User name
 |
View all HP t150 manuals
Add to My Manuals
Save this manual to your list of manuals |
Page 160 highlights
Create an Administrative User Account Create administrative user accounts for those individuals who will manage your MultiPoint Server system. To see who has administrative access, in MultiPoint Manager, click the Users tab. Administrative user accounts are displayed in the Account Type column as administrator. Administrative users have access to all MultiPoint Manager tasks that change desktop and system settings, such as: ● Creating accounts ● Adding and removing programs ● Managing desktops and hardware ● Ending other user sessions Administrative users can perform tasks that affect all other users of the MultiPoint Server system, such as install software or change security settings. For this reason administrative users should have unique user names and passwords that are known only to them. NOTE: For more information about developing a strategy for creating and managing user accounts and using strong passwords for user accounts, see the User Account Considerations topic. To create an administrative user account 1. In MultiPoint Manager, click the Users tab. 2. Click Add Account. The Add New User wizard opens. 3. In the User name box, type a logon name for the user. Typically, the logon user name is the first and last name written together with no spaces, or the first initial and last name written together without a space. 4. In the Full Name box, type the name of the user in whatever format you prefer, such as given name, full name, or a nickname. 5. In the Create password box, type a password for the user. The password should only be known to you and the user, and you should store this information in a secure location. The password can only be changed by an administrative user. 6. In the Confirm password box, retype the password, and then click Next. 7. On the Set level of access page, select Administrator, and then click Next. 8. MultiPoint Manager will check all of the information and display a message when the account has been set up. When you see the text, Successfully added new user, click Finish. 150 Appendix I Managing Users
-
 1
1 -
2
-
3
-
4
-
5
-
6
-
7
-
8
-
9
-
10
-
11
-
12
-
13
-
14
-
15
-
16
-
17
-
18
-
19
-
20
-
21
-
22
-
23
-
24
-
25
-
26
-
27
-
28
-
29
-
30
-
31
-
32
-
33
-
34
-
35
-
36
-
37
-
38
-
39
-
40
-
41
-
42
-
43
-
44
-
45
-
46
-
47
-
48
-
49
-
50
-
51
-
52
-
53
-
54
-
55
-
56
-
57
-
58
-
59
-
60
-
61
-
62
-
63
-
64
-
65
-
66
-
67
-
68
-
69
-
70
-
71
-
72
-
73
-
74
-
75
-
76
-
77
-
78
-
79
-
80
-
81
-
82
-
83
-
84
-
85
-
86
-
87
-
88
-
89
-
90
-
91
-
92
-
93
-
94
-
95
-
96
-
97
-
98
-
99
-
100
-
101
-
102
-
103
-
104
-
105
-
106
-
107
-
108
-
109
-
110
-
111
-
112
-
113
-
114
-
115
-
116
-
117
-
118
-
119
-
120
-
121
-
122
-
123
-
124
-
125
-
126
-
127
-
128
-
129
-
130
-
131
-
132
-
133
-
134
-
135
-
136
-
137
-
138
-
139
-
140
-
141
-
142
-
143
-
144
-
145
-
146
-
147
-
148
-
149
-
150
-
151
-
152
-
153
-
154
-
 155
155 -
 156
156 -
 157
157 -
 158
158 -
 159
159 -
 160
160 -
 161
161 -
 162
162 -
 163
163 -
 164
164 -
 165
165 -
166
-
167
-
168
-
169
-
170
-
171
-
172
-
173
-
174
-
175
-
176
-
177
-
178
-
179
-
180
-
181
-
182
-
183
-
184
-
185
-
186
-
187
-
188
-
189
-
190
-
191
-
192
-
193
-
194
-
195
-
196
-
197
-
198
-
199
-
200
-
201
-
202
-
203
-
204
-
205
-
206
-
207
-
208
-
209
-
210
-
211
-
212
-
213
-
214
 |
 |
