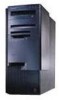
IBM 847651U Handbook
IBM 847651U - Netfinity 3000 - 51U Manual
 |
UPC - 087944496366
View all IBM 847651U manuals
Add to My Manuals
Save this manual to your list of manuals |
IBM 847651U manual content summary:
- IBM 847651U | Handbook - Page 1
Netfinity 3000 User's Handbook - IBM 847651U | Handbook - Page 2
- IBM 847651U | Handbook - Page 3
IBM Netfinity 3000 User's Handbook - IBM 847651U | Handbook - Page 4
Note Before using this information and the product it supports, be sure to read the general information under this publication may contain reference to, or information about, IBM products (machines and programs), programming, or services that are not announced in your country. Such references or - IBM 847651U | Handbook - Page 5
glance 3 What your IBM Netfinity 3000 server offers 4 Reliability, availability, and serviceability features 7 Controls and indicators 8 Input/output connectors 11 Internal view 15 External view 16 Chapter 2. Getting started 17 Questions or problems - IBM 847651U | Handbook - Page 6
messages 196 Troubleshooting 200 Checking the system for damage 222 Replacing the battery 224 Chapter 6. Getting help, service, and information 229 Service support 230 Before you call for service 232 Getting customer support and service 232 Purchasing additional services 238 Ordering - IBM 847651U | Handbook - Page 7
Chapter 7. Server records and specifications 243 Recording the identification numbers 244 Recording installed devices 245 System specifications 251 Appendix A. Ethernet cable specifications 271 Appendix B. Product warranties and notices 275 Warranty Statements 275 Notices 286 Electronic - IBM 847651U | Handbook - Page 8
vi Netfinity 3000 User's Handbook - IBM 847651U | Handbook - Page 9
16. RAM default settings and changes 250 17. Adapter-slot configuration information 250 18. Cabling specifications for 10BASE-T and 100BASE-TX link segments 272 © Copyright IBM Corp. 1999 vii - IBM 847651U | Handbook - Page 10
viii Netfinity 3000 User's Handbook - IBM 847651U | Handbook - Page 11
statements before performing any of the instructions. Instruções de Cuidado e Perigo (Português do Brasil) Importante: Todas as instruções de cuidado e perigo deste manual são iniciadas por um número. Este ções de cuidado e perigo antes de executar qualquer operação. © Copyright IBM Corp. 1999 ix - IBM 847651U | Handbook - Page 12
x Netfinity 3000 User's Handbook - IBM 847651U | Handbook - Page 13
Instrukce Nebezpečí a Pozor (Česky) Pozor: Všechny bezpečnostní instrukce v této knize začínají číslem. Tato čísla jsou používána pro nalezení odpovídajícího překladu anglické bezpečnostní instrukce v knize Safety Information. Například pokud bezpečnostní instrukce začíná číslem 1, naleznete odpoví - IBM 847651U | Handbook - Page 14
le livret Safety Information. Prenez connaissance de toutes les consignes de type Attention et Danger avant de procéder aux opérations décrites par les instructions. xii Netfinity 3000 User's Handbook - IBM 847651U | Handbook - Page 15
Sicherheitshinweise (Deutsch) Wichtig: Alle Sicherheitshinweise in dieser Broschüre beginnen mit einer Nummer. Diese Nummer verweist auf einen englischen Sicherheitshinweis mit den übersetzten Versionen dieses Hinweises, die in der Broschüre mit den Sicherheitshinweisen (Safety Information) - IBM 847651U | Handbook - Page 16
Avvisi di attenzione e di pericolo (Italiano) Importante: Tutti gli avvisi di attenzione e di pericolo riportati in questo manuale iniziano con un numero. Tale numero contrassegna gli avvisi in lingua inglese e le corrispondenti versioni tradotte che sono riportate nella nelle informazioni di - IBM 847651U | Handbook - Page 17
Caution and danger statements xv - IBM 847651U | Handbook - Page 18
Veiligheidsinstructies (Nederlands) Belangrijk: Alle veiligheidsinstructies in dit boekje beginnen met een nummer. Met dit nummer wordt verwezen naar de Engelse instructie en alle vertalingen in dit boekje Safety Information. Als een instructie bijvoorbeeld begint met nummer 1, kunt u de Engelse - IBM 847651U | Handbook - Page 19
Advarsels- og faremerknader (norsk) Viktig: Alle advarsels- og faremerknader i denne boken begynner med et nummer. Dette nummeret brukes som kryssreferanse mellom en engelsk advarsels- eller faremerknad og den oversatte versjonen av merknaden som du kan finne i boken om sikkerhetsinformasjon (Safety - IBM 847651U | Handbook - Page 20
número é utilizado para, a partir de uma nota de cuidado ou perigo, em Inglês, identificar a respectiva tradução, a qual pode ser encontrada no manual Safety Information (Informações sobre Segurança). Por exemplo, se uma nota de cuidado começa pelo número 1, a respectiva tradução é apresentada no - IBM 847651U | Handbook - Page 21
Inštrukcie Nebezpečenstvo a Pozor (Slovensky) Pozor: Všetky bezpečnostné inštrukcie v tejto knižke začínajú číslom. Tieto čísla sú používané pre hadanie zodpovedajúceho prekladu anglickej bezpečnostnej inštrukcie v knižke Safety Information. Napíklad ak bezpečnostné inštrukcie začínajú číslom 1, ná - IBM 847651U | Handbook - Page 22
entre de una declaración de precaución o peligro en inglés con las versiones traducidas que de dichas declaraciones pueden encontrarse en el manual Información de seguridad (Safety Information). Por ejemplo, si una declaración de peligro empieza con el número 1, las traducciones de esta declaraci - IBM 847651U | Handbook - Page 23
Caution and danger statements xxi - IBM 847651U | Handbook - Page 24
xxii Netfinity 3000 User's Handbook - IBM 847651U | Handbook - Page 25
damage. - Disconnect the attached power cords, telecommunications systems, networks, and modems before you open the device covers, unless instructed otherwise in the installation and configuration procedures. - Connect and disconnect cables as described in the following table when installing, moving - IBM 847651U | Handbook - Page 26
To Connect: 1. Turn everything OFF. 2. First, attach all cables to devices. 3. Attach signal cables to connectors. 4. Attach power cords to outlet. 5. Turn device ON. To Disconnect: 1. Turn everything OFF. 2. First, remove power cords from outlet. 3. Remove signal cables from connectors. 4. Remove - IBM 847651U | Handbook - Page 27
Lithium battery notice 2 CAUTION: When replacing the lithium battery, use only IBM Part Number 33L3963 or an equivalent type battery recommended by the manufacturer. If your system has a module containing a lithium battery, replace it only with the - IBM 847651U | Handbook - Page 28
IBM PC Server and Netfinity models are equipped from the factory with a CD-ROM drive. CD-ROM drives are also sold separately as options. The CD-ROM drive is a laser product. The CD-ROM drive is certified in the U.S. to conform to the requirements of the Department of Health and Human Services - IBM 847651U | Handbook - Page 29
DANGER Some laser products contain an embedded Class 3A or Class 3B laser diode. Note the following. Laser radiation when open. Do not stare into the beam, do not view directly with optical instruments, and avoid direct exposure to the beam. Safety information xxvii - IBM 847651U | Handbook - Page 30
xxviii Netfinity 3000 User's Handbook - IBM 847651U | Handbook - Page 31
problems," includes an overview of the diagnostic tools, instructions for testing the server, error codes and messages, and troubleshooting help, service, and information," provides instructions on how to obtain service and technical assistance for your Netfinity 3000 server and other IBM products - IBM 847651U | Handbook - Page 32
, or advice. Attention These notices indicate possible damage to programs, devices, or data. An attention notice is placed just before the instruction or situation in which damage could occur. Caution These notices indicate situations that can be potentially hazardous to you. A caution notice is - IBM 847651U | Handbook - Page 33
IEEE 802.2 and NETBIOS API, SC30-3587 IBM Transmission Control Protocol/Internet Protocol Version 2.1 for DOS: Programmer's Reference, SC31-7046 IBM LAN Server Command and Utilities, S10H-9686 Guide to LAN Server Books, S10H-9688 DOS LAN Services and User's Guide, S10H-9684 About this book xxxi - IBM 847651U | Handbook - Page 34
Additional publications are available for purchase from IBM. For a list of publications available in your country: In the U.S., Canada, and Puerto Rico, call 1-800-879-2755. In other countries, contact your IBM reseller or IBM marketing representative. xxxii Netfinity 3000 User's Handbook - IBM 847651U | Handbook - Page 35
register your server, go to the following World Wide Web address: http://www.ibm.com/pc/register For service, assistance, or additional information about IBM Start Up Support and the World Wide Web, see Chapter 6, "Getting help, service, and information" on page 229. If you have not yet set up your - IBM 847651U | Handbook - Page 36
safe practices when lifting your machine. This chapter contains: Features at a glance 3 What your IBM Netfinity 3000 server offers 4 Reliability, availability, and serviceability features 7 Controls and indicators 8 Server controls 8 Status indicators 10 Input/output connectors 11 Internal - IBM 847651U | Handbook - Page 37
-line memory-module (DIMM) sockets 64 MB, expandable to 768 MB 100 MHz, synchronous dynamic random-access memory (SDRAM) with error checking and correction (ECC) Support for 32 MB, 64 MB, and 128 MB unbuffered DIMMs1 or for 256 MB registered DIMMs1 Flash memory for system programs Diskette drive - IBM 847651U | Handbook - Page 38
The unique design of your IBM Netfinity 3000 server takes advantage of advancements in data storage, networking, and memory management. Your server offers: Impressive performance using an innovative approach to uniprocessing The Netfinity 3000 server supports one Intel microprocessor installed on - IBM 847651U | Handbook - Page 39
, you need to download system-specific NOS installation instructions and device drivers from the World Wide Web. Access the IBM site on the World Wide Web at http://www.ibm.com/pc/support. Your Netfinity 3000 server comes with the IBM Enhanced Diagnostics CD. This CD contains the server diagnostic - IBM 847651U | Handbook - Page 40
can also use these programs to test some external devices. For more information, see "Running the diagnostic test programs" on page 164. Your IBM Netfinity 3000 server is designed to be cost-effective, powerful, and flexible. It uses both peripheral component interconnect (PCI) and industry-standard - IBM 847651U | Handbook - Page 41
, availability, and serviceability (RAS). These list of the RAS features on the IBM Netfinity 3000 server. Many of these programs Built-in, menu-driven small computer system interface (SCSI) configuration programs fans with speed-sensing capability Customer support center 24 hours per day3 Error - IBM 847651U | Handbook - Page 42
Socket 7 Controls and indicators Controls and indicators The most commonly used controls and status indicators are on the front of your server. Server controls Power Switch CD-ROM Eject/Load Button Diskette Eject Button 8 Netfinity 3000 User's Handbook - IBM 847651U | Handbook - Page 43
Controls and indicators Power Switch: Press this switch to turn your server on or off. Attention: Do not turn off the server if a drive in-use light is on. This might damage the information stored on a hard disk or on a diskette. When the power is on, there is a period of time during the power-on - IBM 847651U | Handbook - Page 44
Socket 7 Controls and indicators Status indicators The following illustration identifies the indicators located on the front of the server. Power-On Light Hard-Disk Drive In-Use Light Ethernet Activity Light CD-ROM Drive In-Use Light Diskette Drive In-Use Light Power-On Light: This light comes on - IBM 847651U | Handbook - Page 45
Input/output connectors Ethernet Diagnostic LEDs: Your server contains two diagnostic light-emitting diodes (LEDs) on the Ethernet connector that is located at the rear of the server. When the green LED is on, it indicates that the Ethernet controller is connected to a hub or switch and is receiving - IBM 847651U | Handbook - Page 46
Input/output connectors Power Connector External SCSI Device Microphone Audio Line In Audio Line Out Ethernet (RJ-45) Parallel Expansion Slots USB 1 Serial 1 Keyboard Monitor 2 2 11 USB 2 Serial 2 Mouse PCI 1 PCI 2 PCI 3 ISA 1 ISA 2 ISA 3 Power Connector: The server power cable connects here - IBM 847651U | Handbook - Page 47
Input/output connectors Expansion Slots: Cables to the external connectors on installed ISA and PCI adapters connect here. For information about expansion slots and adapters, see "Working with adapters" on page 79. Microphone: This connector is used to attach a microphone to your server when you - IBM 847651U | Handbook - Page 48
Input/output connectors Universal Serial Bus (USB) Connectors: I/O devices with universal serial bus (USB) connectors attach to USB connector 1 and connector 2. You need a 4-pin cable to connect a device to these ports. Serial Connectors: Signal cables for modems or other serial devices attach to - IBM 847651U | Handbook - Page 49
Internal view The following illustration shows the internal view of your server, with the side panel removed. For information on removing the cover, see "Disconnecting cables and removing the side cover" on page 74. For information about drives, bays, adapters, and microprocessors, see the - IBM 847651U | Handbook - Page 50
External view The following illustration shows the external view of your server. Note: This illustration is for reference only. 1 Power-on button 2 Power-on light 3 Hard disk drive light 4 Ethernet activity light 5 Bay 1, CD-ROM drive 6 CD-ROM eject button 7 CD-ROM emergency eject hole - IBM 847651U | Handbook - Page 51
your workspace and instructions for using Installing options" on page 67 for instructions on installing hardware in your server. connect the cables and power cord. Follow the instructions in "Cabling the server" on page 24. This chapter contains: Questions or problems 19 Arranging your workspace 20 - IBM 847651U | Handbook - Page 52
Getting started Handling a CD 31 Loading and unloading a CD 31 18 Netfinity 3000 User's Handbook - IBM 847651U | Handbook - Page 53
or problems? The following information is provided in case you need help while you are setting up your server. World Wide Web You can obtain up-to-date information about your server model, a complete listing of the options that are supported on your model, and information about other IBM server - IBM 847651U | Handbook - Page 54
same position for a long time can cause fatigue. A good chair can make a big difference. The backrest and seat should adjust independently and provide good support. The seat should have a curved front to relieve pressure on the thighs. Adjust the seat so that your thighs are parallel to the floor - IBM 847651U | Handbook - Page 55
clarity of the image on the screen; try them only after you have exhausted other methods of reducing glare. Dust buildup compounds problems associated with glare. Remember to clean your monitor screen periodically using a soft cloth moistened with a nonabrasive liquid glass cleaner. Air circulation - IBM 847651U | Handbook - Page 56
Arranging your workspace 51 mm (2 in.) on the left and right sides Also, make sure the vented air is not blowing on someone else. Electrical outlets and cable lengths The location of electrical outlets and the length of power cords and cables that connect to the monitor, printer, and other devices - IBM 847651U | Handbook - Page 57
Using the stabilizing feet The four feet attached to the bottom cover rotate 90 degrees to provide additional stability for your server. Before you place the server in an upright position, rotate the four feet a quarter turn away from the server. Then, carefully position the server on its feet. When - IBM 847651U | Handbook - Page 58
Cabling the server Cabling the server Before cabling your server: Make sure that you have an adequate number of properly grounded electrical outlets for your server, monitor, and any other options that you intend to install. Place your server in a location that is dry. Rain or spilled liquids might - IBM 847651U | Handbook - Page 59
Cabling the server To cable the server: 1. Use the following illustration to cable your server. For information about Ethernet cables, see Appendix A, "Ethernet cable specifications" on page 271. Power Connector External SCSI Device Microphone Audio Line In Audio Line Out Ethernet (RJ-45) - IBM 847651U | Handbook - Page 60
Starting the server Starting the server To start the server: 1. If you installed any external devices, such as monitors, printers, plotters, or modems, turn them on now. 2. After you turn on your monitor, adjust the Brightness and Contrast controls to the approximate midpoint. You can readjust these - IBM 847651U | Handbook - Page 61
Starting the server 3. Adjust the keyboard feet and position the keyboard for personal typing comfort. 5 32 kg (70.5 lbs) 55 kg (121.2 lbs) CAUTION: Use safe practices when lifting your machine. 4. If a removable-media drive contains packing material, a diskette, or a CD, remove it from the - IBM 847651U | Handbook - Page 62
Socket 7 Starting the server 5. Turn on the server. To turn on the server, press the power switch. The power-on light comes on. The power-on self-test (POST) begins. Power-On Light Hard-Disk Drive In-Use Light Ethernet Activity Light CD-ROM Drive In-Use Light Diskette Drive In-Use Light See "Power- - IBM 847651U | Handbook - Page 63
the problem, have the system serviced. 6. Check your monitor for POST results. When the test finishes: The screen displays the IBM logo and password at the password prompt. (See "System Security" on page 43 for instructions on setting and using passwords.) Type your password at the prompt; then, - IBM 847651U | Handbook - Page 64
Using the CD-ROM drive Using the CD-ROM drive An IDE CD-ROM drive is a standard feature on all Netfinity 3000 servers. CD-ROM drives can play back or read from a CD, but cannot write information to it. CD-ROM drives use industry-standard, 12 cm (4.75-inch) CDs. Follow these guidelines when using a - IBM 847651U | Handbook - Page 65
the server. To load and unload a CD in a CD-ROM drive: 1. Press the Eject/Load button. The tray slides out of the drive. (Do not manually force the tray open.) 2. Place the CD in the tray with the label facing up. 3. Close the tray by pressing the Eject/Load button, or - IBM 847651U | Handbook - Page 66
Using the CD-ROM drive 4. To eject the CD, press the Eject/Load button. When the tray slides out, carefully remove the CD. 5. Close the tray by pressing the Eject/Load button, or by gently pushing the tray forward. Notes: 1. If the tray does not slide out of the drive when you press the Eject/Load - IBM 847651U | Handbook - Page 67
conflicts 58 Configuring the Ethernet controller 59 Using the SCSISelect Utility program 62 Starting the SCSISelect Utility program 62 SCSISelect Utility program choices 62 © Copyright IBM Corp. 1999 33 - IBM 847651U | Handbook - Page 68
Peripheral Component Interconnect (PCI) Industry Standard Architecture (ISA) Small Computer System Interface (SCSI) Accelerated Graphics Port (AGP) You can information, by accessing the following World Wide Web address: http://www.ibm.com/pc/us/compat/ Jumpers and switches are used to define - IBM 847651U | Handbook - Page 69
page 243. 3. Set jumpers or switches on the device. See the device installation instructions. 4. Install the device in the server. See Chapter 4, "Installing options" on Refer to the information that comes with your IBM ServerGuide package for more information. Chapter 3. Configuring your server 35 - IBM 847651U | Handbook - Page 70
run the Configuration/Setup Utility program if you receive an error message instructing you to do so. If you installed or removed SCSI devices, You are then prompted to enter the Configuration/Setup Utility program to manually update the configuration settings or to confirm and save the settings - IBM 847651U | Handbook - Page 71
The Configuration/Setup Utility program POST Startup Error(s) The following error(s) were detected when the system was started: 162 Configuration Change Has Occurred Select one of the following: Continue Exit Setup Note: Depending on the configuration changes that occurred, the error message that - IBM 847651U | Handbook - Page 72
The Configuration/Setup Utility program Notes: 1. If an administrator password is not set, the Configuration/Setup Utility program starts once you complete the startup procedure. 2. If an administrator password is set, but a power-on password is not set, you must enter the administrator password to - IBM 847651U | Handbook - Page 73
. In the Configuration/Setup Utility program menus, you can accept the configuration changes by viewing and saving the changes, or you can make manual changes and then save the settings. The following is a quick reference for identifying symbols in the Configuration/Setup Utility program. A bullet - IBM 847651U | Handbook - Page 74
Using the Configuration/Setup Utility program A right arrowhead ( ) beside a menu item indicates that a configuration change occurred in that category. The might also appear in subsequent menus. An asterisk (*) beside a menu item indicates that a resource conflict exists. To exit from the - IBM 847651U | Handbook - Page 75
Using the Configuration/Setup Utility program Product Data Select this choice to view the machine type and model, the system serial number, the system board identifier, and the revision level or issue date of the flash EEPROM (BIOS). Devices and I/O Ports Software recognizes ports from their port - IBM 847651U | Handbook - Page 76
Using the Configuration/Setup Utility program Start Options Select this choice to view and change settings for device startup sequence, keyboard speed, virus detection, various power-on options, and other features. You can control the startup sequence of the devices in your server. Each time that - IBM 847651U | Handbook - Page 77
Using the Configuration/Setup Utility program Date and Time Select this choice to set the system date and time. The system time is in a 24-hour format: hour/minute/second. The system date is in standard format for your country. For example, in the United States, the format is MM/DD/YYYY (Month/Day - IBM 847651U | Handbook - Page 78
Using the Configuration/Setup Utility program you have a mouse connected to a serial port, it will be activated when the server is started, regardless of whether a password is set. Note: If Remote Administration is enabled, you cannot select On. In this case, select Dual. If the power-on password - IBM 847651U | Handbook - Page 79
that the mouse port is disabled, and the server will halt. To enable the operating system to load without displaying the error message, follow the instructions that apply to your operating system. If you are using OS/2®, do one of the following before enabling password prompt Off mode: Set the - IBM 847651U | Handbook - Page 80
will automatically restart and resume operating in this mode, without operator intervention. Note: The power-on password prompt Off mode does not support any locally or remotely scheduled shutdowns or restarts. In the password prompt Dual mode, the startup behavior of the server depends on whether - IBM 847651U | Handbook - Page 81
enabled, it resets automatically to Dual. 8. To change a power-on password, select Change Power-On Password from the Power-On Password menu, and follow the instructions on the screen. Chapter 3. Configuring your server 47 - IBM 847651U | Handbook - Page 82
Power-On Password; then, press Enter. 4. The Power-On Password menu appears. 5. Select Delete Power-On Password and follow the instructions on the screen. Using the Administrator Password menu The administrator password (sometimes called a supervisor-level password) controls access to some features - IBM 847651U | Handbook - Page 83
Using the Configuration/Setup Utility program 6. Enter your password again in the appropriate data field, 7. Define the Power-On Password Changeable by User field. The choices are: Yes The power-on password can be changed without entering the administrator password, if the administrator password is - IBM 847651U | Handbook - Page 84
Using the Configuration/Setup Utility program If both a power-on and administrator password are set, you can enter either password to complete the system startup. However, the administrator password provides access to all menu choices, and provides the ability to change information. If you enter the - IBM 847651U | Handbook - Page 85
Wide Web. To obtain up-to-date information about your server model, access the home page for your server at the following address: http://www.ibm.com/netfinity/ 2. Turn on the server. If it is already turned on, you must turn it off and back on again. 3. The update begins, and - IBM 847651U | Handbook - Page 86
4. Set, change, or delete your password. Follow the instructions on the screen. (See "Using the Administrator Password menu" toggle the entry to Disable. Note: Your server supports IDE CD-ROM drives. IDE hard disk drives are not supported. Remote Administration Using this option, the BIOS can - IBM 847651U | Handbook - Page 87
) update under the following circumstances: When you receive a system message instructing you to do so When you install a new microprocessor (see " 2 MB diskette into diskette drive A. 2. Go to http://www.ibm.com/pc/support/ on the World Wide Web and download the appropriate flash update program - IBM 847651U | Handbook - Page 88
246 for the default settings for these features. Attention: The system might not operate properly if these options are configured incorrectly. Follow the instructions on the screen carefully. Use the Left Arrow (←) or Right Arrow (→) key to select a menu choice. Cache Control Select this choice to - IBM 847651U | Handbook - Page 89
Plug and Play is a configuration method that makes expanding your server easier. Support for Plug and Play is built into the system board of your server. known as legacy adapters. If you install a legacy adapter, you must manually configure it by setting switches or jumpers on the adapter, and by - IBM 847651U | Handbook - Page 90
your server and the settings for APM BIOS mode are ignored. Refer to your operating-system documentation to determine if your operating system supports ACPI. If your operating system does not support ACPI, you cannot use the ACPI BIOS Mode Power Management feature. 56 Netfinity 3000 User's Handbook - IBM 847651U | Handbook - Page 91
Resolving configuration conflicts To set ACPI BIOS mode: 1. Select Power Management from the Configuration/Setup Utility program menu. 2. Set ACPI BIOS Mode to Enabled or Disabled as desired using the Left Arrow (←) or Right Arrow (→) key. Resolving configuration conflicts The resources used by your - IBM 847651U | Handbook - Page 92
problems" on page 157 for information about troubleshooting hardware and software problems "Preparing to add options" on page 73 for instructions for removing the cover. Then, refer to the the device or adapter. Some configurations are not supported. If you must remove an adapter, see "Installing - IBM 847651U | Handbook - Page 93
duplex mode will always be selected. A full-duplex switch that does not support auto-negotiation will not attach to the Netfinity 3000 server in full-duplex mode to operate in full-duplex mode, you must manually override the settings to obtain a full-duplex connection. To do this, - IBM 847651U | Handbook - Page 94
the Ethernet controller a device driver that supports manual overrides. Use the ServerGuide software to install this device driver. Refer to your ServerGuide package for instructions on installing device drivers. The ServerGuide software includes IBM Update Connector, which helps you keep your - IBM 847651U | Handbook - Page 95
information, see "Troubleshooting the 10/100 Mbps Ethernet controller" on page 217. 4. The Ethernet controller supports the operating systems that your server supports. To find out which operating systems your server supports, go to the following World Wide Web address: http://www.ibm.com/netfinity - IBM 847651U | Handbook - Page 96
. Starting the SCSISelect Utility program You can access this program when you start the server. The SCSISelect prompt appears after the IBM Netfinity 3000 server logo appears. Press Ctrl+A immediately after the SCSISelect prompt appears: > Use the Up - IBM 847651U | Handbook - Page 97
rate for Fast SCSI devices. Advanced Configuration Options Select this choice to view or change the settings for advanced configuration options. These options include enabling support for large hard disk drives and support for drives with UltraSCSI speed. Chapter 3. Configuring your server 63 - IBM 847651U | Handbook - Page 98
Using the SCSISelect Utility program To reset the SCSI controller defaults, press F6; then, follow the instructions on the screen. SCSI Disk Utilities To see the IDs that are assigned to each SCSI device or to format a SCSI device, select SCSI Disk - IBM 847651U | Handbook - Page 99
). A message appears on the screen if the defect limit is reached. If this happens, have the system serviced. 3. To install an operating system after the hard disk is formatted, follow the instructions in the ServerGuide package that comes with your server. Chapter 3. Configuring your server 65 - IBM 847651U | Handbook - Page 100
Using the SCSISelect Utility program 66 Netfinity 3000 User's Handbook - IBM 847651U | Handbook - Page 101
to remove one option to install another. If you have several internal options to install, these instructions enable you to add them all at one time. This chapter contains: Before you begin 69 connectors 135 Parallel port connector 137 Video port connector 138 © Copyright IBM Corp. 1999 67 - IBM 847651U | Handbook - Page 102
Ethernet connector 143 Adding security options 144 Installing a U-bolt and security cable 145 Completing the installation 148 Updating the server configuration 153 Network operating system instructions 154 68 Netfinity 3000 User's Handbook - IBM 847651U | Handbook - Page 103
Before you begin Before you begin Become familiar with the safety and handling guidelines specified under "Safety information" on page xxiii, "Electrical safety" on page 70, and "Handling static-sensitive devices" on page 71. These guidelines will help you work safely while working with your server - IBM 847651U | Handbook - Page 104
or equipment damage, disconnect the attached power cords, telecommunications systems, networks, and modems before you open the server covers, unless instructed otherwise in the installation and configuration procedures. For your safety, always do the following before removing the cover: 1. Turn off - IBM 847651U | Handbook - Page 105
the power supplies, power backplane, and AC box. There are no serviceable parts inside the power supplies, power backplane, or AC box. If you suspect a problem with one of these parts, contact an IBM service technician. Handling static-sensitive devices Static electricity, though harmless to you - IBM 847651U | Handbook - Page 106
Handling static-sensitive devices When possible, remove the option and install it directly into the server without setting the option down. When this is not possible, place the static-protective package that the option comes in on a smooth, level surface and place the option on it. Do not place the - IBM 847651U | Handbook - Page 107
Preparing to add options Preparing to add options Before you begin: Be sure that your current server configuration is working properly. If you have not already done so, locate the keys to the cover lock. At the time of shipment, two keys are attached to the back of the server, over the keylock. - IBM 847651U | Handbook - Page 108
Preparing to add options Disconnecting cables and removing the side cover Attention: The presence of 5 V ac standby power might result in damage to your hardware unless you disconnect the power cord from the electrical outlet before you open the server. 1. Remove any media (diskettes or CDs) from - IBM 847651U | Handbook - Page 109
equipment damage, disconnect the attached power cords, telecommunications systems, networks, and modems before you open the server covers, unless instructed otherwise in the installation and configuration procedures. 7. Disconnect all cables attached to the server; this includes power cords, input - IBM 847651U | Handbook - Page 110
Preparing to add options Keyboard Mouse Monitor Parallel Device Serial Device Ethernet Device Audio Devices USB Device SCSI Device 76 Netfinity 3000 User's Handbook - IBM 847651U | Handbook - Page 111
Preparing to add options 8. If necessary, unlock the server side cover. (The cover lock is located at the rear of the server.) Cover Lock 9. Remove the side cover by pulling out on the cover-release tab at the rear of the side cover. Then, slide the cover toward the front of the server and lift it - IBM 847651U | Handbook - Page 112
Preparing to add options Accessing the system board Before you can install or remove certain options, you might need to access the system board. For example, you might need to remove adapters, drives, and cables that impede your access to components on the system board. You also need to access the - IBM 847651U | Handbook - Page 113
supports, go to http://www.ibm.com/pc/us/compat/ on the World Wide Web, or contact your IBM marketing representative. 2. For Netfinity 3000 servers, the ServeRAID adapters are supported you might need to manually configure the adapter by available. Refer to the instructions that come with your - IBM 847651U | Handbook - Page 114
in the dedicated AGP slot connector, in an ISA slot connector, or in a PCI slot connector. However, the server system board does not support the AGP video connector and the integrated video subsystem simultaneously. Your server contains one dedicated AGP slot connector on the inside rear of the - IBM 847651U | Handbook - Page 115
Working with adapters The following illustration shows the expansion slot connectors and other connectors on the riser card. ISA ISA ISA PCI PCI PCI CD Audio Connector 340-Pin Connector Alert on LAN Connector Disk Fan A Connector Disk Fan B Connector Front Fan Connector SCSI Hard Disk LED - IBM 847651U | Handbook - Page 116
. Read the documentation that comes with the option. Read "Accessing the system board" on page 78. To install an ISA or PCI adapter: 1. Review the instructions that come with the adapter to determine if it must be installed in an ISA or PCI expansion slot; otherwise, use any empty, bus-compatible - IBM 847651U | Handbook - Page 117
Working with adapters 4. Remove the screw and bracket. 5. Remove the appropriate expansion-slot cover: a. Remove the expansion-slot screw on the top of the expansion-slot cover. b. Slide the expansion-slot cover out of the server. c. Store the expansion-slot cover in a safe place for future use. 6. - IBM 847651U | Handbook - Page 118
Working with adapters 7. Install the adapter into the appropriate slot on the riser card. You might have to remove the system board and the front fan in order to slide the adapter into the slot. See "Removing and replacing the front fan" on page 94 and "Removing and replacing the system board" on - IBM 847651U | Handbook - Page 119
Working with adapters 9. If you removed the bottom cover, the microprocessor, the front fan, or the system board, replace them. See "Installing or replacing microprocessors" on page 127, "Removing and replacing the front fan" on page 94, "Removing and replacing the system board" on page 91, and " - IBM 847651U | Handbook - Page 120
a PCI slot connector. However, the server system board does not support the AGP video connector and the integrated video subsystem simultaneously. 2. You slot connector. For information on the available AGP adapters, go to http://www.ibm.com/pc/us/compat/ on the World Wide Web. Before you begin: Read - IBM 847651U | Handbook - Page 121
. Note that the connector for external devices on the AGP adapter is accessible through the slot on the server wall. Note: Some adapters support the attachment of secondary adapters called daughterboards. (A daughterboard is an adapter that can be plugged into another adapter or the system board - IBM 847651U | Handbook - Page 122
Working with adapters 4. If necessary, connect any internal cables to the adapter. Refer to the documentation that comes with the option. 5. If you want to install or remove any other options, do so now. Otherwise, go to "Completing the installation" on page 148. 88 Netfinity 3000 User's Handbook - IBM 847651U | Handbook - Page 123
Working with adapters Removing and replacing the bottom cover Attention: The presence of 5 V ac standby power might result in damage to your hardware unless you disconnect the power cord from the wall before you open the server. Before you begin: Read "Electrical safety" on page 70 and "Handling - IBM 847651U | Handbook - Page 124
Working with adapters To replace the bottom cover: 1. Hold the bottom cover at an angle and align the tabs on the end with the openings in the frame. 2. Fit the tabs into the openings and pivot the bottom cover until it is closed. 3. Align the holes and insert the two bottom screws. 4. If you want - IBM 847651U | Handbook - Page 125
Working with adapters Removing and replacing the system board Attention: The presence of 5 V ac standby power might result in damage to your hardware unless you disconnect the power cord from the electrical outlet before you open the server. Before you begin: Read "Electrical safety" on page 70 and - IBM 847651U | Handbook - Page 126
Working with adapters 6. Grasp and turn the latch clockwise to the extended position. This releases the system board from the riser card. Note: Do not pull on the microprocessor, the DIMMs, or the DIMM sockets to remove the system board. Latch System Board Rail Tab Lift Here System Board Pull - IBM 847651U | Handbook - Page 127
Working with adapters 5. Push down on the latch to lock the tab on the underside in the opening (hole) in the chassis. This securely holds the latch in the closed position. System Board Push Here Hole Tab Alignment Mark Note: You cannot see the connection with a full-sized adapter in place. To - IBM 847651U | Handbook - Page 128
Working with adapters Removing and replacing the front fan Attention: The presence of 5 V ac standby power might result in damage to your hardware unless you disconnect the power cord from the electrical outlet before you open the server. Before you begin: Read "Electrical safety" on page 70 and " - IBM 847651U | Handbook - Page 129
Working with adapters 4. Press the tab and pull the front fan forward until it clears the server wall. Tab Hooks 5. Replace the front fan by aligning the two hooks on the bottom of the front fan assembly with the slots on the server wall. 6. Insert the tab on the front fan assembly into the slot on - IBM 847651U | Handbook - Page 130
run faster. You can increase the amount of system memory by installing options called memory modules. The maximum amount of system memory your server supports is 384 MB of unbuffered memory, or 768 MB of registered memory. The memory modules that your server uses are dual-inline memory modules - IBM 847651U | Handbook - Page 131
. See "Using the Configuration/Setup Utility program" on page 39. For more information about the DIMMs that your server supports, go to the following World Wide Web address: http://www.ibm.com/pc/us/compat/ Memory configuration When you are adding or removing memory, a basic rule to follow is to - IBM 847651U | Handbook - Page 132
Working with memory modules Table 1 and Table 2 on page 98 show some of the possible memory configurations for your server. The contents of these tables and additional information can be found on a label located inside your server. Alternative configurations are possible. Table 1. Memory - IBM 847651U | Handbook - Page 133
Working with memory modules Before you begin: Read "Electrical safety" on page 70 and "Handling static-sensitive devices" on page 71. Read the documentation that comes with the option. Read "Accessing the system board" on page 78. Notes: 1. When you are removing a memory module, be careful not to - IBM 847651U | Handbook - Page 134
Working with memory modules 4. Touch the static-protective package containing the DIMM to any unpainted metal surface in the server; then, remove the DIMM. 5. Position the DIMM above the connector so that the two notches on the bottom edge of the DIMM align properly with the connector. 6. Firmly - IBM 847651U | Handbook - Page 135
Working with memory modules 7. To install another DIMM, repeat steps 3 through 6 on pages 99 and 100. 8. If you want to install or remove any other options, do so now. Otherwise, go to "Completing the installation" on page 148. Chapter 4. Installing options 101 - IBM 847651U | Handbook - Page 136
Installing or removing internal drives Installing or removing internal drives Drives are devices that your server uses to store and retrieve data. You can add drives to your server to increase storage capacity and to enable your server to read multiple types of media. Several types of drives are - IBM 847651U | Handbook - Page 137
of the hard disk drives vary by model. For information on the supported types of drives and their installation, see "Drive specifications" on page 104, "Preinstallation steps (all bays)" on page 112, and http://www.ibm.com/pc/us/compat/ on the World Wide Web. Diskette drive: The 3.5-inch - IBM 847651U | Handbook - Page 138
Removable media include CD-ROMs, optical discs, diskettes, and tapes. If you install removable-media drives, you must install them in bays 1-4 only. The server supports only one diskette drive (standard in bay 4). 8 In some models, the CD-ROM drive might be set as the default startup (or boot) drive - IBM 847651U | Handbook - Page 139
Installing or removing internal drives Types of cables Your server uses cables to connect IDE and SCSI drives to the power supply, riser card, and system board. The diskette drive is also powered through a cable attached to the riser card. Each cable connector is designed to fit a corresponding - IBM 847651U | Handbook - Page 140
Installing or removing internal drives The diskette, IDE CD-ROM, and other IDE device connectors are on the back of the riser card. When you are installing optional drives, refer to the following illustration for the location of the appropriate connectors. Note: The following illustration is for - IBM 847651U | Handbook - Page 141
Installing or removing internal drives The following illustration shows the connectors on the riser card. ISA ISA ISA PCI PCI PCI CD Audio Connector 340-Pin Connector Alert on LAN Connector Disk Fan A Connector Disk Fan B Connector Front Fan Connector SCSI Hard Disk LED Connector Wake on LAN - IBM 847651U | Handbook - Page 142
Installing or removing internal drives ISA ISA ISA PCI PCI PCI CD Audio Connector 340-Pin Connector Alert on LAN Connector Disk Fan A Connector Disk Fan B Connector Front Fan Connector SCSI Hard Disk LED Connector Wake on LAN Connector Asset ID Antenna Connector Chassis-Intrusion Detector - IBM 847651U | Handbook - Page 143
drives, cables, and other options for your server, do one of the following: Within the United States, call 1-800-IBM-2YOU (1-800-426-2968), your IBM reseller, or your IBM marketing representative. Within Canada, call 1-800-565-3344 or 1-800-465-7999. Outside the United States and Canada, contact - IBM 847651U | Handbook - Page 144
on page 112. Some drives have a special design called small computer system interface (SCSI). This design allows you to attach multiple drives ). For a complete list of the SCSI devices that your server supports, go to http://www.ibm.com/netfinity/ on the World Wide Web. SCSI physical unit numbers - IBM 847651U | Handbook - Page 145
, such as jumpers, thumbwheels, or switches. The SCSI device ID is also known as the SCSI address or physical unit number (PUN). The UltraSCSI adapter supports SCSI IDs 0 to 15; ID 7 is reserved for the adapter. The default startup (boot) SCSI ID is 0 for an internal SCSI hard disk drive in - IBM 847651U | Handbook - Page 146
connected external SCSI devices to your server, set the termination for the last device on the external cable to Enabled. See the device documentation for instructions. If you plan to install both 16-bit (wide) and 8-bit (narrow) SCSI devices: 1. Attach the 16-bit devices at the beginning of the - IBM 847651U | Handbook - Page 147
containing the drive to any unpainted metal surface on the server; then, remove the drive from the bag. 5. Check the instructions that come with the drive, or contact your IBM reseller or IBM marketing representative to see if you need to set any switches or jumpers on the drive, or if you need - IBM 847651U | Handbook - Page 148
outlet before you open the server. Before you begin: Read "Electrical safety" on page 70 and "Handling static-sensitive devices" on page 71. Read the instructions that come with the drive that you want to install or replace. Position the server as described in "Accessing the system board" on page 78 - IBM 847651U | Handbook - Page 149
Installing or removing internal drives Installing drives in the front drive bay assembly This section gives the procedure for installing drives in the front drive bay assembly. If you want to remove a drive from the front drive bay assembly, follow the steps in "Removing drives in the front drive - IBM 847651U | Handbook - Page 150
Installing or removing internal drives c. Remove the bay panel. 2. If knockouts are present in the drive bay opening, twist them with a screwdriver or pliers to remove. If your server comes with a metal static shield in the drive bay, remove the shield by pulling out the tabs on the sides of the - IBM 847651U | Handbook - Page 151
Installing or removing internal drives The following illustration shows the type of metal static shield that might be installed in bays 2 and 3. 3. Install the drive in the bay opening and secure the drive by inserting screws. Note: As shown in the following illustration, only two screws are needed - IBM 847651U | Handbook - Page 152
Installing or removing internal drives 4. Attach the cables to the drive. See "ISA and PCI adapters" on page 80 for an illustration that shows the locations of the connectors on the riser card. 5. If the installed drive has nonremovable media, replace the bay panel. 6. If you installed a CD-ROM - IBM 847651U | Handbook - Page 153
Installing or removing internal drives Removing drives in the front drive bay assembly This procedure shows how to remove drives from the front drive bay assembly. 1. If the drive being removed has nonremovable media, remove the bay panel. a. Locate the appropriate bay panel in the front of the - IBM 847651U | Handbook - Page 154
Installing or removing internal drives 2. Disconnect the cables from the drive that you want to remove. 3. Remove the visible screws that hold the drive and slide it out the front of the server. 120 Netfinity 3000 User's Handbook - IBM 847651U | Handbook - Page 155
Installing or removing internal drives 4. If you are not installing another drive, replace the bay panel. 5. If you want to install or remove any other options, do so now. Otherwise, go to "Completing the installation" on page 148. Chapter 4. Installing options 121 - IBM 847651U | Handbook - Page 156
Installing or removing internal drives Working with drives in bays 5 and 6 Before you begin: Read "Working with drives in bays 1 through 4" on page 114. Read the documentation that comes with the drive. The following illustration identifies the server bays. 1 Bay 1 2 Bay 2 3 Bay 3 4 Bay 4 - IBM 847651U | Handbook - Page 157
Installing or removing internal drives To install or remove drives in bays 5 and 6: 1. If there is a hard disk drive in bay 5 or 6, disconnect the cable from the drive in that bay. 2. Remove the screw that holds the drive bay assembly, and carefully slide the drive bay assembly past the cover lock - IBM 847651U | Handbook - Page 158
Installing or removing internal drives 3. If you are removing a drive, remove the screws that hold the drive in the bay assembly and slide the drive out of the bay assembly. The following illustration shows a drive being removed from bay 6. 4. When you are installing a drive, turn the drive upside - IBM 847651U | Handbook - Page 159
Bay 6 Installing or removing internal drives Note: When the rubber grommets (washers) are used to attach the drive, you must use the additional screws that are shipped with your server. 6. Reinstall the rear drive bay assembly and secure it with the screw that you removed in step 2 on page 123. 7. - IBM 847651U | Handbook - Page 160
or IBM marketing representative. If you do upgrade the microprocessor, use the instructions that come with the upgrade along with the instructions in "Installing or replacing microprocessors" on page 127. The voltage regulator function is built into the system board. This feature supports the - IBM 847651U | Handbook - Page 161
Personal Computer Company Bulletin Board System (BBS). See Chapter 6, "Getting help, service, and information" on page 229 for the appropriate World Wide Web addresses and bulletin board telephone numbers. For a list of supported operating systems, see http://www.ibm.com/netfinity/ on the World Wide - IBM 847651U | Handbook - Page 162
Working with microprocessors Notes: 1. The microprocessor in your server comes with an attached heat sink. The microprocessor plugs into the microprocessor socket on the system board and is stabilized with a plastic bracket attached to the system board. The type of heat sink in your server might be - IBM 847651U | Handbook - Page 163
with microprocessors Note: If the microprocessor has tabs at the upper corners instead of an adapter with a handle, remove it by following these instructions: 1) Place your index fingers on the small retainer tabs on the top of the microprocessor. 2) Push in toward the microprocessor until the tabs - IBM 847651U | Handbook - Page 164
Working with microprocessors Note: The illustrations in this section might differ slightly from your hardware. c. Store the old microprocessor in a static-protective package. 3. Touch the static-protective package that contains the new microprocessor to any unpainted metal surface in the server; - IBM 847651U | Handbook - Page 165
Working with microprocessors 5. Press the microprocessor into the connector until it snaps into place and is fully seated in the connector. 6. If the microprocessor has tabs at the upper corners instead of an adapter with a handle, pull outward on the retainer tabs to secure the microprocessor in - IBM 847651U | Handbook - Page 166
microprocessors BIOS Diskette into the primary diskette drive and run the flash program. Follow the instructions in the program. Note: If you have not already done so, go to http://www.ibm.com/pc/support/ on the World Wide Web and download the appropriate flash update program. Review the applicable - IBM 847651U | Handbook - Page 167
Turn off the server and all attached devices. 2. Follow the instructions that come with the option and the information in this section IBM reseller or IBM marketing representative for additional information. Hot-Swap Drive Bays Adding external SCSI devices The internal SCSI connector provides support - IBM 847651U | Handbook - Page 168
or removing internal drives" on page 102 in addition to the instructions in this section. Read "Installing or removing internal drives"; then, return here. For additional information about SCSI configurations supported, see http://www.ibm.com/netfinity/ If your server comes with a SCSI adapter, it - IBM 847651U | Handbook - Page 169
reseller or IBM marketing representative. Serial port connectors Serial ports are used to communicate with printers, plotters, external modems, auxiliary terminals, and other computers. Your server provides two serial ports (1 and 2). You can add more serial ports by installing a serial adapter in - IBM 847651U | Handbook - Page 170
Connecting external options Both of the serial connectors on your server use a 9-pin, D-shell connector. 1 5 6 9 Table 4 shows the pin-number assignments for the serial port connectors. The pin-number assignments conform to the industry standard. Table 4. Serial port connector pin-number - IBM 847651U | Handbook - Page 171
Connecting external options Parallel port connector Parallel ports are used to communicate with printers and other devices, such as some CD-ROM and tape drives. Your server provides one 25-pin, D-shell connector on the back of the server. 13 1 25 14 This parallel port connector conforms to the - IBM 847651U | Handbook - Page 172
Connecting external options Video port connector The video port is where you can attach a video monitor to your Netfinity 3000 server. Your server provides a 15-pin video port connector. 6 1 11 5 15 10 Table 6 shows the pin-number assignments for the video port connector. Table 6. Video - IBM 847651U | Handbook - Page 173
Connecting external options Keyboard and mouse connectors Your server provides one keyboard port and one auxiliary-device port. An auxiliary device can be a mouse or other pointing device. Your server provides two 6-pin port connectors. 6 4 2 5 3 1 Table 7 shows the pin-number assignments for - IBM 847651U | Handbook - Page 174
to install internal SCSI devices in your server and to attach external SCSI devices to your server. Note: The 50-pin SCSI connector is not supported. See "SCSI drives (if your server model comes with a SCSI adapter)" on page 110 for additional information about the SCSI subsystem. Internal SCSI - IBM 847651U | Handbook - Page 175
Connecting external options Table 8 shows the pin-number assignments for the 68-pin SCSI connectors. Table 8. The 68-pin SCSI port connector pin-number assignments Pin Signal Pin Signal 1 Ground 2 Ground 3 Ground 4 Ground 5 Ground 6 Ground 7 Ground 8 Ground 9 Ground 10 - IBM 847651U | Handbook - Page 176
segment. Note: If more than one USB device is to be attached, the device must be connected to a hub. Your Netfinity 3000 server does not support a keyboard attached to the system USB port. Your Netfinity 3000 server comes with two USB ports. Table 9 shows the pin-number assignments for the USB - IBM 847651U | Handbook - Page 177
Connecting external options Ethernet connector The system board in your Netfinity 3000 server contains an Ethernet controller. The controller has an external RJ-45 connector on the rear of the server that is used with a Category 5 twisted-pair cable. Through this connector, you can attach an - IBM 847651U | Handbook - Page 178
Adding security options Adding security options Security features can help to protect your server data and programs from unauthorized access and use, and help to physically protect your server from theft and tampering. After you determine your system security needs, you can activate or implement the - IBM 847651U | Handbook - Page 179
the following: - A flat-blade screwdriver - An adjustable wrench - A 19 mm (3/4 in.) U-bolt or wire rope (similar to National Manufacturing No. 3230, Stock No. 176-735) - Threaded nuts that fit the U-bolt - A security cable - A lock, such as a combination lock or padlock Read "Electrical safety - IBM 847651U | Handbook - Page 180
Adding security options 1. Remove the server side cover (see "Disconnecting cables and removing the side cover" on page 74). 2. Locate the two holes on the lower right edge of the rear of the server. 3. Insert the U-bolt through the rear panel; then, attach and tighten the nuts with an appropriately - IBM 847651U | Handbook - Page 181
Adding security options 5. Thread the cable through the U-bolt and around an object that is not a part of or permanently secured to the building structure or foundation, and from which it cannot be removed; then, fasten the cable ends together with a lock. The following illustration shows an example - IBM 847651U | Handbook - Page 182
Completing the installation Completing the installation Before you begin: Complete all the installation procedures for the internal options that you have chosen to install. Read "Electrical safety" on page 70. 1. Ensure that all components have been reassembled correctly and that no tools or loose - IBM 847651U | Handbook - Page 183
Completing the installation b. Align the three bottom cover guides with the corresponding notches on the frame of the server. Tab Opening Notches c. Insert the bottom cover tab into the tab opening. Tab Notches Chapter 4. Installing options 149 - IBM 847651U | Handbook - Page 184
Socket 7 Completing the installation d. With one hand, align the top so that the cover rests against the server. With the other hand, press the cover at the bottom left corner, above the left rotated foot. e. Keep the hand at the top to hold the cover in place. Use the thumb from the other hand to - IBM 847651U | Handbook - Page 185
Completing the installation 5. If a cover lock is present, go to the back of the server and lock the cover. You can use the cover lock and keys to secure the outside cover. For more information about the keys for the cover lock, see "Recording the identification numbers" on page 244. 7 CAUTION: - IBM 847651U | Handbook - Page 186
Completing the installation 7. If you have a modem or fax machine attached to the server, and you are not in the United Kingdom, reconnect the telephone line to the wall outlet and the server, and plug the power cords into properly grounded electrical outlets. If you are in the United Kingdom, plug - IBM 847651U | Handbook - Page 187
after an ISA legacy adapter is installed or removed, you must manually update the server configuration and save the information. Notes: 1. If "Solving problems" for information about correcting this situation. 3. To run the Configuration/Setup Utility program, follow the instructions in "Using - IBM 847651U | Handbook - Page 188
operating system (NOS), you must download system-specific NOS installation instructions and download device drivers. To obtain system-specific NOS installation instructions and the latest device drivers, access the IBM Web site at http://www.ibm.com/pc/support 154 Netfinity 3000 User's Handbook - IBM 847651U | Handbook - Page 189
Note: If you are outside the United States, access the IBM Web site at http://www.ibm.com/pc and select a country-specific Web site. Chapter 4. Installing options 155 - IBM 847651U | Handbook - Page 190
156 Netfinity 3000 User's Handbook - IBM 847651U | Handbook - Page 191
use these tools to identify and correct problems that might occur as you use your beep codes 161 Error messages 161 Troubleshooting charts 162 Installing files from Option Diskettes Ethernet controller messages 196 Troubleshooting 200 Troubleshooting charts 200 Troubleshooting the 10/100 Mbps - IBM 847651U | Handbook - Page 192
software package. The following tools are available to help identify and resolve hardware-related problems: Diagnostic test programs Power-on self-test (POST) POST beep codes Error messages Troubleshooting charts Option Diskettes Descriptions of these tools follow. 158 Netfinity 3000 User's Handbook - IBM 847651U | Handbook - Page 193
to test some external devices. Also, if you cannot determine whether a problem is caused by the hardware or by the software, you can run the test programs to confirm that the hardware is working properly. The IBM Enhanced Diagnostics programs will isolate your server hardware from software that you - IBM 847651U | Handbook - Page 194
: The amount of available memory shown might be somewhat less than expected because of BIOS shadowing in RAM. If POST finishes without detecting any problems, the first screen of your operating system or application program appears (if you have not set a power-on password). If you have set a power - IBM 847651U | Handbook - Page 195
; they are not intended to be used to identify a failing part. Troubleshooting and servicing of complex problems indicated by error messages should be performed by a trained service technician. Hardware error messages that occur can be text, numeric, or both. Messages generated by your software - IBM 847651U | Handbook - Page 196
are alphanumeric. Follow the instructions on the screen. Software-generated error messages These messages occur if a problem or conflict is found program, or both. Troubleshooting charts The charts under "Troubleshooting charts" on page 200 list symptoms of problems (for example, a symptom - IBM 847651U | Handbook - Page 197
the diskette to your hard disk. Refer to the documentation that comes with the option to see if you need to install files. Chapter 5. Solving problems 163 - IBM 847651U | Handbook - Page 198
. To do this: 1. Insert the Enhanced Diagnostics CD into the CD-ROM drive and restart the system. 2. Select Make IBM Diagnostic Diskette from the Enhanced Diagnostic menu. 3. Follow the instructions on the screen. Use a blank, 3.5-inch, formatted 2 MB diskette in diskette drive A. To start the - IBM 847651U | Handbook - Page 199
page 39 does not eliminate the error message, then proceed with the following instructions. 1. Write down all error code numbers and descriptions that appear on the screen as you start your server. (Note that a single problem can cause several error messages to appear. When you correct the cause of - IBM 847651U | Handbook - Page 200
exit from the Configuration/Setup Utility program menu (see step 5e on page 167), your operating system will start automatically (unless there is an unresolved problem with the startup device). 166 Netfinity 3000 User's Handbook - IBM 847651U | Handbook - Page 201
as they currently appear in the Configuration/Setup Utility program, and your operating system will start (unless there is an unresolved problem with the startup device). e. To exit from the Configuration/Setup Utility program, press Esc and follow the instructions on the screen. Chapter 5. Solving - IBM 847651U | Handbook - Page 202
to: "Running the diagnostic test programs" on page 164. "POST message table" on page 169. "Troubleshooting charts" on page 200. If you are unable to resolve a problem and need assistance, refer to Chapter 6, "Getting help, service, and information" on page 229. 168 Netfinity 3000 User's Handbook - IBM 847651U | Handbook - Page 203
page 71, and "Preparing to add options" on page 73 for important safety information and instructions. Notes: 1. The actions for some of the messages require you to run the Configuration/Setup the system board and microprocessor test. Action: Have the system serviced. Chapter 5. Solving problems 169 - IBM 847651U | Handbook - Page 204
you just installed. If you cannot isolate and correct the problem, have the system serviced. A real-time clock (RTC) error occurred. Action: Have the system serviced. The battery on the system board is dead. Attention: Follow the instructions in the battery-safety statement in "Replacing the battery - IBM 847651U | Handbook - Page 205
on page 39 for further information and instructions on saving the configuration. 4. If See "Updating the server configuration" on page 153 for instructions. 5. If you did not add, remove, or the failing device, but you must have the system serviced. (See "Running the diagnostic test programs" on page - IBM 847651U | Handbook - Page 206
the 163 error message reappears, replace the battery. (See "Replacing the battery" on page 224.) If this does not correct the problem, have the system serviced. Until the system is serviced, the server can be used, but any application programs that use the date and time will be affected. A change in - IBM 847651U | Handbook - Page 207
Description An installed microprocessor is not supported by the current POST/BIOS. , select I/O Devices and Ports. Then, follow the instructions on the screen. 2. Select Ethernet Setup. 3. Select server. If the problem cannot be isolated and corrected, have the system serviced. A failure occurred - IBM 847651U | Handbook - Page 208
Utility program" on page 39. If the problem persists, have the system serviced. The privileged-access protection message is received if the Configuration/Setup Utility menu, select System Security. Then, follow the instructions on the screen. Set the values for AssetCare and Asset ID to Disabled - IBM 847651U | Handbook - Page 209
test programs" on page 164 for information on running the diagnostic programs that come with your server.) If the problem cannot be isolated and corrected, have the system serviced. An error occurred during the keyboard and keyboard controller test. These error messages also might be accompanied by - IBM 847651U | Handbook - Page 210
that is formatted correctly and is in good condition. (For information and instructions on formatting diskettes, refer to your operating-system documentation.) If this does not correct the problem, have the system serviced. A failure occurred during a diskette-drive test. Action: 1. Verify that the - IBM 847651U | Handbook - Page 211
in the Configuration/Setup Utility program. See "Using the Configuration/Setup Utility program" on page 39 for additional information and instructions on saving the configuration. If the problem cannot be isolated and corrected, have the system serviced. Chapter 5. Solving problems 177 - IBM 847651U | Handbook - Page 212
that come with your server.) 2. If the diagnostic programs detect a failure, replace the defective hard disk drive or primary or secondary IDE device. If the problem cannot be isolated and corrected, have the system serviced. 178 Netfinity 3000 User's Handbook - IBM 847651U | Handbook - Page 213
, you might need to remove one of these adapters to make an interrupt available to the PCI adapter that you want to install. If the problem cannot be isolated and corrected, have the system serviced. Chapter 5. Solving problems 179 - IBM 847651U | Handbook - Page 214
installed, you might need to remove one of these adapters to make memory available to the PCI adapter that you want to install. If the problem cannot be isolated and corrected, have the system serviced. 180 Netfinity 3000 User's Handbook - IBM 847651U | Handbook - Page 215
port resource settings are correct, the PCI adapter might be defective. Have the system serviced. 3. Make sure that the switches on all ISA legacy adapters are set correctly. want to install. If the problem cannot be isolated and corrected, have the system serviced. Chapter 5. Solving problems 181 - IBM 847651U | Handbook - Page 216
memory address settings are correct, the PCI adapter might be defective. Have the system serviced. 3. Make sure that the switches on all ISA legacy adapters are set correctly to install. If the problem cannot be isolated and corrected, have the system serviced. 182 Netfinity 3000 User's Handbook - IBM 847651U | Handbook - Page 217
remove one of these adapters to make memory available to the PCI adapter that you want to install. If the problem cannot be isolated and corrected, have the system serviced. A PCI adapter read-only memory (ROM) error occurred. Action: Remove all PCI adapters that are not required for system startup - IBM 847651U | Handbook - Page 218
need to remove one of these adapters to make an interrupt available to the Plug and Play adapter that you want to install. If the problem cannot be isolated and corrected, have the system serviced. 184 Netfinity 3000 User's Handbook - IBM 847651U | Handbook - Page 219
might need to remove one of these adapters to make memory available to the Plug and Play adapter that you want to install. If the problem cannot be isolated and corrected, have the system serviced. Chapter 5. Solving problems 185 - IBM 847651U | Handbook - Page 220
settings are correct, the Plug and Play adapter might be defective. Have the system serviced. 3. Make sure that the switches on all ISA legacy adapters are set correctly. want to install. If the problem cannot be isolated and corrected, have the system serviced. 186 Netfinity 3000 User's Handbook - IBM 847651U | Handbook - Page 221
address settings are correct, the Plug and Play adapter might be defective. Have the system serviced. 4. If all memory addresses are being used by ISA legacy adapters, you might need install. If the problem cannot be isolated and corrected, have the system serviced. Chapter 5. Solving problems 187 - IBM 847651U | Handbook - Page 222
might need to remove one of these adapters to make memory available to the Plug and Play adapter that you want to install. If the problem cannot be isolated and corrected, have the system serviced. 188 Netfinity 3000 User's Handbook - IBM 847651U | Handbook - Page 223
one at a time, powering on the server after each adapter is reinstalled. When message 1885 displays, replace the adapter that you just installed. If the problem cannot be isolated and corrected, have the system serviced. Chapter 5. Solving problems 189 - IBM 847651U | Handbook - Page 224
might need to remove one of these adapters to make memory available to the Plug and Play adapter that you want to install. If the problem cannot be isolated and corrected, have the system serviced. 190 Netfinity 3000 User's Handbook - IBM 847651U | Handbook - Page 225
. 3. Make sure that all adapters are installed correctly. For instructions on adding adapters, see "Installing or removing ISA and PCI adapters" on page 82. If the problem cannot be isolated and corrected, have the system serviced. A video configuration error occurred. Action: 1. Make sure that the - IBM 847651U | Handbook - Page 226
program. See "Using the Configuration/Setup Utility program" on page 39 for additional information and instructions on saving the configuration. If the problem cannot be isolated and corrected, have the system serviced. A pointing device or system board error occurred. Action: Have the system - IBM 847651U | Handbook - Page 227
, three beeps, then two beeps) indicates a memory module problem. If the following beep codes occur, have the system serviced. Beep Code 1-1-3 1-1-4 1-2-1 1-2-2 1-2-3 1-2-4 1-3-1 1-3-2 2-1-1 2-1-2 2-1-3 2-1-4 2-2-2 2-3-2 2-3-3 3-1-1 3-1-2 3-1-4 3-2-4 3-3-1 Probable Cause CMOS write/read failure - IBM 847651U | Handbook - Page 228
memory is used. Beep Code 1-3-4 Probable Cause Memory types mixed-unbuffered vs. registered SCSI messages The following table lists messages that reflect problems with the SCSI controller or a SCSI device. Note: If your server does not have a hard disk drive, ignore any message that indicates - IBM 847651U | Handbook - Page 229
messages SCSI Messages All Description One or more of the following might be causing the problem: A failing SCSI device (adapter, drive, controller) An improper SCSI configuration or SCSI about the failing device. If the error recurs, have the system serviced. Chapter 5. Solving problems 195 - IBM 847651U | Handbook - Page 230
controller, record the error message, and tell your network administrator about the problem. The two most common error messages are: RPL-ROM-ERR: 1 5 execute correctly. If this error message appears, you must have the server serviced. Error 107 indicates that the cable from the LAN is not securely - IBM 847651U | Handbook - Page 231
Ethernet controller was unable to initialize. Action: Make sure that the Ethernet controller is enabled in the BIOS. If the problem persists, have the system serviced. RPL-ROM-ERR: 102 The integrated Ethernet controller could not be reset. Action: Make sure that the Ethernet controller is - IBM 847651U | Handbook - Page 232
messages Error Code Description RPL-ROM-ERR: 110 The integrated Ethernet controller RAM failed the memory test. Action: Have the system serviced. E61 Service boot (startup) canceled; that is, the boot diskette image was not downloaded from the network. Action: No action is required. E62 - IBM 847651U | Handbook - Page 233
. M96 Cannot ARP MTFTP address. M98 Cannot open MTFTP connection. M99 Cannot read from MTFTP connection. Txx If you are running a TFTP session to another computer, an error message generated by the TFTP session will contain a message prefix of Txx. Chapter 5. Solving - IBM 847651U | Handbook - Page 234
problems that have definite symptoms. Troubleshooting charts Look for the symptom in the left column of the chart. Instructions and probable solutions to the problem or new device. Note: If you cannot find the problem in the troubleshooting charts, go to "Running the diagnostic test programs" on - IBM 847651U | Handbook - Page 235
Troubleshooting CD-ROM drive problems The CD is not working properly. The CD-ROM drive tray is not working. Action Follow the instructions in "Using circular pattern. This can cause loss of data. If a problem still exists, have the system serviced. The system must be turned on. If the system is - IBM 847651U | Handbook - Page 236
Troubleshooting CD-ROM drive problems The server does not recognize the CD-ROM drive. Action Your server comes with an IDE CD-ROM drive. Verify that: 1. The CD-ROM drive is enabled in the Configuration/Setup Utility program. For instructions the system serviced. 202 Netfinity 3000 User's Handbook - IBM 847651U | Handbook - Page 237
that comes with the monitor for adjusting and testing instructions. If you still cannot find the problem, check the Monitor Problems troubleshooting chart for possible solutions. If the problem cannot be isolated and corrected, have the monitor and system serviced. Chapter 5. Solving problems 203 - IBM 847651U | Handbook - Page 238
Troubleshooting Monitor problems The screen is blank. Only the cursor appears. The monitor device drivers, follow the instructions in the ServerGuide package that comes with your server. If the problem cannot be isolated and corrected, have the monitor and system serviced. 204 Netfinity 3000 User - IBM 847651U | Handbook - Page 239
Troubleshooting Monitor problems problem cannot be isolated and corrected, have the system serviced. Set the monitor for the highest, noninterlaced refresh rate supported supported by your monitor might damage it. You can reset the refresh rate through your operating system, using the instructions - IBM 847651U | Handbook - Page 240
Troubleshooting Monitor problems supported refresh rates. Note: An enhanced monitor signal cable with additional shielding might be available for your monitor. Contact your IBM reseller or marketing representative for information. If the problem still exists, have the monitor and system serviced - IBM 847651U | Handbook - Page 241
Troubleshooting General problems The server does not start when you press the power might have installed more options than the power supply supports. If the problem still exists, have the system serviced. Intermittent problems A problem occurs only occasionally and is difficult to detect. Action - IBM 847651U | Handbook - Page 242
Troubleshooting Microprocessor problems primary diskette drive and run the flash program. Follow the instructions in the program. For information on error code 167, see microprocessor. If the problem still exists, have the system serviced. Keyboard, mouse, or pointingdevice problems All or some - IBM 847651U | Handbook - Page 243
Troubleshooting Keyboard, mouse, or pointingdevice problems The mouse or pointing device does not work. Action Verify The device drivers for the mouse are installed correctly. If the problem cannot be isolated and corrected, have the server and the device serviced. Chapter 5. Solving problems 209 - IBM 847651U | Handbook - Page 244
Troubleshooting Memory problems The amount of memory displayed is less than the amount of memory installed and automatically reallocated memory to enable your server to continue to operate. If the problem cannot be isolated and corrected, have the system serviced. 210 Netfinity 3000 User's Handbook - IBM 847651U | Handbook - Page 245
Troubleshooting Option problems An IBM option that used to work does not work now. Action Verify that all of the option hardware and cable connections are secure. If the option comes with its own test instructions, use those instructions to test the option. If the failing option is a SCSI option, - IBM 847651U | Handbook - Page 246
Troubleshooting Option problems An IBM option that was just installed does not work. Action Verify that: 1. The option is designed for the system. 2. You followed the installation instructions that come with the option and the instructions in Chapter 4, "Installing options" on page 67. 3. You have - IBM 847651U | Handbook - Page 247
Troubleshooting Parallel port problems The parallel port cannot be accessed, or the number of and PCI adapters" on page 82. If the items above are correct, have the system serviced. Serial port problems The serial port cannot be accessed, or the number of serial ports displayed is less than - IBM 847651U | Handbook - Page 248
Troubleshooting Universal serial bus (USB) port problems The USB ports cannot be accessed, or the number of removing ISA and PCI adapters" on page 82. If the items above are correct, have the system serviced. Verify that: 1. The USB is enabled and is assigned a unique address. For information on - IBM 847651U | Handbook - Page 249
Troubleshooting Printer problems 11. Note: Non-IBM printer cables might cause unpredictable problems. 3. You have assigned OK, have the system serviced. Expansion enclosure problems The SCSI expansion enclosure used comes with its own test instructions, use those instructions to test it. In addition - IBM 847651U | Handbook - Page 250
Troubleshooting Expansion enclosure problems The SCSI Repeater Card used to work, but does not own test instructions, use those instructions to test it. If the items above are correct and the test programs found no problem, have the server and SCSI Repeater Card serviced. Software problems Is your - IBM 847651U | Handbook - Page 251
10/100 Mbps Ethernet controller This section provides troubleshooting information for problems that might occur with the 10/100 location on the server, see "Status indicators" on page 10. Network connection problems If the Ethernet controller cannot connect to the network, check the following: 1. - IBM 847651U | Handbook - Page 252
Troubleshooting If the Ethernet activity light is off: a. Make sure that the hub and network are operating, and that the correct device drivers are loaded. b. There might be a defective Ethernet connector or cable, or a problem with the hub. 3. Make sure that you are using the correct device drivers - IBM 847651U | Handbook - Page 253
troubleshooting chart You can use the following troubleshooting chart to find solutions to Ethernet controller problems that have definite symptoms. Controller problems . The Configuration/Setup Utility program has been run on another computer that does not have any PCI slots. Run the Configuration/ - IBM 847651U | Handbook - Page 254
Troubleshooting Controller problems The Ethernet activity light does not come on. sure that you also force the speed to either 10 Mbps or 100 Mbps. If the problem still exists, have the system serviced. 1. Make sure that you are using Category 5 Ethernet cabling when operating the server at either - IBM 847651U | Handbook - Page 255
Troubleshooting Controller problems The instructions, if you used ServerGuide to install your operating system). 4. Try a different Ethernet adapter. See http://www.ibm.com/pc/us/compat/ on the World Wide Web for a list of compatible adapters. If the problem still exists, have the system serviced - IBM 847651U | Handbook - Page 256
system for damage This section provides instructions on what to do if your system might be damaged. After dropping it Look for loose cables and obvious damage. If any cables are loose, reconnect them securely. If there is obvious damage to the system, have it serviced. If you see no damage, turn - IBM 847651U | Handbook - Page 257
and turn on the server. If it does not work correctly, have the keyboard serviced. If liquid gets inside the monitor: 1. Turn off the monitor. 2. Turn monitor from the server and the electrical outlet. 4. Have the monitor serviced immediately. If liquid gets inside the server: 1. Turn off the server - IBM 847651U | Handbook - Page 258
must be handled correctly to avoid possible danger. If you replace the battery, you must adhere to the following instructions. 2 CAUTION: When replacing the battery, use only IBM Part Number 33L3963 or an equivalent type battery recommended by the manufacturer. If your system has a module containing - IBM 847651U | Handbook - Page 259
IBM marketing representative. Before you begin, be sure you have: Read "Electrical safety" on page 70 and "Handling static-sensitive devices" on page 71. Followed any special handling and installation instructions finger to pull the battery from under the battery clip. Chapter 5. Solving problems 225 - IBM 847651U | Handbook - Page 260
Replacing the battery d. Ensure that the battery clip is touching the base of the battery socket by pressing gently on the clip. 3. Insert the new battery: a. Tilt the battery so that you can insert it into the front of the socket, under the battery clip. b. As you slide it under the battery clip, - IBM 847651U | Handbook - Page 261
" on page 43. To reset the power-on password, go to "Setting power-on password modes" on page 43. To reconfigure your system, follow the instructions given in "The Configuration/Setup Utility program" on page 36 (all models). Chapter 5. Solving - IBM 847651U | Handbook - Page 262
Replacing the battery 228 Netfinity 3000 User's Handbook - IBM 847651U | Handbook - Page 263
IBM products and services, find the latest technical information, and download device drivers and updates. Some of these pages are: http://www.ibm.com Main IBM home page http://www.ibm.com/pc IBM Personal Computing http://www.ibm.com/pc/support IBM Personal Computing Support http://www.ibm - IBM 847651U | Handbook - Page 264
listed are subject to change without notice. Service support With the original purchase of an IBM hardware product, you have access to extensive support coverage. During the IBM hardware product warranty period, you may call the IBM Personal Computer HelpCenter (1-800-772-2227 in the U.S.) for - IBM 847651U | Handbook - Page 265
obtain warranty service. Please have the following information ready when you call: Machine Type and Model Serial numbers of your IBM hardware products Description of the problem Exact wording of any error messages Hardware and software configuration information If possible, be at your computer when - IBM 847651U | Handbook - Page 266
problem, refer to the troubleshooting information in your hardware documentation or run the diagnostic tests. If you suspect a software problem, consult the documentation (including README files) for the operating system or application program. Getting customer support and service Purchasing an IBM - IBM 847651U | Handbook - Page 267
community sites monitored by IBM support staff. For information about specific Personal Computer products, visit the following pages: http://www.ibm.com/pc/us/intellistation http://www.ibm.com/pc/us/ibmpc http://www.ibm.com/pc/us/netfinity http://www.ibm.com/pc/us/thinkpad http://www.ibm.com/pc/us - IBM 847651U | Handbook - Page 268
400 baud are supported. Long distance telephone charges might apply. To access the IBM BBS: In services, such as America Online (AOL), contain information about IBM products. (For AOL, use the "Go to" keyword IBM IBM Automated Fax System 24 hours a day, 7 days a week. Follow the recorded instructions - IBM 847651U | Handbook - Page 269
with questions you might have on the following: Setting up your computer and IBM monitor Installing and setting up IBM options purchased from IBM or an IBM reseller 30-day, preinstalled-operating-system support Arranging for service (on-site or carry-in) Arranging for overnight shipment of customer - IBM 847651U | Handbook - Page 270
components, or your proof of purchase Description of the problem Exact wording of any error messages Hardware and software configuration information for your system If possible, be at your computer when you call. In the U.S. and Canada, these services are available 24 hours a day, 7 days a week. In - IBM 847651U | Handbook - Page 271
-772-2227 In all other countries, contact your IBM reseller or IBM marketing representative. Getting help around the world If you travel with your computer or need to move it to another country, you can register for International Warranty Service. When you register with the International Warranty - IBM 847651U | Handbook - Page 272
programs on the Supported Products list. This service includes technical support for: Installing and configuring your out-of-warranty IBM computer Installing and configuring non-IBM options in IBM computers Using IBM operating systems in IBM and non-IBM computers Using application programs - IBM 847651U | Handbook - Page 273
. In addition, many popular non-IBM adapters and network interface cards are supported. This service includes all of the features of the Enhanced PC Support Line, plus: Installing and configuring client workstations and servers Identifying system problems and correcting problems on the client or the - IBM 847651U | Handbook - Page 274
, including ThinkPad EasyServ Maintenance Agreements. Availability of the services varies by product. For more information about warranty upgrades and extensions: In the U.S., call 1-800-426-4968. In Canada, call 1-800-465-7999. In all other countries, contact your IBM reseller or IBM marketing - IBM 847651U | Handbook - Page 275
In the U.S., Canada, and Puerto Rico, call 1-800-879-2755. In other countries, contact your IBM reseller or IBM marketing representative. Chapter 6. Getting help, service, and information 241 - IBM 847651U | Handbook - Page 276
242 Netfinity 3000 User's Handbook - IBM 847651U | Handbook - Page 277
add other options and, if the need should arise, to report a hardware problem. In addition to server records, this chapter contains specifications. These specifications include product administrator password switch 266 Setting the diskette write-protect switch 268 © Copyright IBM Corp. 1999 243 - IBM 847651U | Handbook - Page 278
the following information. Table 12. Server identification numbers Product Name Machine Type Microprocessor Type Model Number Serial Number Key Serial Number IBM Netfinity 3000 8476 (ex: 500 MHz Pentium III) with preinstalled hard disk drive without preinstalled hard disk drive The server serial - IBM 847651U | Handbook - Page 279
configuration settings. This information can be helpful when you install additional options in your server or if you ever need to have your server serviced. Copy these tables before recording information in them, in case you need extra space to write new values later, when you update your system - IBM 847651U | Handbook - Page 280
Ports Mouse Diskette Drive A Diskette Drive B Serial Port Setup Serial Port A Address (hex) Serial Port B Address (hex) USB Setup USB Support USB Keyboard/Mouse Support Parallel Port Setup Parallel Port (hex) Parallel Port Mode Parallel Port Extended Mode Parallel Port DMA Parallel Port IRQ Video - IBM 847651U | Handbook - Page 281
IDE Hard Disk Drive 0 IDE Hard Disk Drive 1 IDE CD-ROM Drive 2 IDE Hard Disk Drive 3 Audio Setup Audio Support Audio Output Mode Ethernet Setup Ethernet Support Alert on LAN Network Boot MAC Address [ Enabled ] [ Line Out ] [ Enabled ] DISABLED [ DHCP ] 006094310735 Start Options Keyboard NumLock - IBM 847651U | Handbook - Page 282
Recording installed devices Table 14 (Page 3 of 4). Configuration/setup program defaults and changes Option Default value New value System Security Enhanced Security Secure IDE Devices and Diskette Drives Remote Administration Power-On Password Password Prompt Administrator Password Power-On - IBM 847651U | Handbook - Page 283
Recording installed devices Table 14 (Page 4 of 4). Configuration/setup program defaults and changes Option Default value New value Plug and Play Control Set Device Node Address Decode Plug and Play Operating System Processor Control Processor 0 ID Processor Updating ISA Legacy Resources Memory - IBM 847651U | Handbook - Page 284
Port (AGP) slot is for AGP adapters only. For instructions on installing an AGP adapter in this slot, see " information on the available AGP adapters, go to http://www.ibm.com/pc/compat/ on the World Wide Web. 2. , the server system board does not support the AGP video connector and the integrated - IBM 847651U | Handbook - Page 285
System specifications The server specifications include product dimensions, environmental operating requirements, the system board layout, jumper settings, and switch settings. These specifications are described in the following sections. Environmental specifications The following table contains the - IBM 847651U | Handbook - Page 286
values stated because of room reflections and other nearby noise sources. The declared sound power levels indicate an upper limit, below which a large number of computers will operate. 252 Netfinity 3000 User's Handbook - IBM 847651U | Handbook - Page 287
The system board, also called the planar or motherboard, is the main circuit board in your server. It provides basic server functions and supports a variety of devices that are preinstalled or that you can install later. Some configuration actions are controlled through jumpers on the system board - IBM 847651U | Handbook - Page 288
Erasing lost or forgotten passwords Erasing lost or forgotten passwords Note: To set, change, or delete a password, see "System Security" on page 43. Your server uses complementary metal-oxide semiconductor (CMOS) memory on the system board for storing configuration and setup information. CMOS - IBM 847651U | Handbook - Page 289
Erasing lost or forgotten passwords The jumper is located on the system board with the label Clear CMOS Request. To locate this jumper, see "System Board Illustration" on page 253, or refer to the label inside the server. Before you begin: Using the Configuration/Setup Utility program, record all - IBM 847651U | Handbook - Page 290
to turn off the power using the power switch until POST is nearly complete. Unplug the power cord to turn off your server. 7. Follow the instructions on the screen to continue. 8. When the Configuration/Setup Utility program starts, make the necessary changes, save the settings, and exit setup. You - IBM 847651U | Handbook - Page 291
Erasing lost or forgotten passwords the server. For more information, see "Using the Configuration/Setup Utility program" on page 39. Chapter 7. Server records and specifications 257 - IBM 847651U | Handbook - Page 292
page 73). Locate the Flash BIOS in "Remote Administration" on page 52. Note: If you have not already done so, go to http://www.ibm.com/pc/support/ on the World Wide Web and download the appropriate flash update program. Review the applicable README files, and use this information to create a Flash - IBM 847651U | Handbook - Page 293
Attention: Before you change the settings for switches 1 through 4, be sure that you check the orientation of your server system board to correctly identify the switch number locations. If you change the settings on the wrong switches, you might seriously damage server components or options. 266 MHz - IBM 847651U | Handbook - Page 294
damage your server's components or options. 14 Microprocessors listed in these tables were not necessarily available or planned for your model at the time this manual was written. When a microprocessor becomes available for your model, use these switch settings. 260 Netfinity 3000 User's Handbook - IBM 847651U | Handbook - Page 295
switches are set as shown. Notes: a. Visit http://www.ibm.com/netfinity (Server Tech Library/Configuration Tools or equivalent selection) to into the primary diskette drive and run the flash program. Follow the instructions in the program. For additional information on error code 167, see the - IBM 847651U | Handbook - Page 296
BIOS Diskette that you created in "Remote Administration" on page 52. Note: If you have not already done so, go to http://www.ibm.com/pc/support/ on the World Wide Web and download the appropriate flash update program. Review the applicable README files, and use this information to create a Flash - IBM 847651U | Handbook - Page 297
Normal ROM Operation 12345678 ON OFF ROM Recovery Mode 12345678 ON OFF 3. Move the switch to the ON position. 4. Insert the Flash BIOS Diskette (POST/BIOS update) into drive A. 5. Turn on the server. 6. After the update session completes, turn off the server and remove the diskette from drive A. - IBM 847651U | Handbook - Page 298
Setting the Ethernet controller operation mode switch When you want to change the Ethernet controller operation mode from Normal to MAC Disabled, you must change the setting of configuration switch 6. Before you begin: Read "Electrical safety" on page 70 and "Handling static-sensitive devices" on - IBM 847651U | Handbook - Page 299
Note: In the following illustration, MAC represents medium access control. This refers to the Ethernet controller address. Ethernet Normal Operation 12345678 ON OFF Ethernet MAC Disabled 12345678 ON OFF 3. Move the switch to the ON position. 4. Make the required adjustments to the Ethernet - IBM 847651U | Handbook - Page 300
Setting the administrator password switch When you want to set, change, or delete an administrator password that is protected by enhanced security, you must first unlock the administrator password. To do this, change the setting of the administrator password switch from Locked to Unlocked. Before - IBM 847651U | Handbook - Page 301
Note: You must know the administrator password to change or delete it. 4. Set, change, or delete your password. Follow the instructions on the screen. (See "Using the Administrator Password menu" on page 48.) 5. Move the switch back to the OFF position. 6. Replace the cover. Then, turn - IBM 847651U | Handbook - Page 302
Setting the diskette write-protect switch The diskette write-protect switch controls whether you can write information to a diskette using a diskette drive. The ability to prevent writing to a diskette is particularly useful if you are concerned about the security of information that can be obtained - IBM 847651U | Handbook - Page 303
" on page 39. Note: To control and specify who has access to the diskettes in your server, use the Configuration/Setup Utility program. Follow the instructions in "Restricting access to IDE devices and diskette drives" on page 52. Chapter 7. Server records and specifications 269 - IBM 847651U | Handbook - Page 304
270 Netfinity 3000 User's Handbook - IBM 847651U | Handbook - Page 305
an IEEE Standard 802.3 network. The Ethernet controller on your system board provides 10BASE-T and 100BASE-TX support through the RJ-45 connector on the back of your server. When you connect your server to the link pulses. This LED is also known as the Link OK light. © Copyright IBM Corp. 1999 271 - IBM 847651U | Handbook - Page 306
When the amber LED is on, it indicates that the Ethernet network is operating at 100 Mbps. When this LED is off, it indicates that the Ethernet network is operating at 10 Mbps. For additional information, see "Diagnostic LEDs" on page 218. Do not use telephone extension cables to connect the server - IBM 847651U | Handbook - Page 307
Note: AWG = American Wire Gauge EIA = Electronics Industries Association STP = shielded twisted pair TIA = Telecommunications Industries Association The following figure illustrates the RJ-45 connector. 10BASE-T or 100 BASE-TX UTP Cable 1 23 Pins 6 RJ-45 Modular Plug Connector The following - IBM 847651U | Handbook - Page 308
The following figure illustrates the wiring in crossover cables. RJ-45 Modular Connector 10BASE-T / 100BASE-TX RJ-45 Modular Connector Twisted Signal Pair Name Pin 1 TD+ 1 Signal Pin Name 1 TD+ 1 TD 2 2 TD 2 RD+ 3 3 RD+ 2 RD 6 6 RD 3, 4 (Not used) 4, 5, 7, 8 Relative to - IBM 847651U | Handbook - Page 309
Period* - Three Years *Contact your place of purchase for warranty service information. Some IBM Machines are eligible for On-site warranty service depending on the country where service is performed. The IBM Warranty for Machines IBM warrants that each Machine 1) is free from defects in materials - IBM 847651U | Handbook - Page 310
non-IBM machines WITHOUT WARRANTIES OF ANY KIND. Any technical or other support provided for a Machine under warranty, such as assistance via telephone with "how-to" questions and those regarding Machine set-up and installation, will be provided WITHOUT WARRANTIES OF ANY KIND. Warranty Service 276 - IBM 847651U | Handbook - Page 311
obtain authorization from the owner to have IBM or your reseller service a Machine that you do not own; and 3. where applicable, before service is provided a. follow the problem determination, problem analysis, and service request procedures that IBM or your reseller provides, b. secure all programs - IBM 847651U | Handbook - Page 312
RECORDS OR DATA; OR 3) SPECIAL, INCIDENTAL, OR INDIRECT DAMAGES OR FOR ANY ECONOMIC CONSEQUENTIAL DAMAGES (INCLUDING LOST PROFITS OR SAVINGS), EVEN IF IBM, ITS SUPPLIERS OR YOUR RESELLER IS INFORMED OF THEIR POSSIBILITY. SOME JURISDICTIONS DO NOT ALLOW THE EXCLUSION OR LIMITATION OF INCIDENTAL OR - IBM 847651U | Handbook - Page 313
Period* - Three Years *Contact your place of purchase for warranty service information. Some IBM Machines are eligible for On-site warranty service depending on the country where service is performed. The IBM Warranty for Machines IBM warrants that each Machine 1) is free from defects in materials - IBM 847651U | Handbook - Page 314
IBM provides non-IBM machines WITHOUT WARRANTIES OF ANY KIND. Any technical or other support IBM or your reseller service a Machine that you do not own; and 3. where applicable, before service is provided a. follow the problem determination, problem analysis, and service request procedures that IBM - IBM 847651U | Handbook - Page 315
RECORDS OR DATA; OR 3) SPECIAL, INCIDENTAL, OR INDIRECT DAMAGES OR FOR ANY ECONOMIC CONSEQUENTIAL DAMAGES (INCLUDING LOST PROFITS OR SAVINGS), EVEN IF IBM, ITS SUPPLIERS OR YOUR RESELLER IS INFORMED OF THEIR POSSIBILITY. SOME JURISDICTIONS DO NOT ALLOW THE EXCLUSION OR LIMITATION OF INCIDENTAL OR - IBM 847651U | Handbook - Page 316
Machine that is the subject of the claim. NEW ZEALAND: The IBM Warranty for Machines: The following paragraph is added to this Section: The The Consumer Guarantees Act 1993 will not apply in respect of any goods which IBM provides, if you require the goods for the purposes of a business as defined - IBM 847651U | Handbook - Page 317
for that Machine in any of those countries from either (1) an IBM reseller approved to perform warranty service or (2) from IBM. If you purchased an IBM Personal Computer Machine in Albania, Armenia, Belarus, Bosnia and Herzegovina, Bulgaria, Croatia, Czech Republic, Georgia, Hungary, Kazakhstan - IBM 847651U | Handbook - Page 318
. Extent of Warranty: The second paragraph does not apply. Warranty Service: The following is added to this Section: During the warranty period, transportation for delivery of the failing Machine to IBM will be at IBM's expense. Production Status: The following paragraph replaces this Section: Each - IBM 847651U | Handbook - Page 319
12 of the Sale of Goods Act 1979 or Section 2 of the Supply of Goods and Services Act 1982. Applicability of suppliers and resellers (unchanged). The following is added to the end of this Section: IBM's entire liability and your sole remedy, whether in contract or in tort, in respect of any - IBM 847651U | Handbook - Page 320
: To obtain warranty service from IBM, call 1-800-IBM-SERV. Notices References in this publication to IBM products, programs, or services do not imply that IBM intends to make these available in all countries in which IBM operates. Any reference to an IBM product, program, or service is not intended - IBM 847651U | Handbook - Page 321
Trademarks Year 2000 readiness and instructions This is a Year 2000 Readiness Disclosure. A product is Year process four-digit date information correctly within and between the 20th and 21st centuries. If your IBM computer is on when the century changes, you should turn it off and then back on again - IBM 847651U | Handbook - Page 322
Notes Alert on LAN Asset ID HelpWare IntelliStation OS/2 ThinkPad Aptiva HelpCenter IBM Netfinity ServerGuide Wake on LAN Lotus and Domino are X/Open Company Limited. Other company, product, and service names may be trademarks or service marks of others. Important notes Processor speeds indicate - IBM 847651U | Handbook - Page 323
IBM products. Support (if any) for the non-IBM products is provided by the third party, not IBM. Some software may differ from its retail version (if available), and may not include user manuals installed and used in accordance with the instruction manual, may cause harmful interference to radio - IBM 847651U | Handbook - Page 324
interference received, including interference that may cause undesired operation. Industry Canada Class A emission compliance statement This Class A digital apparatus complies with Canadian ICES-003. Avis de conformité à la réglementation d'Industrie Canada Cet appareil numérique de la classe A est - IBM 847651U | Handbook - Page 325
Taiwan electronic emission statement Japanese Voluntary Control Council for Interference (VCCI) statement Appendix B. Product warranties and notices 291 - IBM 847651U | Handbook - Page 326
product. To avoid electrical shock, always use the power cord and plug with a properly grounded outlet. IBM power cords used in the United States and Canada are listed by Underwriter's Laboratories (UL) and certified by the Canadian Standards Association (CSA). For units - IBM 847651U | Handbook - Page 327
region are usually available only in that country or region. IBM power cord part number 13F9940 13F9979 13F9997 14F0015 14F0033 14F0051 14F0069 (South), Liberia, Mexico, Netherlands Antilles, Nicaragua, Panama, Peru, Philippines, Saudi Arabia, Suriname, Taiwan, Trinidad (West Indies), United States - IBM 847651U | Handbook - Page 328
294 Netfinity 3000 User's Handbook - IBM 847651U | Handbook - Page 329
more characters. (2) The location in the storage of a computer where data is stored. (3) To refer to a specific of address information in a computer. ANSI. American National Standards Institute is specific to the solution of an application problem. Synonymous with application software. (T) (2) A - IBM 847651U | Handbook - Page 330
that is synonymous with signal events. The baud rate is usually expressed in bits per second. BBS. Bulletin board system. architecture. See computer architecture. asynchronous transmission. Data transmission in which transmission of a character or a block of characters can begin at any time but in - IBM 847651U | Handbook - Page 331
other machine-related functions. client. A functional unit that receives shared services from a server. (T) clock. A device that generates periodic, accurately (T) code. A collection of instructions that is in a form that can be read and processed by a computer. collision. An unwanted condition that - IBM 847651U | Handbook - Page 332
or more other electrical parts. (Contrast with port.) control. The determination of the time and order in which the parts of a computer and the devices that contain those parts perform the input, processing, storage, and output functions. data. (1) A re-interpretable representation of information - IBM 847651U | Handbook - Page 333
the data on the storage medium. electrically erasable programmable read-only memory (EEPROM). EPROM that can be reprogrammed while it is in the computer. EPROM. Erasable programmable read-only memory. direct memory access (DMA). The transfer of data between memory and input/output devices without - IBM 847651U | Handbook - Page 334
stored or processed as a unit. (T) hard disk. A rigid magnetic disk such as the internal disks used in the system units of personal-computer systems and in external hard disk drives. flash memory. See electrically erasable programmable read-only memory (EEPROM). frame. (1) A data structure that - IBM 847651U | Handbook - Page 335
code or feature that provides a function or service. I/O. Input/output. IRQ. Interrupt request. ISA or channel involved in data input, data output, or both. instruction. A statement that specifies an operation to be performed by a of a computer program into memory from auxiliary storage so that the - IBM 847651U | Handbook - Page 336
to perform complex mathematical operations in parallel with other operations. memory. Addressable storage space in the computer that is used for temporary storage of instructions and data while a program is running, or for permanent storage of microcode. Contrast with auxiliary storage. menu - IBM 847651U | Handbook - Page 337
thousand millionth (10−9) of a second. NetBIOS. Network BIOS. An operating system interface for application programs used on IBM personal computers that are attached to the IBM Token-Ring Network. See also BIOS. network. (1) An arrangement of nodes and connecting branches. (T) (2) A configuration of - IBM 847651U | Handbook - Page 338
OBI. Options by IBM. operating system. Software that controls the execution of programs and that may provide services such as resource two dissimilar materials. parallel port. An access point through which a computer transmits or receives data that consists of several bits sent simultaneously on - IBM 847651U | Handbook - Page 339
A sequence of instructions that a computer can interpret and execute. (2) To design, write, modify, and test computer programs. (I) (A) which data is read in a nonsequential manner. RAS. Reliability, availability, and serviceability. read. To acquire or interpret data from a storage device, from a - IBM 847651U | Handbook - Page 340
An area that stores binary data while it is being processed by the computer. repeater. A device used to amplify or reshape signals. resolution. In video can be retrieved. server. (1) A functional unit that provides shared services to workstations over a network. (2) In straight-through cable. A - IBM 847651U | Handbook - Page 341
board. In a system unit, the main circuit board that supports a variety of basic system devices, such as a keyboard or a mouse, and provides other basic system functions. system unit. In personal-computer systems, the part of the computer that contains the processor circuitry, read-only memory (ROM - IBM 847651U | Handbook - Page 342
telephone twisted pair. utility program. (1) A computer program in general support of computer processes; for example, a diagnostic program, a twisted pair. Point-to-point twisted-pair cabling and repeaters to provide network services. There is no maximum node count. Maximum cable distance is 100 m. - IBM 847651U | Handbook - Page 343
installation requirements 112, 134 setting SCSI IDs 111 9-pin serial port 12, 14, 41 900 number support 238 A about this book xxix Accelerated Graphics Port (AGP) adapters compatibility 86, 250 dedicated slot video 3, 80, 86 adding AGP adapter 86 device drivers 154 © Copyright IBM Corp. 1999 309 - IBM 847651U | Handbook - Page 344
adding (continued) external options 133 internal drives 114 ISA and PCI adapters 82 memory modules 98 microprocessor upgrades 127 security for server 144 U-bolt 145 address conflicts 57, 58 Ethernet controller 264 SCSI ID (PUN) 110 SCSI ROM 54 adjusting chair 20 controls 21 keyboard 27 lighting 21 - IBM 847651U | Handbook - Page 345
bandwidth 60 battery accessing 78 disposal xxv, 224 failure error message 170 handling precautions xxv, 224 heavy metal 224 installing 226 location on system board 225, 253 ordering replacements 224 part number 224 removing 225 replacing 224 safety information xxv, 224 baud rate Ethernet controller - IBM 847651U | Handbook - Page 346
(continued) emergency-eject hole 16, 32, 201 external view 16 in-use light 11, 31 internal view 15 laser compliance statement xxvi preinstalled 102 problems 201, 202 purpose 102 using 30, 31 CD-ROMs cleaning 31, 201 diagnostic 164 eject/load button 9, 31 Enhanced Diagnostics 159, 164 handling 31 - IBM 847651U | Handbook - Page 347
circulation, air 21, 69, 152 Class A electronic emission notice 289-290 cleaning compact discs (CDs) 31, 201 the monitor 21 clear CMOS request jumper 253, 254 clearances for air circulation 69, 152 comfort 20 communication adapter 79 modem and fax requirements for the United Kingdom 70 protocol for - IBM 847651U | Handbook - Page 348
62 Ethernet cable specifications 271 configuring 59 connector (RJ-45) 143 description 4 error messages 196 operation mode switch settings 264 pin assignments 143 problems 217 network 143 printer 111 SCSI, problems 194 UltraSCSI 79, 110, 111 video 3, 80, 86 314 Netfinity 3000 User's Handbook - IBM 847651U | Handbook - Page 349
controlling diskette access 52, 268 controls CD-ROM drive 31 CD-ROM eject/load button 9, 31 description 9 diskette eject button 9 illustration 8 memory 4 monitor 26 power switch 9 cord, power 292 cover bottom, installing 90 bottom, removing 89 expansion-slot, removing 83 lock 77, 148, 206 side, - IBM 847651U | Handbook - Page 350
, hard See hard disk drive disk utility programs, SCSI 64 diskette drive bay locations 104 eject button 9 in-use light 11 preinstalled 102 problems 203 purpose 102 disketteless operation 247 diskettes controlling access 52, 268 Enhanced Diagnostics 159, 164 option 163 POST/BIOS (flash) update 52, 53 - IBM 847651U | Handbook - Page 351
251 outlets 22 safety xxv, 70 electrically erasable programmable read-only memory See EEPROM electronic emission Class A notice 289, 290 electronic support 233 Electronics Industries Association (EIA) 273 emergency-eject hole, CD-ROM 16, 32, 201 energy-saving features 56 Enhanced Diagnostics CD - IBM 847651U | Handbook - Page 352
4 related publications xxxi remote program load (RPL) 196 switch, setting 264 troubleshooting 217 European Community electronic emission Class A notice 290 Exit Setup 40 expansion bays 102 expansion enclosure problems 215 expansion slots adapter locations 246 adapters 80, 81 connectors 13 cover - IBM 847651U | Handbook - Page 353
rear view 12 records 245 security 144 ServerGuide 5 summary 3 fee services 238 fixed disk See hard disk drive flash (POST/BIOS) update drives 112 security 144 using CD-ROM drive 30 general problems 206 getting started 8, 17 glare 21 glossary 295 graphics, IBM Personal Computer 229 Index 319 - IBM 847651U | Handbook - Page 354
IBM Personal Computing 232 humidity range 251 I I/O ports See also connectors assigning system resources 56 configuring 41 connector 142 IBM 10/100 Mbps Ethernet Controller 4, 59, 217 IBM Enhanced Diagnostics 159, 164 IBM service , 203 hard disk drive 10 problems 206 indicators, status 8, 10 Industry - IBM 847651U | Handbook - Page 355
SCSI devices, terminating 111 view 15 international warranty service 237 Internet home page 229, 232 interrupt 14, 139 locked 44 pin assignments 139 port 139 problems 208 keyboardless operation 247 keys replacing 244 serial number load (RPL) 196 troubleshooting the Ethernet controller 217 laser - IBM 847651U | Handbook - Page 356
160 cache 3 CMOS 254 configuration error 172 connector locations 96 default settings 246, 250 device records 246 microprocessor patch not found 173 problems 210 size errors 100 memory modules configuration 97 device records 250 installing 98 location on system board 253 purpose 96 removing 98 size - IBM 847651U | Handbook - Page 357
mode 56 adjusting of 20 cleaning 21 configuring 41 connector 12, 14 controls 26 dusting of 21 placement of 21 port 138 power management 56 problems 204 refresh rates 249 self-tests 203 motherboard See system board mouse connector 12, 14 locked 44 password prompt Off mode 45, 46 pin assignments - IBM 847651U | Handbook - Page 358
load (RPL) 196 troubleshooting the Ethernet controller 217 network and server startup support 235 network and server support services, fee 239 noise level , 288 O occasional problems 207 office space, arranging 20 Online Housecall 235 online information services 233 operating system compatibility - IBM 847651U | Handbook - Page 359
Capabilities Port (ECP) 41 location 12 pin assignments 137 problems 213 setting to bidirectional 41 parameters default, configuration 246 prompt On mode 43, 46 removing 254 startup 46 using 43 PC support services, fee 238 PCI (peripheral component interconnect) architecture adapter locations 81, 82 - IBM 847651U | Handbook - Page 360
133 for installation 69, 73, 74 for setup 17, 69 primary PCI slots 81 printer controller 111 problems 215 SCSI 110 privileged-access password See administrator password problems, solving configuration conflicts 57 diagnostic tools Enhanced Diagnostics CD 159, 164 Ethernet LEDs 11, 219 error messages - IBM 847651U | Handbook - Page 361
problems, solving (continued) Ethernet controller 219 expansion enclosure 215 intermittent 207 publications xxxi reliability, availability, and serviceability (RAS) 7 Remote Administration 52 remote program load (RPL) error messages 196 remote technical support 235 removing adapters 78 administrator - IBM 847651U | Handbook - Page 362
configuration settings 40 scanners, SCSI 110 screens blank 204 Configuration/Setup Utility Main Menu 39 filter 21 flicker 205 SCSI Disk Utilities 64 SCSI (small computer system interface) 16-bit devices 111, 112, 134 68-pin connector 140, 141 328 Netfinity 3000 User's Handbook - IBM 847651U | Handbook - Page 363
SCSI (small computer system interface) (continued) 8-bit devices 111, 112, 134 address 111 cables disk format 64 physical unit number (PUN) 110, 111 pin assignments 141 problems 194 purpose 110 repeater card problems 215 ROM address, changing 54 SCSISelect Utility program low-level disk format 64 - IBM 847651U | Handbook - Page 364
See the Start Here booklet updating configuration 153 server startup support 235 server support 235 ServerGuide See also your ServerGuide package description 5 service summary 230 service, warranty See telephone numbers services, fee 238 setting adapter ROM security 54 administrator password 48 - IBM 847651U | Handbook - Page 365
82 software configuration conflicts 58 error 162, 216 problems 216 solving problems 232 configuration conflicts 57 diagnostic tools 158 expansion bus, universal 214 serial port 213 software 216 testing 159 troubleshooting charts 200 using the Enhanced Diagnostics CD 159, 164 specifications - IBM 847651U | Handbook - Page 366
, handling 71 status indicators 8, 10 storage devices 103 straight-through cable wiring 273 supervisor password See administrator password support line services, ordering 239 surge protectors 22 switch set accessing 78 administrator password 266 diskette write-protect switch 268 Ethernet controller - IBM 847651U | Handbook - Page 367
data 135 troubleshooting CD-ROM drive problems 201, 202 CD-ROM problems 201 charts 200 diskette drive problems 203 Ethernet controller 217, 219 expansion enclosure problems 215 general problems 206 intermittent problems 207 keyboard problems 208 memory problems 210 microprocessor problems 208 - IBM 847651U | Handbook - Page 368
troubleshooting (continued) universal serial bus problems 214 turning on the system location of power switch 9 problems 207 types cable 105, 271 drive 104 drive bay assemblies 114 system memory 96 U U-bolt installing 145 location 147 UltraSCSI adapter Configure/View Host Adapter - IBM 847651U | Handbook - Page 369
vital product data (VPD) 7 voltage input 251 regulator feature 3, 126 VPD (vital product data) 7 W warranty statement warranty extensions and upgrades 240 warranty service 235 weight of server 251 Windows NT Server See also operating system password prompt Off mode 46 work area, arranging 20 World - IBM 847651U | Handbook - Page 370
IBM® Part Number: 37L7037 Printed in U.S.A. May 1999 37L7 37
-
 1
1 -
 2
2 -
 3
3 -
 4
4 -
 5
5 -
 6
6 -
 7
7 -
8
-
9
-
10
-
11
-
12
-
13
-
14
-
15
-
16
-
17
-
18
-
19
-
20
-
21
-
22
-
23
-
24
-
25
-
26
-
27
-
28
-
29
-
30
-
31
-
32
-
33
-
34
-
35
-
36
-
37
-
38
-
39
-
40
-
41
-
42
-
43
-
44
-
45
-
46
-
47
-
48
-
49
-
50
-
51
-
52
-
53
-
54
-
55
-
56
-
57
-
58
-
59
-
60
-
61
-
62
-
63
-
64
-
65
-
66
-
67
-
68
-
69
-
70
-
71
-
72
-
73
-
74
-
75
-
76
-
77
-
78
-
79
-
80
-
81
-
82
-
83
-
84
-
85
-
86
-
87
-
88
-
89
-
90
-
91
-
92
-
93
-
94
-
95
-
96
-
97
-
98
-
99
-
100
-
101
-
102
-
103
-
104
-
105
-
106
-
107
-
108
-
109
-
110
-
111
-
112
-
113
-
114
-
115
-
116
-
117
-
118
-
119
-
120
-
121
-
122
-
123
-
124
-
125
-
126
-
127
-
128
-
129
-
130
-
131
-
132
-
133
-
134
-
135
-
136
-
137
-
138
-
139
-
140
-
141
-
142
-
143
-
144
-
145
-
146
-
147
-
148
-
149
-
150
-
151
-
152
-
153
-
154
-
155
-
156
-
157
-
158
-
159
-
160
-
161
-
162
-
163
-
164
-
165
-
166
-
167
-
168
-
169
-
170
-
171
-
172
-
173
-
174
-
175
-
176
-
177
-
178
-
179
-
180
-
181
-
182
-
183
-
184
-
185
-
186
-
187
-
188
-
189
-
190
-
191
-
192
-
193
-
194
-
195
-
196
-
197
-
198
-
199
-
200
-
201
-
202
-
203
-
204
-
205
-
206
-
207
-
208
-
209
-
210
-
211
-
212
-
213
-
214
-
215
-
216
-
217
-
218
-
219
-
220
-
221
-
222
-
223
-
224
-
225
-
226
-
227
-
228
-
229
-
230
-
231
-
232
-
233
-
234
-
235
-
236
-
237
-
238
-
239
-
240
-
241
-
242
-
243
-
244
-
245
-
246
-
247
-
248
-
249
-
250
-
251
-
252
-
253
-
254
-
255
-
256
-
257
-
258
-
259
-
260
-
261
-
262
-
263
-
264
-
265
-
266
-
267
-
268
-
269
-
270
-
271
-
272
-
273
-
274
-
275
-
276
-
277
-
278
-
279
-
280
-
281
-
282
-
283
-
284
-
285
-
286
-
287
-
288
-
289
-
290
-
291
-
292
-
293
-
294
-
295
-
296
-
297
-
298
-
299
-
300
-
301
-
302
-
303
-
304
-
305
-
306
-
307
-
308
-
309
-
310
-
311
-
312
-
313
-
314
-
315
-
316
-
317
-
318
-
319
-
320
-
321
-
322
-
323
-
324
-
325
-
326
-
327
-
328
-
329
-
330
-
331
-
332
-
333
-
334
-
335
-
336
-
337
-
338
-
339
-
340
-
341
-
342
-
343
-
344
-
345
-
346
-
347
-
348
-
349
-
350
-
351
-
352
-
353
-
354
-
355
-
356
-
357
-
358
-
359
-
360
-
361
-
362
-
363
-
364
-
365
-
366
-
367
-
368
-
369
-
370
 |
 |

Netfinity 3000
User's Handbook