IBM 847651U Handbook - Page 49
Internal view, System Board Illustration
 |
UPC - 087944496366
View all IBM 847651U manuals
Add to My Manuals
Save this manual to your list of manuals |
Page 49 highlights
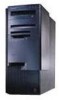
Internal view The following illustration shows the internal view of your server, with the side panel removed. For information on removing the cover, see "Disconnecting cables and removing the side cover" on page 74. For information about drives, bays, adapters, and microprocessors, see the applicable sections of Chapter 4, "Installing options" on page 67. For information on the system board, see "System Board Illustration" on page 253. Note: The following illustration is for reference only. 1 Drive bay assembly for bays 1 through 4 2 System board 3 Riser card 4 Adapter (if installed) 5 Expansion slots 6 Drive bay assembly for bays 5 and 6 7 Bay 6, hard disk drive 8 Bay 5 9 Power supply Chapter 1. Introducing your Netfinity 3000 server 15
-
 1
1 -
2
-
3
-
4
-
5
-
6
-
7
-
8
-
9
-
10
-
11
-
12
-
13
-
14
-
15
-
16
-
17
-
18
-
19
-
20
-
21
-
22
-
23
-
24
-
25
-
26
-
27
-
28
-
29
-
30
-
31
-
32
-
33
-
34
-
35
-
36
-
37
-
38
-
39
-
40
-
41
-
42
-
43
-
 44
44 -
 45
45 -
 46
46 -
 47
47 -
 48
48 -
 49
49 -
 50
50 -
 51
51 -
 52
52 -
 53
53 -
 54
54 -
55
-
56
-
57
-
58
-
59
-
60
-
61
-
62
-
63
-
64
-
65
-
66
-
67
-
68
-
69
-
70
-
71
-
72
-
73
-
74
-
75
-
76
-
77
-
78
-
79
-
80
-
81
-
82
-
83
-
84
-
85
-
86
-
87
-
88
-
89
-
90
-
91
-
92
-
93
-
94
-
95
-
96
-
97
-
98
-
99
-
100
-
101
-
102
-
103
-
104
-
105
-
106
-
107
-
108
-
109
-
110
-
111
-
112
-
113
-
114
-
115
-
116
-
117
-
118
-
119
-
120
-
121
-
122
-
123
-
124
-
125
-
126
-
127
-
128
-
129
-
130
-
131
-
132
-
133
-
134
-
135
-
136
-
137
-
138
-
139
-
140
-
141
-
142
-
143
-
144
-
145
-
146
-
147
-
148
-
149
-
150
-
151
-
152
-
153
-
154
-
155
-
156
-
157
-
158
-
159
-
160
-
161
-
162
-
163
-
164
-
165
-
166
-
167
-
168
-
169
-
170
-
171
-
172
-
173
-
174
-
175
-
176
-
177
-
178
-
179
-
180
-
181
-
182
-
183
-
184
-
185
-
186
-
187
-
188
-
189
-
190
-
191
-
192
-
193
-
194
-
195
-
196
-
197
-
198
-
199
-
200
-
201
-
202
-
203
-
204
-
205
-
206
-
207
-
208
-
209
-
210
-
211
-
212
-
213
-
214
-
215
-
216
-
217
-
218
-
219
-
220
-
221
-
222
-
223
-
224
-
225
-
226
-
227
-
228
-
229
-
230
-
231
-
232
-
233
-
234
-
235
-
236
-
237
-
238
-
239
-
240
-
241
-
242
-
243
-
244
-
245
-
246
-
247
-
248
-
249
-
250
-
251
-
252
-
253
-
254
-
255
-
256
-
257
-
258
-
259
-
260
-
261
-
262
-
263
-
264
-
265
-
266
-
267
-
268
-
269
-
270
-
271
-
272
-
273
-
274
-
275
-
276
-
277
-
278
-
279
-
280
-
281
-
282
-
283
-
284
-
285
-
286
-
287
-
288
-
289
-
290
-
291
-
292
-
293
-
294
-
295
-
296
-
297
-
298
-
299
-
300
-
301
-
302
-
303
-
304
-
305
-
306
-
307
-
308
-
309
-
310
-
311
-
312
-
313
-
314
-
315
-
316
-
317
-
318
-
319
-
320
-
321
-
322
-
323
-
324
-
325
-
326
-
327
-
328
-
329
-
330
-
331
-
332
-
333
-
334
-
335
-
336
-
337
-
338
-
339
-
340
-
341
-
342
-
343
-
344
-
345
-
346
-
347
-
348
-
349
-
350
-
351
-
352
-
353
-
354
-
355
-
356
-
357
-
358
-
359
-
360
-
361
-
362
-
363
-
364
-
365
-
366
-
367
-
368
-
369
-
370
 |
 |

Internal view
The following illustration shows the internal view of your server,
with the side panel removed.
For information on removing the
cover, see “Disconnecting cables and removing the side cover” on
page
74. For information about drives, bays, adapters, and
microprocessors, see the applicable sections of Chapter
4, “Installing
options” on page
67.
For information on the system board, see
“System Board Illustration” on page
253.
Note:
The following illustration is for reference only.
±1²
Drive bay assembly for bays 1
through 4
±2²
System board
±3²
Riser card
±4²
Adapter (if installed)
±5²
Expansion slots
±6²
Drive bay assembly for bays 5
and 6
±7²
Bay 6, hard disk drive
±8²
Bay 5
±9²
Power supply
Chapter
1.
Introducing your Netfinity 3000 server
15