Kenwood TH-D75 User Manual - Page 93
SETTING THE ACCESS REPEATER (FROM), SETTING THE DESTINATION (TO), Setting by Repeater List
 |
View all Kenwood TH-D75 manuals
Add to My Manuals
Save this manual to your list of manuals |
Page 93 highlights
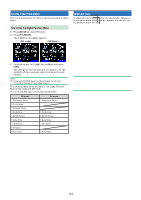
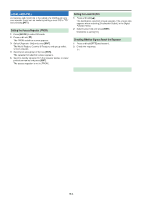
Setting the Destination Repeater (TO) 1 Press and hold [ ]. The destination selection screen appears. This screen also appears when selecting [Destination Select] in the Digital Function Menu. 2 Select [Individual] and press [ENT]. The repeater list appears. 3 Select the Callsign from the Callsign lists and press [ENT]. The repeater is set to [TO]. 4 Press [PTT] to transmit. Setting by Direct Input You can set the repeater by directly inputting the Callsign of the repeater. 1 Press and hold [ ]. The FROM selection screen appears. 2 Select [Direct Input(RPT1)] and press [ENT]. The direct input screen appears. 3 Enter a repeater Callsign and press [ENT]. The access repeater is set to [FROM] when the entered Callsign is in the repeater list. SETTING THE ACCESS REPEATER (FROM) To access a repeater, set the repeater to [FROM]. There are 4 setting methods. 1 Setting by Repeater List 2 Setting by Nearby Repeaters 3 Setting by TX History 4 Setting by Direct Input Setting by Repeater List 1 Press and hold [ ]. The FROM selection screen appears. 2 Select [Repeater List] and press [ENT]. The World Region, Country & Reagion, and group selection screen appears. 3 Select your area group and press [ENT]. The repeater list selection screen appears. 4 Select a nearby repeater from the repeater names or state/ prefecture names and press [ENT]. The access repeater is set to [FROM]. Setting by Nearby Repeaters You can search for a nearby repeater based on the location of your station set by Menu No. 401 and the location information of repeaters. The repeaters located near your station are displayed as the selected candidates among the registered repeater list. 1 Press and hold [ ]. The FROM selection screen appears. 2 Select [Nearby Repeaters] and press [ENT]. A search begins. Up to 20 nearby repeaters are displayed. 3 Select a nearby repeater from the repeater names or repeater Callsigns and press [ENT]. The access repeater is set to [FROM]. Note: ¡ It is not possible to select the candidate of any repeater that is 160 km (100 mi) or farther away from your station. SETTING THE ROUTE REPEATER (ROUTE) You can set whether you use the destination repeater Callsign and gateway or not. This is a useful setting when the route setting is not successful. 1 Select [Route Select] in the Digital Function Menu. 2 Select [Stand Alone], [Local NW], [Over the Gateway], or [Direct Input(RPT2)]. [Stand Alone]: The same Callsign as RPT1 is set to RPT2. The local icon < > is displayed on the ROUTE screen. [Local NW]: When a Callsign is set to RPT1, the repeater list selection screen appears. The Callsign of the selected repeater is set to RPT2. The assist icon < > is displayed on the ROUTE screen. [Over the Gateway]: When a Callsign is set to RPT1, RPT2 automatically sets the gateway repeater Callsign of RPT1. A repeater without a gateway cannot be selected. The gateway icon < > is displayed on the ROUTE screen. When a gateway is set, [Local CQ] cannot be set to [TO]. [Individual] or [Gateway CQ] must be set. [Direct Input(RPT2)]: A directly input destination repeater Callsign is set to RPT2. The icon on the ROUTE screen disappears. SETTING THE DESTINATION (TO) You can set the repeater to output the CQ or Callsign of the destination station to call to [TO]. There are 7 setting methods. 1 Setting by Local CQ 2 Setting by Gateway CQ 3 Setting by Individual 4 Setting by Reflector 5 Setting by Call History 6 Setting by Direct Input (URCALL) 7 Setting EMR Note: ¡ Gateway CQ and Reflector cannot be selected in DV mode. Setting by TX History You can select among previously accessed repeaters. 1 Press and hold [ ]. The FROM selection screen appears. 2 Select [TX History] and press [ENT]. TX History selection screen appears. 3 Select a repeater in the TX History list and press [ENT]. The access repeater is set to [FROM]. 16-7
-
 1
1 -
2
-
3
-
4
-
5
-
6
-
7
-
8
-
9
-
10
-
11
-
12
-
13
-
14
-
15
-
16
-
17
-
18
-
19
-
20
-
21
-
22
-
23
-
24
-
25
-
26
-
27
-
28
-
29
-
30
-
31
-
32
-
33
-
34
-
35
-
36
-
37
-
38
-
39
-
40
-
41
-
42
-
43
-
44
-
45
-
46
-
47
-
48
-
49
-
50
-
51
-
52
-
53
-
54
-
55
-
56
-
57
-
58
-
59
-
60
-
61
-
62
-
63
-
64
-
65
-
66
-
67
-
68
-
69
-
70
-
71
-
72
-
73
-
74
-
75
-
76
-
77
-
78
-
79
-
80
-
81
-
82
-
83
-
84
-
85
-
86
-
87
-
 88
88 -
 89
89 -
 90
90 -
 91
91 -
 92
92 -
 93
93 -
 94
94 -
 95
95 -
 96
96 -
 97
97 -
 98
98 -
99
-
100
-
101
-
102
-
103
-
104
-
105
-
106
-
107
-
108
-
109
-
110
-
111
-
112
-
113
-
114
-
115
-
116
-
117
-
118
-
119
-
120
-
121
-
122
-
123
-
124
-
125
-
126
-
127
-
128
-
129
-
130
-
131
-
132
-
133
 |
 |
