Lenovo NetVista Hardware Maintenence Manual for Netvista 6838 and 6848 systems - Page 39
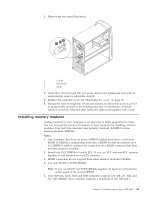
Connect the cables to the drive., Connect the power and signal cables to the drive.
 |
View all Lenovo NetVista manuals
Add to My Manuals
Save this manual to your list of manuals |
Page 39 highlights
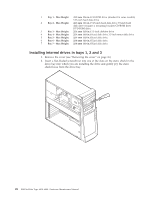
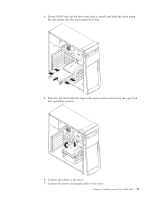
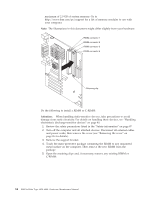
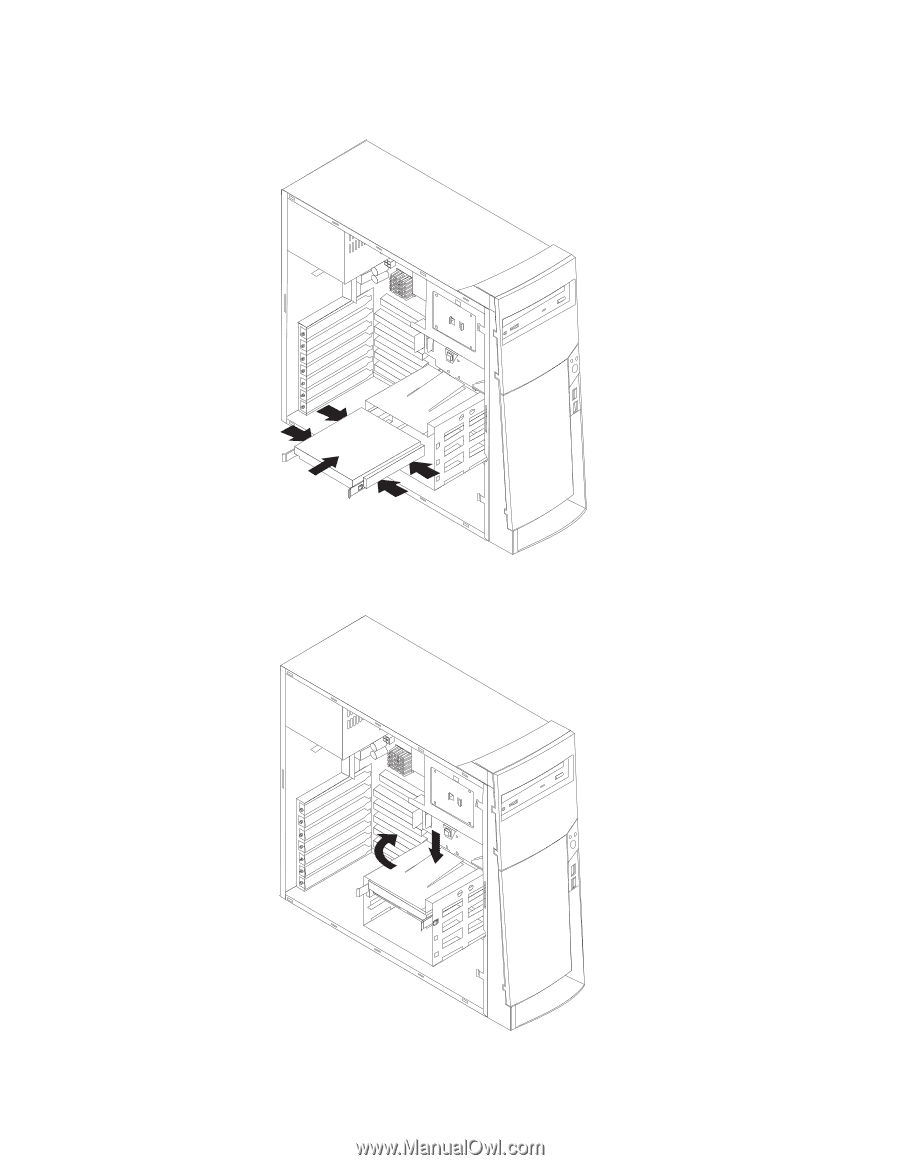
4. Mount DASD rails on the drive you wish to install and slide the drive along the rail guides into the unoccupied drive bay. 5. Press the tab that holds the cage in the open position and swing the cage back into operating position. 6. Connect the cables to the drive. 7. Connect the power and signal cables to the drive. Chapter 5. Installing options Type 6838, 6848 31
-
 1
1 -
2
-
3
-
4
-
5
-
6
-
7
-
8
-
9
-
10
-
11
-
12
-
13
-
14
-
15
-
16
-
17
-
18
-
19
-
20
-
21
-
22
-
23
-
24
-
25
-
26
-
27
-
28
-
29
-
30
-
31
-
32
-
33
-
 34
34 -
 35
35 -
 36
36 -
 37
37 -
 38
38 -
 39
39 -
 40
40 -
 41
41 -
 42
42 -
 43
43 -
 44
44 -
45
-
46
-
47
-
48
-
49
-
50
-
51
-
52
-
53
-
54
-
55
-
56
-
57
-
58
-
59
-
60
-
61
-
62
-
63
-
64
-
65
-
66
-
67
-
68
-
69
-
70
-
71
-
72
-
73
-
74
-
75
-
76
-
77
-
78
-
79
-
80
-
81
-
82
-
83
-
84
-
85
-
86
-
87
-
88
-
89
-
90
-
91
-
92
-
93
-
94
-
95
-
96
-
97
-
98
-
99
-
100
-
101
-
102
-
103
-
104
-
105
-
106
-
107
-
108
-
109
-
110
-
111
-
112
-
113
-
114
-
115
-
116
-
117
-
118
-
119
-
120
-
121
-
122
-
123
-
124
-
125
-
126
-
127
-
128
-
129
-
130
 |
 |
4.
Mount DASD rails on the drive you wish to install and slide the drive along
the rail guides into the unoccupied drive bay.
5.
Press the tab that holds the cage in the open position and swing the cage back
into operating position.
6.
Connect the cables to the drive.
7.
Connect the power and signal cables to the drive.
Chapter 5. Installing options Type 6838, 6848
31