Lexmark X464de Service Manual - Page 110
Reset Photoconductor Maintenance Counter (Reset PC Cnt), USB Scan to Local, Print Quality s - scan to pc
 |
View all Lexmark X464de manuals
Add to My Manuals
Save this manual to your list of manuals |
Page 110 highlights
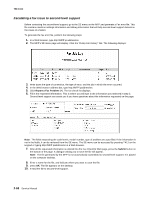
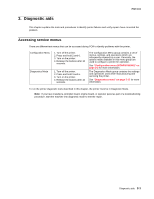
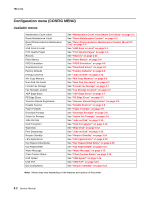
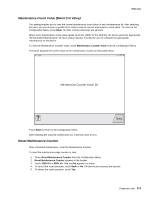
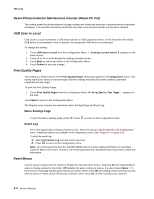
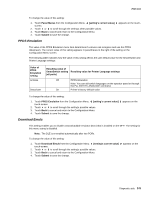
7014-xxx Reset Photoconductor Maintenance Counter (Reset PC Cnt) This setting resets the photoconductor kit page counter and clears any warnings or photoconductor exhausted messages. This operation should be performed only after a new photoconductor unit has been installed. USB Scan to Local USB Scan to Local enumerates a USB simple device or USB composite device. In the off position the simple USB device is enumerated: in the on position, the composite USB device is enumerated. To change this setting: 1. Touch USB Scan to Local from the Configuration Menu. [setting's current value] touch-screen. 2. Touch or to scroll through the setting's possible values. 3. Touch Back to cancel and return to the Configuration Menu. 4. Touch Submit to save the change. appears on the Print Quality Pages This setting is a limited version of the Print Quality Pages setting that appears in the Diagnostics menu. This setting reports the values of a broad range of printer settings and tests the printer's ability to generate acceptable printed output. To print the Print Quality Pages: 1. Touch Print Quality Pages from the Configuration Menu. Printing Quality Test Pages... appears on the LCD. Touch Back to return to the Configuration Menu. The Reports menu contains two selections: Menu Settings Page and Event Log. Menu Settings Page To print the Menu Settings page, press . Press Event Log to return to the Configuration menu. The event log provides a history of printer errors. The event log can only be printed in the Configuration menu. Additional options are available in the Diagnostics menu. See "Reports" on page 3-32. To print the event log: 1. Select Print Event Log from the Event Log menu. 2. Press to return to the Configuration menu. Note: An event log printed from the CONFIG MENU will not contain debug information or secondary codes for 900 service errors. However, the event log printed from DIAGNOSTICS mode does include this information. Panel Menus Lets the system support person enable or disable the operator panel menus. Selecting On (the default) allows users to change values for the printer. Off disables the users' access to menus. If a user presses Menu ( ), they receive a message that the panel menus are locked. When set to Off, this setting restricts all menu access, even to menus or items set for PIN access. However, when set to On, all PIN restrictions are restored. 3-4 Service Manual
-
 1
1 -
2
-
3
-
4
-
5
-
6
-
7
-
8
-
9
-
10
-
11
-
12
-
13
-
14
-
15
-
16
-
17
-
18
-
19
-
20
-
21
-
22
-
23
-
24
-
25
-
26
-
27
-
28
-
29
-
30
-
31
-
32
-
33
-
34
-
35
-
36
-
37
-
38
-
39
-
40
-
41
-
42
-
43
-
44
-
45
-
46
-
47
-
48
-
49
-
50
-
51
-
52
-
53
-
54
-
55
-
56
-
57
-
58
-
59
-
60
-
61
-
62
-
63
-
64
-
65
-
66
-
67
-
68
-
69
-
70
-
71
-
72
-
73
-
74
-
75
-
76
-
77
-
78
-
79
-
80
-
81
-
82
-
83
-
84
-
85
-
86
-
87
-
88
-
89
-
90
-
91
-
92
-
93
-
94
-
95
-
96
-
97
-
98
-
99
-
100
-
101
-
102
-
103
-
104
-
 105
105 -
 106
106 -
 107
107 -
 108
108 -
 109
109 -
 110
110 -
 111
111 -
 112
112 -
 113
113 -
 114
114 -
 115
115 -
116
-
117
-
118
-
119
-
120
-
121
-
122
-
123
-
124
-
125
-
126
-
127
-
128
-
129
-
130
-
131
-
132
-
133
-
134
-
135
-
136
-
137
-
138
-
139
-
140
-
141
-
142
-
143
-
144
-
145
-
146
-
147
-
148
-
149
-
150
-
151
-
152
-
153
-
154
-
155
-
156
-
157
-
158
-
159
-
160
-
161
-
162
-
163
-
164
-
165
-
166
-
167
-
168
-
169
-
170
-
171
-
172
-
173
-
174
-
175
-
176
-
177
-
178
-
179
-
180
-
181
-
182
-
183
-
184
-
185
-
186
-
187
-
188
-
189
-
190
-
191
-
192
-
193
-
194
-
195
-
196
-
197
-
198
-
199
-
200
-
201
-
202
-
203
-
204
-
205
-
206
-
207
-
208
-
209
-
210
-
211
-
212
-
213
-
214
-
215
-
216
-
217
-
218
-
219
-
220
-
221
-
222
-
223
-
224
-
225
-
226
-
227
-
228
-
229
-
230
-
231
-
232
-
233
-
234
-
235
-
236
-
237
-
238
-
239
-
240
-
241
-
242
-
243
-
244
-
245
-
246
-
247
-
248
-
249
-
250
-
251
-
252
-
253
-
254
-
255
-
256
-
257
-
258
-
259
-
260
-
261
-
262
-
263
-
264
-
265
-
266
-
267
-
268
-
269
-
270
-
271
-
272
-
273
-
274
-
275
-
276
-
277
-
278
-
279
-
280
-
281
-
282
-
283
-
284
-
285
-
286
-
287
-
288
-
289
-
290
-
291
-
292
-
293
-
294
-
295
-
296
-
297
-
298
-
299
-
300
-
301
-
302
-
303
-
304
-
305
-
306
-
307
-
308
-
309
-
310
 |
 |