Lexmark X464de Service Manual - Page 112
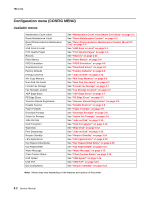
Factory Defaults, Energy Conserve, Min Copy Memory, Warning, Restore Base, Restore Network
 |
View all Lexmark X464de manuals
Add to My Manuals
Save this manual to your list of manuals |
Page 112 highlights
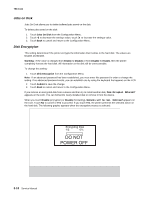
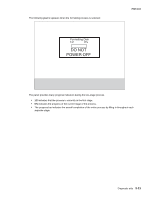
7014-xxx Factory Defaults Warning: This operation cannot be undone. This setting enables you to restore all of the printer's settings to the base printer settings, the network settings, or to remove all Lexmark Embedded Solutions (LES) applications. To restore the Factory Default settings: 1. Touch Factory Defaults from the Configuration Menu. 2. Touch Restore Base to restore all non-critical base printer NVRAM settings. 3. Touch Restore Network to restore all network NVRAM settings. 4. Touch Restore LES to remove all Lexmark Embedded Solution applications. When you select either value, the LCD displays Restoring Factory Defaults and then Resetting the Device. The device immediately performs a POR and restores the appropriate settings to their factory default values. The following settings are not changed: • Display Language (general settings) • Network/Ports Menu • Standard USB, USB (x) Menus (if an ENA is installed) Energy Conserve This menu controls what values appear on the Power Saver menu. If Off is selected in the Energy Conserve menu, then Disabled appears in the Power Saver menu, and Power Saver can be turned off. If On is set in the Energy Conserve menu, the Power Saver feature cannot be disabled. To change this setting: 1. Touch Energy Conserve from the Configuration Menu. [setting's current value] touch-screen. 2. Touch or to scroll through the setting's possible values. 3. Touch Back to cancel and return to the Configuration Menu. 4. Touch Submit to save the change. appears on the Min Copy Memory Values will only be displayed if the amount of installed DRAM is at least twice the amount of the value, that is, at least 200 MB of installed DRAM is required to display the 100 MB selection. To change this setting: 1. Touch Min Copy Memory from the Configuration Menu. [setting's current value] touch-screen. 2. Touch to decrease the setting's value; touch to increase the setting's value. 3. Touch Back to cancel and return to the Configuration Menu. 4. Touch Submit to save the change. appears on the 3-6 Service Manual
-
 1
1 -
2
-
3
-
4
-
5
-
6
-
7
-
8
-
9
-
10
-
11
-
12
-
13
-
14
-
15
-
16
-
17
-
18
-
19
-
20
-
21
-
22
-
23
-
24
-
25
-
26
-
27
-
28
-
29
-
30
-
31
-
32
-
33
-
34
-
35
-
36
-
37
-
38
-
39
-
40
-
41
-
42
-
43
-
44
-
45
-
46
-
47
-
48
-
49
-
50
-
51
-
52
-
53
-
54
-
55
-
56
-
57
-
58
-
59
-
60
-
61
-
62
-
63
-
64
-
65
-
66
-
67
-
68
-
69
-
70
-
71
-
72
-
73
-
74
-
75
-
76
-
77
-
78
-
79
-
80
-
81
-
82
-
83
-
84
-
85
-
86
-
87
-
88
-
89
-
90
-
91
-
92
-
93
-
94
-
95
-
96
-
97
-
98
-
99
-
100
-
101
-
102
-
103
-
104
-
105
-
106
-
 107
107 -
 108
108 -
 109
109 -
 110
110 -
 111
111 -
 112
112 -
 113
113 -
 114
114 -
 115
115 -
 116
116 -
 117
117 -
118
-
119
-
120
-
121
-
122
-
123
-
124
-
125
-
126
-
127
-
128
-
129
-
130
-
131
-
132
-
133
-
134
-
135
-
136
-
137
-
138
-
139
-
140
-
141
-
142
-
143
-
144
-
145
-
146
-
147
-
148
-
149
-
150
-
151
-
152
-
153
-
154
-
155
-
156
-
157
-
158
-
159
-
160
-
161
-
162
-
163
-
164
-
165
-
166
-
167
-
168
-
169
-
170
-
171
-
172
-
173
-
174
-
175
-
176
-
177
-
178
-
179
-
180
-
181
-
182
-
183
-
184
-
185
-
186
-
187
-
188
-
189
-
190
-
191
-
192
-
193
-
194
-
195
-
196
-
197
-
198
-
199
-
200
-
201
-
202
-
203
-
204
-
205
-
206
-
207
-
208
-
209
-
210
-
211
-
212
-
213
-
214
-
215
-
216
-
217
-
218
-
219
-
220
-
221
-
222
-
223
-
224
-
225
-
226
-
227
-
228
-
229
-
230
-
231
-
232
-
233
-
234
-
235
-
236
-
237
-
238
-
239
-
240
-
241
-
242
-
243
-
244
-
245
-
246
-
247
-
248
-
249
-
250
-
251
-
252
-
253
-
254
-
255
-
256
-
257
-
258
-
259
-
260
-
261
-
262
-
263
-
264
-
265
-
266
-
267
-
268
-
269
-
270
-
271
-
272
-
273
-
274
-
275
-
276
-
277
-
278
-
279
-
280
-
281
-
282
-
283
-
284
-
285
-
286
-
287
-
288
-
289
-
290
-
291
-
292
-
293
-
294
-
295
-
296
-
297
-
298
-
299
-
300
-
301
-
302
-
303
-
304
-
305
-
306
-
307
-
308
-
309
-
310
 |
 |
