Netgear AC2100 User Manual - Page 96
View and manage logs of router activity
 |
View all Netgear AC2100 manuals
Add to My Manuals
Save this manual to your list of manuals |
Page 96 highlights
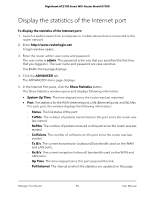
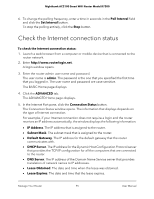
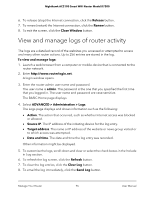
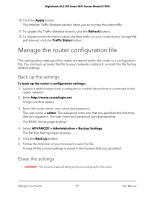
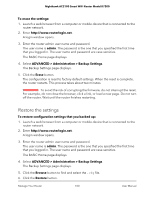
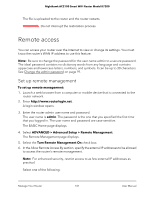
Nighthawk AC2100 Smart WiFi Router Model R7200 6. To release (stop) the Internet connection, click the Release button. 7. To renew (restart) the Internet connection, click the Renew button. 8. To exit the screen, click the Close Window button. View and manage logs of router activity The logs are a detailed record of the websites you accessed or attempted to access and many other router actions. Up to 256 entries are stored in the log. To view and manage logs: 1. Launch a web browser from a computer or mobile device that is connected to the router network. 2. Enter http://www.routerlogin.net. A login window opens. 3. Enter the router admin user name and password. The user name is admin. The password is the one that you specified the first time that you logged in. The user name and password are case-sensitive. The BASIC Home page displays. 4. Select ADVANCED > Administration > Logs. The Logs page displays and shows information such as the following: • Action. The action that occurred, such as whether Internet access was blocked or allowed. • Source IP. The IP address of the initiating device for the log entry. • Target address. The name or IP address of the website or news group visited or to which access was attempted. • Date and time. The date and time the log entry was recorded. Other information might be displayed. 5. To customize the logs, scroll down and clear or select the check boxes in the Include in Log section. 6. To refresh the log screen, click the Refresh button. 7. To clear the log entries, click the Clear Log button. 8. To email the log immediately, click the Send Log button. Manage Your Router 96 User Manual
-
 1
1 -
2
-
3
-
4
-
5
-
6
-
7
-
8
-
9
-
10
-
11
-
12
-
13
-
14
-
15
-
16
-
17
-
18
-
19
-
20
-
21
-
22
-
23
-
24
-
25
-
26
-
27
-
28
-
29
-
30
-
31
-
32
-
33
-
34
-
35
-
36
-
37
-
38
-
39
-
40
-
41
-
42
-
43
-
44
-
45
-
46
-
47
-
48
-
49
-
50
-
51
-
52
-
53
-
54
-
55
-
56
-
57
-
58
-
59
-
60
-
61
-
62
-
63
-
64
-
65
-
66
-
67
-
68
-
69
-
70
-
71
-
72
-
73
-
74
-
75
-
76
-
77
-
78
-
79
-
80
-
81
-
82
-
83
-
84
-
85
-
86
-
87
-
88
-
89
-
90
-
 91
91 -
 92
92 -
 93
93 -
 94
94 -
 95
95 -
 96
96 -
 97
97 -
 98
98 -
 99
99 -
 100
100 -
 101
101 -
102
-
103
-
104
-
105
-
106
-
107
-
108
-
109
-
110
-
111
-
112
-
113
-
114
-
115
-
116
-
117
-
118
-
119
-
120
-
121
-
122
-
123
-
124
-
125
-
126
-
127
-
128
-
129
-
130
-
131
-
132
-
133
-
134
-
135
-
136
-
137
-
138
-
139
-
140
-
141
-
142
-
143
-
144
-
145
-
146
-
147
-
148
-
149
-
150
-
151
-
152
-
153
-
154
-
155
-
156
-
157
-
158
-
159
-
160
-
161
-
162
-
163
 |
 |