Netgear WG103 WG103 Reference Manual - Page 24
Ethernet Cabling Requirements, LAN Configuration Requirements, Computer Hardware Requirements - dhcp
 |
UPC - 606449062038
View all Netgear WG103 manuals
Add to My Manuals
Save this manual to your list of manuals |
Page 24 highlights
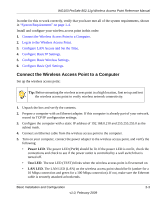
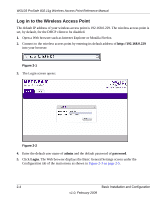
WG103 ProSafe 802.11g Wireless Access Point Reference Manual • Away from sources of interference, such as PCs, microwaves ovens, and 2.4 GHz cordless phones. • Away from large metal surfaces or water. • Putting the antenna in a vertical position provides best side-to-side coverage. Putting the antenna in a horizontal position provides best up-and-down coverage. • If using multiple wireless access points, it is better if adjacent wireless access points use different radio frequency channels to reduce interference. The recommended channel spacing between adjacent wireless access points is five channels (for example, use channels 1 and 6, or 6 and 11, or 1 and 11). The time it takes to establish a wireless connection can vary depending on both your security settings, and placement. WEP connections can take slightly longer to establish. Also, WEP encryption can consume more battery power on a notebook computer. Ethernet Cabling Requirements The wireless access point connects to your LAN via twisted-pair category 5 Ethernet cable with RJ-45 connectors. LAN Configuration Requirements For the initial configuration of your wireless access point, you need to connect a computer to the wireless access point. Note: For assistance with DHCP configuration, see the online document that you can access from "Preparing Your Network" in Appendix B. Computer Hardware Requirements To connect to the wireless access point on your network, each computer must have a 802.11g or 802.11b wireless adapter installed. Installing and Configuring the Wireless Access Point Before installing the wireless access point, make sure that your Ethernet network is up and working. You will be connecting the wireless access point to the Ethernet network. Then computers with 802.11b or 802.11g wireless adapters will be able to communicate with the Ethernet network. 2-2 Basic Installation and Configuration v1.0, February 2009
-
 1
1 -
2
-
3
-
4
-
5
-
6
-
7
-
8
-
9
-
10
-
11
-
12
-
13
-
14
-
15
-
16
-
17
-
18
-
 19
19 -
 20
20 -
 21
21 -
 22
22 -
 23
23 -
 24
24 -
 25
25 -
 26
26 -
 27
27 -
 28
28 -
 29
29 -
30
-
31
-
32
-
33
-
34
-
35
-
36
-
37
-
38
-
39
-
40
-
41
-
42
-
43
-
44
-
45
-
46
-
47
-
48
-
49
-
50
-
51
-
52
-
53
-
54
-
55
-
56
-
57
-
58
-
59
-
60
-
61
-
62
-
63
-
64
-
65
-
66
-
67
-
68
-
69
-
70
-
71
-
72
-
73
-
74
-
75
-
76
-
77
-
78
-
79
-
80
-
81
-
82
-
83
-
84
-
85
-
86
-
87
-
88
-
89
-
90
-
91
-
92
-
93
-
94
-
95
-
96
-
97
-
98
-
99
-
100
-
101
-
102
-
103
-
104
-
105
-
106
-
107
-
108
-
109
-
110
-
111
-
112
-
113
-
114
-
115
-
116
-
117
-
118
-
119
-
120
 |
 |