Netgear WNDAP360 WNDAP360 Reference Manual - Page 16
Connect the Wireless Access Point to Computer, Con IP Settings and Optional DHCP Server Settings - not working
 |
View all Netgear WNDAP360 manuals
Add to My Manuals
Save this manual to your list of manuals |
Page 16 highlights
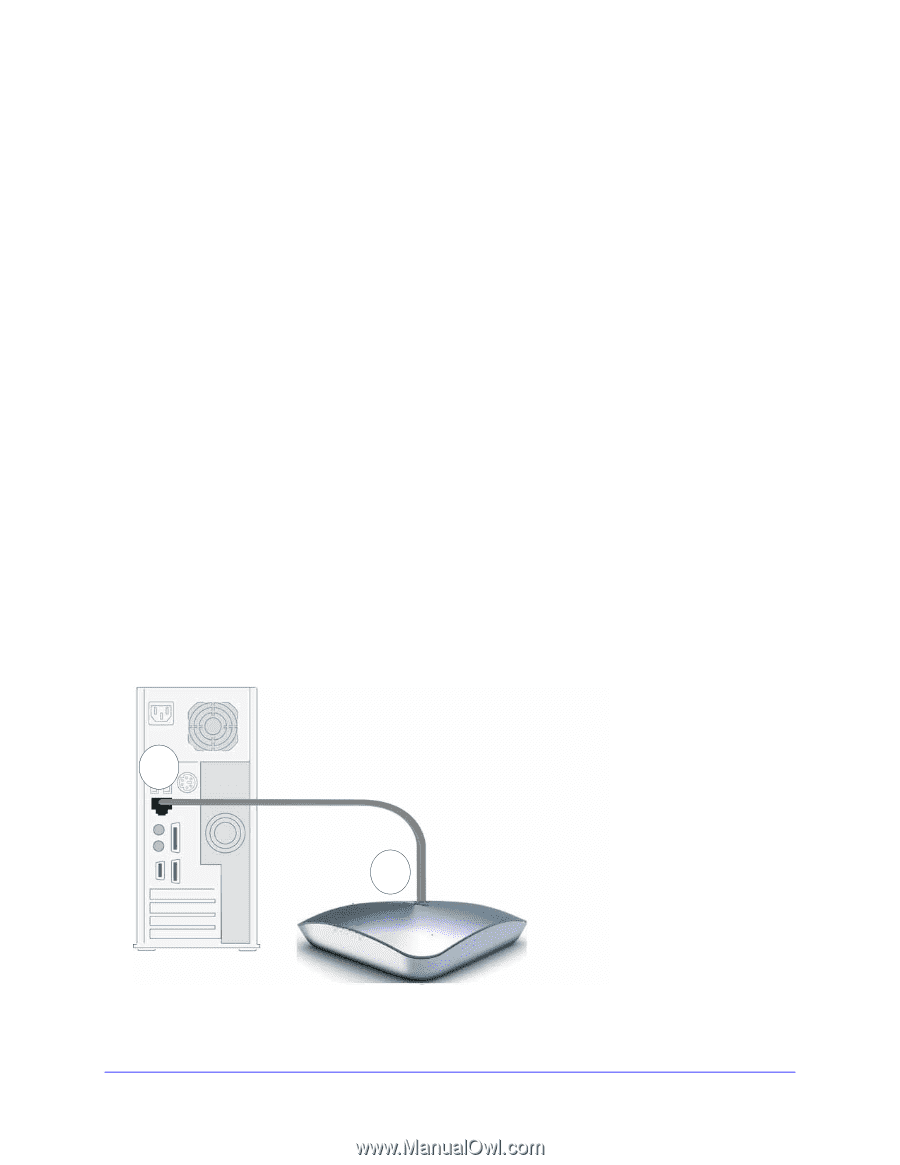
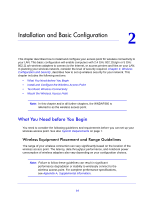
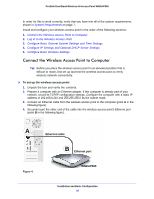
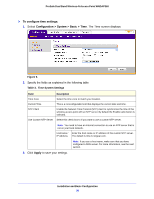
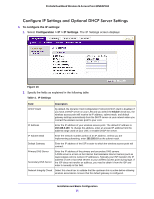
ProSafe Dual Band Wireless-N Access Point WNDAP360 In order for this to work correctly, verify that you have met all of the system requirements, shown in System Requirements on page 7. Install and configure your wireless access point in the order of the following sections: 1. Connect the Wireless Access Point to Computer 2. Log In to the Wireless Access Point 3. Configure Basic General System Settings and Time Settings 4. Configure IP Settings and Optional DHCP Server Settings 5. Configure Basic Wireless Settings Connect the Wireless Access Point to Computer Tip: Before you place the wireless access point in an elevated position that is difficult to reach, first set up and test the wireless access point to verify wireless network connectivity. To set up the wireless access point: 1. Unpack the box and verify the contents. 2. Prepare a computer with an Ethernet adapter. If this computer is already part of your network, record its TCP/IP configuration settings. Configure the computer with a static IP address of 192.168.0.210 and 255.255.255.0 as the subnet mask. 3. Connect an Ethernet cable from the wireless access point to the computer (point A in the following figure). 4. Securely insert the other end of the cable into the wireless access point's Ethernet port (point B in the following figure). . A Ethernet cable B Ethernet port Figure 4. WNDAP360 Installation and Basic Configuration 16
-
 1
1 -
2
-
3
-
4
-
5
-
6
-
7
-
8
-
9
-
10
-
 11
11 -
 12
12 -
 13
13 -
 14
14 -
 15
15 -
 16
16 -
 17
17 -
 18
18 -
 19
19 -
 20
20 -
 21
21 -
22
-
23
-
24
-
25
-
26
-
27
-
28
-
29
-
30
-
31
-
32
-
33
-
34
-
35
-
36
-
37
-
38
-
39
-
40
-
41
-
42
-
43
-
44
-
45
-
46
-
47
-
48
-
49
-
50
-
51
-
52
-
53
-
54
-
55
-
56
-
57
-
58
-
59
-
60
-
61
-
62
-
63
-
64
-
65
-
66
-
67
-
68
-
69
-
70
-
71
-
72
-
73
-
74
-
75
-
76
-
77
-
78
-
79
-
80
-
81
-
82
-
83
-
84
-
85
-
86
-
87
-
88
-
89
-
90
-
91
-
92
-
93
-
94
-
95
-
96
-
97
-
98
-
99
-
100
-
101
-
102
-
103
-
104
-
105
-
106
-
107
-
108
-
109
-
110
-
111
-
112
-
113
-
114
-
115
-
116
-
117
-
118
-
119
-
120
-
121
-
122
-
123
-
124
-
125
-
126
-
127
-
128
-
129
-
130
-
131
-
132
-
133
-
134
-
135
-
136
-
137
 |
 |