Netgear WNDAP360 WNDAP360 Reference Manual - Page 21
Con IP Settings and Optional DHCP Server Settings, To con the IP settings - default login
 |
View all Netgear WNDAP360 manuals
Add to My Manuals
Save this manual to your list of manuals |
Page 21 highlights
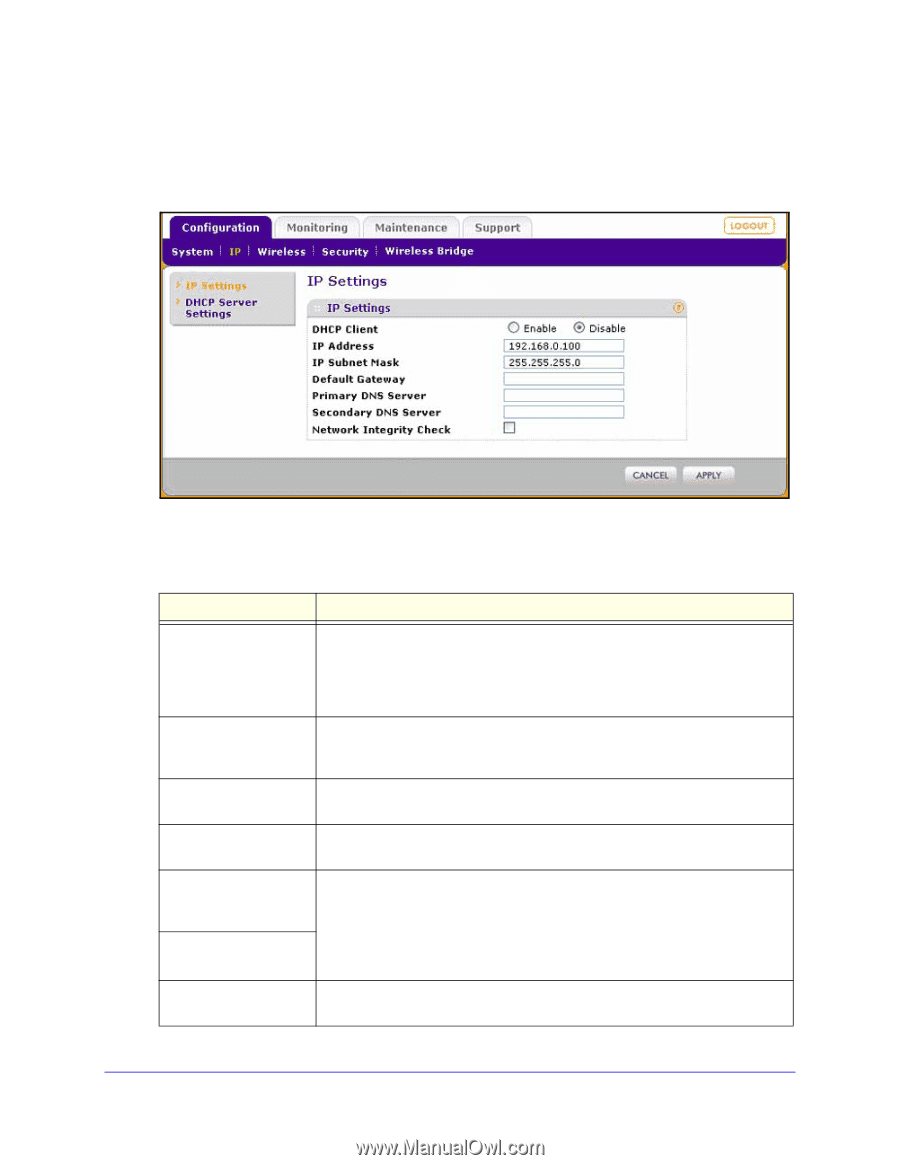
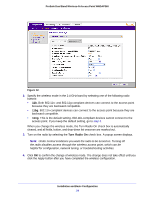
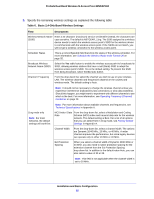
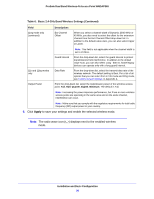
ProSafe Dual Band Wireless-N Access Point WNDAP360 Configure IP Settings and Optional DHCP Server Settings To configure the IP settings: 1. Select Configuration > IP > IP Settings. The IP Settings screen displays: Figure 10. 2. Specify the fields as explained in the following table: Table 4. IP Settings Field Description DHCP Client By default, the Dynamic Host Configuration Protocol (DHCP) client is disabled. If you have a DHCP server on your LAN and you select the Enable check box, the wireless access point will receive its IP address, subnet mask, and default gateway settings automatically from the DHCP server on your network when you connect the wireless access point to your LAN. IP Address Enter the IP address of your wireless access point. The default IP address is 192.168.0.100. To change the address, enter an unused IP address from the address range used on your LAN, or enable DHCP the server. IP Subnet Mask Enter the network number portion of an IP address. Unless you are implementing subnetting, enter 255.255.0.0 as the subnet mask. Default Gateway Enter the IP address of the ISP's router to which the wireless access point will connect. Primary DNS Server Secondary DNS Server Enter the IP address of the primary and secondary DNS servers. A DNS server is a host on the Internet that translates Internet names (such as www.netgear.com) to numeric IP addresses. Typically your ISP transfers the IP address of one or two DNS servers to your wireless access point during login. If the ISP does not transfer an address, you need to obtain it from the ISP and enter it manually in this field. Network Integrity Check Select this check box to validate that the upstream link is active before allowing wireless associations. Ensure that the default gateway is configured. Installation and Basic Configuration 21
-
 1
1 -
2
-
3
-
4
-
5
-
6
-
7
-
8
-
9
-
10
-
11
-
12
-
13
-
14
-
15
-
 16
16 -
 17
17 -
 18
18 -
 19
19 -
 20
20 -
 21
21 -
 22
22 -
 23
23 -
 24
24 -
 25
25 -
 26
26 -
27
-
28
-
29
-
30
-
31
-
32
-
33
-
34
-
35
-
36
-
37
-
38
-
39
-
40
-
41
-
42
-
43
-
44
-
45
-
46
-
47
-
48
-
49
-
50
-
51
-
52
-
53
-
54
-
55
-
56
-
57
-
58
-
59
-
60
-
61
-
62
-
63
-
64
-
65
-
66
-
67
-
68
-
69
-
70
-
71
-
72
-
73
-
74
-
75
-
76
-
77
-
78
-
79
-
80
-
81
-
82
-
83
-
84
-
85
-
86
-
87
-
88
-
89
-
90
-
91
-
92
-
93
-
94
-
95
-
96
-
97
-
98
-
99
-
100
-
101
-
102
-
103
-
104
-
105
-
106
-
107
-
108
-
109
-
110
-
111
-
112
-
113
-
114
-
115
-
116
-
117
-
118
-
119
-
120
-
121
-
122
-
123
-
124
-
125
-
126
-
127
-
128
-
129
-
130
-
131
-
132
-
133
-
134
-
135
-
136
-
137
 |
 |