Panasonic KXTVA200 KXTVA200 User Guide - Page 52
To Add, Delete, or Review Caller ID, Numbers Later, Assigning Caller ID Numbers
 |
UPC - 037988851430
View all Panasonic KXTVA200 manuals
Add to My Manuals
Save this manual to your list of manuals |
Page 52 highlights
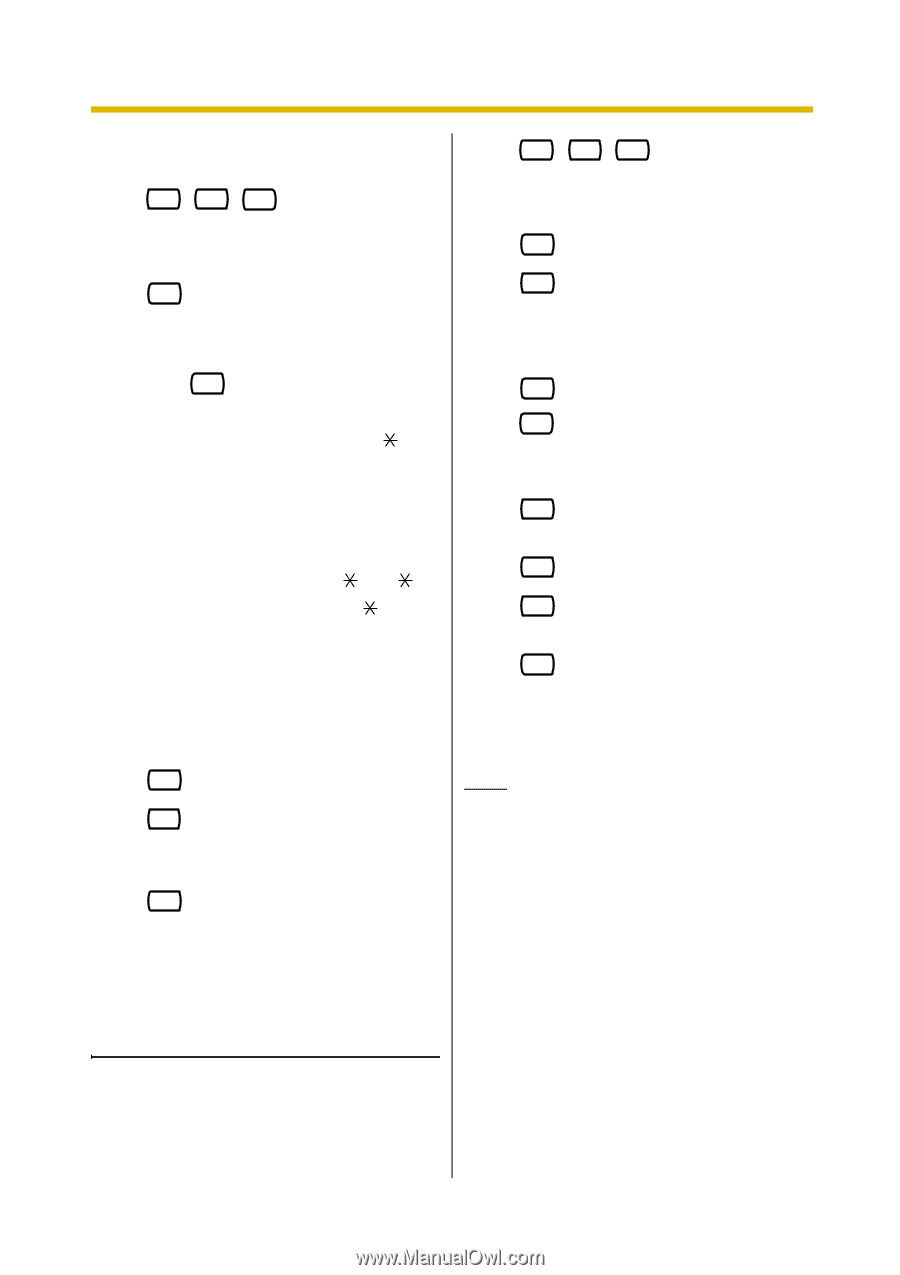
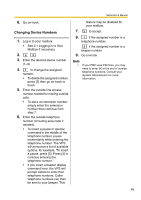
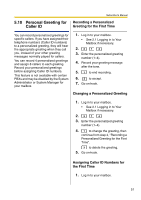
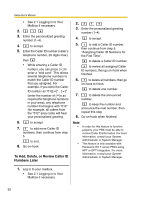
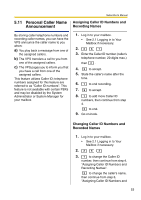
Subscriber's Manual • See 2.1 Logging in to Your Mailbox if necessary. 2. 3 1 4 3. Enter the personalized greeting number (1-4). 4. 2 to accept. 5. Enter the Caller ID number (caller's telephone number, 20 digits max.) then # . • While entering a Caller ID number, you can press [ ] to enter a "wild card". This allows several telephone numbers to match the Caller ID number that you assigned. For example, if you store the Caller ID number as "012 enter the number of [ ]s as required for telephone numbers in your area), any telephone number that begins with "012" (for example, all callers from the "012" area code) will hear your personalized greeting. 6. 2 to accept. 7. 1 to add more Caller ID numbers, then continue from step 5. 2 to end. 8. Go on-hook. To Add, Delete, or Review Caller ID Numbers Later 2. 3 1 4 3. Enter the personalized greeting number (1-4). 4. 2 to accept. 5. 1 to add a Caller ID number, then continue from step 5, "Assigning Caller ID Numbers for the First Time". 2 to delete a Caller ID number. 3 to review all assigned Caller ID numbers, then go on-hook when finished. 6. 1 to delete all numbers, then go on-hook to finish. 2 to delete one number. 7. 1 to delete the announced number. 2 to keep the number and announce the next number, then repeat this step. 8. Go on-hook when finished. Note • • In order for this feature to function properly, your PBX must be able to receive Caller ID information. For more information, consult your System Administrator or System Manager. This feature is only available with Panasonic KX-T series PBXs using APT or DPT Integration. For more information, consult your System Administrator or System Manager. 1. Log in to your mailbox. • See 2.1 Logging in to Your Mailbox if necessary. 52
-
 1
1 -
2
-
3
-
4
-
5
-
6
-
7
-
8
-
9
-
10
-
11
-
12
-
13
-
14
-
15
-
16
-
17
-
18
-
19
-
20
-
21
-
22
-
23
-
24
-
25
-
26
-
27
-
28
-
29
-
30
-
31
-
32
-
33
-
34
-
35
-
36
-
37
-
38
-
39
-
40
-
41
-
42
-
43
-
44
-
45
-
46
-
 47
47 -
 48
48 -
 49
49 -
 50
50 -
 51
51 -
 52
52 -
 53
53 -
 54
54 -
 55
55 -
 56
56 -
 57
57 -
58
-
59
-
60
-
61
-
62
-
63
-
64
-
65
-
66
-
67
-
68
-
69
-
70
-
71
-
72
-
73
-
74
-
75
-
76
-
77
-
78
-
79
-
80
-
81
-
82
-
83
-
84
-
85
-
86
-
87
-
88
-
89
-
90
-
91
-
92
-
93
-
94
-
95
-
96
-
97
-
98
-
99
-
100
-
101
-
102
-
103
-
104
-
105
-
106
-
107
-
108
-
109
-
110
-
111
-
112
-
113
-
114
-
115
-
116
-
117
-
118
-
119
-
120
-
121
-
122
-
123
-
124
-
125
-
126
-
127
-
128
-
129
-
130
-
131
-
132
-
133
-
134
-
135
-
136
-
137
-
138
-
139
-
140
-
141
-
142
-
143
-
144
-
145
-
146
-
147
-
148
-
149
-
150
-
151
-
152
-
153
-
154
-
155
-
156
-
157
-
158
-
159
-
160
-
161
-
162
-
163
-
164
-
165
-
166
-
167
-
168
-
169
-
170
-
171
-
172
 |
 |