Pioneer SC-35 Owner's Manual - Page 54
Using XM HD Surround, Saving channel presets, Using the XM Menu, Listening to SIRIUS Radio
 |
UPC - 884938108751
View all Pioneer SC-35 manuals
Add to My Manuals
Save this manual to your list of manuals |
Page 54 highlights
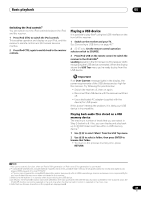
05 Basic playback • The currently selected channel is automatically chosen (without pressing ENTER) after five seconds. Using XM HD Surround XM HD Surround uses Neural Surround™ technologies to achieve optimal surround sound from XM radio. XM HD Surround Sound is available on select XM channels only. • While listening to XM Radio, press AUTO/ALC/ DIRECT for XM HD Surround listening. XM HD Surround can be selected also with STANDARD. Saving channel presets This receiver can memorize up to 63 channels, stored in seven banks, or classes (A to G) of 9 channels each.1 1 Select the channel you want to memorize. See Selecting channels and browsing by genre on page 53. 2 Press T.EDIT. The display shows a blinking memory class. 3 Press CLASS to select one of the seven classes, then press / to select the channel preset you want. You can also use the number buttons to select a preset. • The default for all presets is XM1. 4 Press ENTER. After pressing ENTER, the preset class and number stop blinking and the receiver stores the XM channel. Tip • You can also press MEMORY during reception display to save the information of up to five songs. See Using the XM Menu below to recall this information. Listening to channel presets 1 Press CLASS to select the class in which the channel is stored. Press repeatedly to cycle through classes A to G. 2 Press / to select the channel preset you want. • You can also use the number buttons on the remote control to recall the channel preset. Using the XM Menu The XM Menu provides additional XM Radio features.2 1 Press TOP MENU. 2 Use / to select a menu item, then press ENTER. Choose from the following menu items: • Channel Skip/Add - Use / and ENTER to select channels you would like to remove/restore from/to the channel guide. • Antenna Aiming - Check the strength of satellite and terrestrial reception. • Memory Recall - Use / to browse your saved song information (see Tip above). 3 When you're finished press TOP MENU to return to the reception display. Listening to SIRIUS Radio For details on SIRIUS Radio, see About SIRIUS and XM on page 137. 1 SC-37 only: Set the remote control operation selector switch to SOURCE. 2 Press OPTION 1 (SC-37)/SIRIUS (SC-35) to switch to the SIRIUS input. For best reception, you may need to move the SiriusConnect™ tuner antenna near a window (refer to the manual for the SiriusConnect™ Home tuner for antenna placement recommendations).3 • If after pressing OPTION 1 (SC-37)/SIRIUS (SC-35) the display shows Antenna Error, try disconnecting the antenna and reconnecting.4 If the display shows Check Sirius Tuner, check the connection of the AC adapter and this receiver to the SiriusConnect™ tuner. After connecting, you will be able to use this receiver to select channels and navigate categories using the GUI screen display.5 Note 1 You can reset the channel presets and memory in Resetting the system on page 82. 2 You can reset the Channel Skip/Add settings in Resetting the system on page 82. 3 • In order to activate your radio subscription, you will need the SIRIUS ID (SID) which uniquely identifies your tuner. The SID may be found on a sticker located on the packaging, or on the bottom of the tuner itself. The label will have a printed 12-digit SID number. When you have located the SID, write it down in the space provided near the end of this manual. Contact SIRIUS on the internet at: https:// activate.siriusradio.com Follow the prompts to activate your subscription, or you can also call SIRIUS toll-free at 1-888-539-SIRIUS (1-888-539-7474). • Select 0 (SIRIUS ID) from the on-screen display to check the Radio ID of the SiriusConnect™ tuner (see Selecting channels and browsing by genre on page 55). 4 You can check the strength of reception in Using the SIRIUS Menu on page 55. 5 It's easiest if you have your TV switched on to take advantage of the GUI screens. You can, however, use just the front panel display to do everything if you prefer. 54 En
-
 1
1 -
2
-
3
-
4
-
5
-
6
-
7
-
8
-
9
-
10
-
11
-
12
-
13
-
14
-
15
-
16
-
17
-
18
-
19
-
20
-
21
-
22
-
23
-
24
-
25
-
26
-
27
-
28
-
29
-
30
-
31
-
32
-
33
-
34
-
35
-
36
-
37
-
38
-
39
-
40
-
41
-
42
-
43
-
44
-
45
-
46
-
47
-
48
-
 49
49 -
 50
50 -
 51
51 -
 52
52 -
 53
53 -
 54
54 -
 55
55 -
 56
56 -
 57
57 -
 58
58 -
 59
59 -
60
-
61
-
62
-
63
-
64
-
65
-
66
-
67
-
68
-
69
-
70
-
71
-
72
-
73
-
74
-
75
-
76
-
77
-
78
-
79
-
80
-
81
-
82
-
83
-
84
-
85
-
86
-
87
-
88
-
89
-
90
-
91
-
92
-
93
-
94
-
95
-
96
-
97
-
98
-
99
-
100
-
101
-
102
-
103
-
104
-
105
-
106
-
107
-
108
-
109
-
110
-
111
-
112
-
113
-
114
-
115
-
116
-
117
-
118
-
119
-
120
-
121
-
122
-
123
-
124
-
125
-
126
-
127
-
128
-
129
-
130
-
131
-
132
-
133
-
134
-
135
-
136
-
137
-
138
-
139
-
140
-
141
-
142
-
143
-
144
-
145
-
146
-
147
-
148
 |
 |