Pioneer SC-35 Owner's Manual - Page 93
Renaming input function names in synchrony with the receiver, IR/RF SELECT
 |
UPC - 884938108751
View all Pioneer SC-35 manuals
Add to My Manuals
Save this manual to your list of manuals |
Page 93 highlights
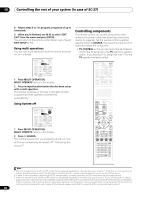
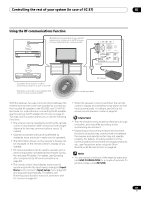
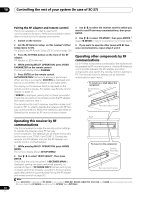
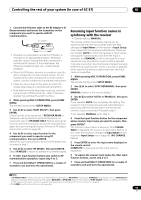
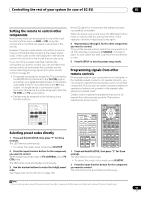
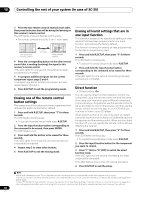
Controlling the rest of your system (In case of SC-37) 10 1 Connect the IR blaster cable to the RF Adapter's IR Blaster terminal and mount the transmitter on the component you want to operate with RF communications. RF adapter • Operation is not possible unless the IR blaster is mounted in an appropriate position. Whenever possible, mount it above the other component's remote control sensor. If mounted below, the influence of external light, etc., could hamper reception. • Mount the IR blaster securely to a position near the other component's remote control sensor. For the location of the other component's remote control sensor, see the component's operating instructions. • Clean any dirt or dust off the place at which the double-faced tape is to be attached beforehand. • Note that the double-faced tape is strong, and that trying to peel it off the shelf, etc., after it has been applied may damage the shelf's surface. 2 While pressing MULTI OPERATION, press HOME MENU. The remote display shows SETUP MENU. 3 Use / to select 'IR/RF SELECT', then press ENTER. Check that the units are paired. If RECEIVER MAIN is displayed, pairing has been performed properly, so proceed to step 4. If RF MODE ONLY flashes, pairing has not been performed properly, so perform this procedure again after performing pairing (see Pairing the RF adapter and remote control on page 92). 4 Use / to select input function for the component you want to operate using RF communications, then press ENTER. Select the input component to which the IR blaster was mounted in step 1. 5 Use / to select 'RF MODE', then press ENTER. Select IR MODE to return to operation by infrared signal. 6 If other input function buttons also switch to RF communications operation, repeat step 4 to 5. 7 Press and hold MULTI OPERATION for a couple of seconds to exit and store the operation(s). Renaming input function names in synchrony with the receiver • Default setting: MANUAL The remote control input display names can be synchronized with the input names that have been changed at Input Name on the receiver's Input Setup menu (page 45) and acquired automatically. There are two modes: AUTO in which the receiver's input names are acquired automatically each time the input is switched, and MANUAL in which the receiver's input names are only acquired for input functions selected manually. Even when input names are changed manually at Renaming input function names manually on page 86, when synchro renaming is performed here, the input name is overwritten. 1 While pressing MULTI OPERATION, press HOME MENU. The remote display shows SETUP MENU. 2 Use / to select 'SYNC RENAMING', then press ENTER. MANUAL flashes in the remote display.1 3 Use / to select 'AUTO' or 'MANUAL', then press ENTER. If you selected AUTO, this completes the setting. The receiver's input names are acquired automatically in synchrony with the receiver each time the remote control's input is switched. Proceed to step 7. If you selected MANUAL, go to step 4. 4 Press the input function button for the component whose receiver input name you want to acquire, then press ENTER.2 The receiver's input name is acquired. After PLEASE WAIT is displayed, the receiver's input name flashes. If the name has not been changed at Input Name on the receiver's Input Setup menu (page 45), NO CHANGE flashes. 5 Press ENTER to enter the input name displayed on the remote control. COMPLETE is displayed and the input name is registered. 6 To acquire the receiver input names for other input function buttons, repeat step 4 to 5. 7 Press and hold MULTI OPERATION for a couple of seconds to exit and store the operation(s). Note 1 If RF MODE ONLY flashes, pairing has not been performed properly or RECEIVER may be set to IR MODE at the remote control's IR/RF SELECT setting. In this case, perform pairing, then switch RECEIVER to RF MODE at the remote control's IR/RF SELECT setting. For details, see Pairing the RF adapter and remote control on page 92 and Operating this receiver by RF communications on page 92. 2 The HDMI input function button is not supported. 93 En
-
 1
1 -
2
-
3
-
4
-
5
-
6
-
7
-
8
-
9
-
10
-
11
-
12
-
13
-
14
-
15
-
16
-
17
-
18
-
19
-
20
-
21
-
22
-
23
-
24
-
25
-
26
-
27
-
28
-
29
-
30
-
31
-
32
-
33
-
34
-
35
-
36
-
37
-
38
-
39
-
40
-
41
-
42
-
43
-
44
-
45
-
46
-
47
-
48
-
49
-
50
-
51
-
52
-
53
-
54
-
55
-
56
-
57
-
58
-
59
-
60
-
61
-
62
-
63
-
64
-
65
-
66
-
67
-
68
-
69
-
70
-
71
-
72
-
73
-
74
-
75
-
76
-
77
-
78
-
79
-
80
-
81
-
82
-
83
-
84
-
85
-
86
-
87
-
 88
88 -
 89
89 -
 90
90 -
 91
91 -
 92
92 -
 93
93 -
 94
94 -
 95
95 -
 96
96 -
 97
97 -
 98
98 -
99
-
100
-
101
-
102
-
103
-
104
-
105
-
106
-
107
-
108
-
109
-
110
-
111
-
112
-
113
-
114
-
115
-
116
-
117
-
118
-
119
-
120
-
121
-
122
-
123
-
124
-
125
-
126
-
127
-
128
-
129
-
130
-
131
-
132
-
133
-
134
-
135
-
136
-
137
-
138
-
139
-
140
-
141
-
142
-
143
-
144
-
145
-
146
-
147
-
148
 |
 |