Pioneer SC-35 Owner's Manual - Page 81
Using the sleep timer, Dimming the display, Switching the HDMI output, Using the Web Control function
 |
UPC - 884938108751
View all Pioneer SC-35 manuals
Add to My Manuals
Save this manual to your list of manuals |
Page 81 highlights
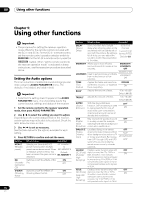
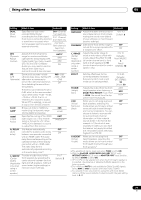
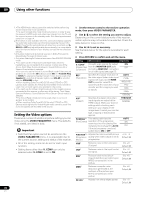
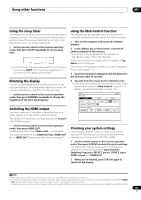
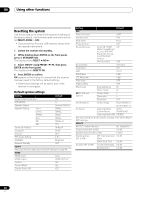
Using other functions 09 Using the sleep timer The sleep timer switches the receiver into standby after a specified amount of time so you can fall asleep without worrying about the receiver being left on all night. Use the remote control to set the sleep timer. • Set the remote control to the receiver operation mode, then press SLEEP repeatedly to set the sleep time. 30 min 60 min Off 90 min • You can check the remaining sleep time at any time by pressing SLEEP once. Pressing repeatedly will cycle through the sleep options again.1 Dimming the display You can choose between four brightness levels for the front panel display. Note that when selecting sources, the display automatically brightens for a few seconds. • Set the remote control to the receiver operation mode, then press DIMMER repeatedly to change the brightness of the front panel display. Switching the HDMI output Set which terminal to use when outputting video and audio signals from the HDMI output terminals. The HDMI OUT1 terminal is compatible with the Control with HDMI function. • Set the remote control to the receiver operation mode, then press HDMI OUT. Please wait a while when Please wait ... is displayed. The output switches among HDMI OUT ALL, HDMI OUT 1 and HDMI OUT 2 each time the button is pressed.2 Using the Web Control function The receiver can be operated using a browser from a computer connected on the same LAN as the receiver. 1 Turn on the computer and launch the Internet browser. 2 In the address bar on the browser, enter the IP address assigned to this receiver. For example, if the IP address of this receiver is "192.168.0.2", enter "http://192.168.0.2/". When the connection is made with the receiver, a Top Menu will be displayed. This receiver's IP address can be found in the 'IP address, Proxy' menu (page 117). 3 Once the Top Menu is displayed, click the button for the zone you want to operate. 4 Operate from the screen for the individual zone. • Even when the receiver is in the standby mode, it can be turned on using the Web Control function. For details, see Network Standby on page 118. Web Control Main ZONE ZONE 2 Top Menu ZONE 3 POWER ON OFF VOLUME -60.0dB MUTE INPUT SELECT DVD LISTENING MODE STEREO AUTO SURR/ALC/ STREAM DIRECT HOME THX STANDARD SURROUND ADVANCED SURROUND STEREO Checking your system settings Use the status display screen to check your current settings for features such as surround back channel processing and your current MCACC preset. 1 Set the remote control to the receiver operation mode, then press STATUS to check the system settings. The front panel display shows each of the following settings for three seconds each: Input function, Sampling Frequency, MCACC preset, ZONE 2 input, ZONE 3 input and HDMI OUT. 2 When you're finished, press STATUS again to switch off the display. Note 1 The sleep timer is valid for all zones. If any zone is on, the sleep timer continues functioning. 2 • The synchronized amp mode is canceled when the HDMI output is switched. If you wish to use the synchronized amp mode, switch to HDMI OUT 1, then select the synchronized amp mode on the TV using the TV's remote control. • When the power is turned off then back on after switching the HDMI output, the input is set to a setting between HDMI1 and HDMI3, or BD. 81 En
-
 1
1 -
2
-
3
-
4
-
5
-
6
-
7
-
8
-
9
-
10
-
11
-
12
-
13
-
14
-
15
-
16
-
17
-
18
-
19
-
20
-
21
-
22
-
23
-
24
-
25
-
26
-
27
-
28
-
29
-
30
-
31
-
32
-
33
-
34
-
35
-
36
-
37
-
38
-
39
-
40
-
41
-
42
-
43
-
44
-
45
-
46
-
47
-
48
-
49
-
50
-
51
-
52
-
53
-
54
-
55
-
56
-
57
-
58
-
59
-
60
-
61
-
62
-
63
-
64
-
65
-
66
-
67
-
68
-
69
-
70
-
71
-
72
-
73
-
74
-
75
-
 76
76 -
 77
77 -
 78
78 -
 79
79 -
 80
80 -
 81
81 -
 82
82 -
 83
83 -
 84
84 -
 85
85 -
 86
86 -
87
-
88
-
89
-
90
-
91
-
92
-
93
-
94
-
95
-
96
-
97
-
98
-
99
-
100
-
101
-
102
-
103
-
104
-
105
-
106
-
107
-
108
-
109
-
110
-
111
-
112
-
113
-
114
-
115
-
116
-
117
-
118
-
119
-
120
-
121
-
122
-
123
-
124
-
125
-
126
-
127
-
128
-
129
-
130
-
131
-
132
-
133
-
134
-
135
-
136
-
137
-
138
-
139
-
140
-
141
-
142
-
143
-
144
-
145
-
146
-
147
-
148
 |
 |