Pioneer SC-35 Owner's Manual - Page 86
Resetting the input assignment of one of the input function buttons, Resetting the remote control
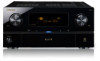 |
UPC - 884938108751
View all Pioneer SC-35 manuals
Add to My Manuals
Save this manual to your list of manuals |
Page 86 highlights
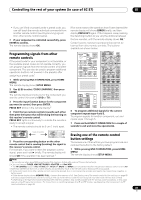
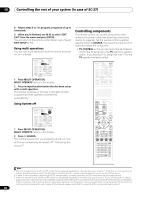
10 Controlling the rest of your system (In case of SC-37) 2 Use / to select 'ERASE LEARNING', then press ENTER. The remote display prompts you for the component corresponding to the button setting to be erased. 3 Press the input function button corresponding to the command to be erased, then press ENTER. The remote display flashes PRESS KEY. 4 Press and hold the button to be erased for two seconds. The remote display shows OK or NO CODE to confirm the button has been erased. 5 Repeat step 4 to erase other buttons. 6 Press and hold MULTI OPERATION for a couple of seconds when you're done. Resetting the input assignment of one of the input function buttons This procedure resets the input assignment preset at the remote control's input function button, restoring the default. 1 While pressing MULTI OPERATION, press HOME MENU. The remote display shows SETUP MENU. 2 Use / to select 'KEY RESET', then press ENTER. The remote display prompts you for the component corresponding to the button setting to be erased. 3 Press the input function button for the component whose input assignment you want to reset, then press and hold ENTER for a couple of seconds. The remote display shows OK when the input assignment of the remote control's input function button is reset. Confirming preset codes Use this feature to check which preset code is assigned to an input function button. 1 While pressing MULTI OPERATION, press HOME MENU. The remote display shows SETUP MENU. 2 Use / to select 'READ PRESET ID', then press ENTER. The remote display prompts you for the input function button you want to check. 3 Press the input function button of the component for which you want to check the preset code, then press ENTER. The brand name and preset code appears in the display for three seconds. Renaming input function names manually You can customize the names that appear on the remote display when you select an input function (for example, you could change the name of DVR to HDD/DVR). 1 While pressing MULTI OPERATION, press HOME MENU. The remote display shows SETUP MENU. 2 Use / to select 'RENAME', then press ENTER. The remote display prompts you for the button of the input function you want to rename. 3 Press the input function button you want to rename then press ENTER.2 4 Use / to select 'NAME EDIT', then press ENTER. To reset the button to its original (default) name, select NAME RESET above. Resetting the remote control settings Use this procedure to reset all the remote control's settings to the factory default.1 1 While pressing MULTI OPERATION, press HOME MENU. The remote display shows SETUP MENU. 2 Use / to select 'ALL RESET', then press ENTER. ALL RESET flashes in the remote display. 3 Press and hold ENTER for about two seconds. The remote display shows OK to confirm the remote presets have been erased. 5 Edit the name of the input function in the remote control display, pressing ENTER when you're finished. Use / to change the character and / to move forward/back a position. The name can be up to 14 characters. Direct function • Default setting: ON You can use the direct function feature to control one component using the remote control while at the same time, using your receiver to playback a different component. This could let you, for example, use the Note 1 When Selecting preset codes directly on page 84 are set, all the signals learned in the input function buttons are cleared. This function is convenient when you want to reset some but not all of input function buttons. 2 The TV CONTROL name can be changed when the remote control operation selector switch is switched to TV. To change the names of the input functions, set the remote control operation selector switch to SOURCE. 86 En
-
 1
1 -
2
-
3
-
4
-
5
-
6
-
7
-
8
-
9
-
10
-
11
-
12
-
13
-
14
-
15
-
16
-
17
-
18
-
19
-
20
-
21
-
22
-
23
-
24
-
25
-
26
-
27
-
28
-
29
-
30
-
31
-
32
-
33
-
34
-
35
-
36
-
37
-
38
-
39
-
40
-
41
-
42
-
43
-
44
-
45
-
46
-
47
-
48
-
49
-
50
-
51
-
52
-
53
-
54
-
55
-
56
-
57
-
58
-
59
-
60
-
61
-
62
-
63
-
64
-
65
-
66
-
67
-
68
-
69
-
70
-
71
-
72
-
73
-
74
-
75
-
76
-
77
-
78
-
79
-
80
-
 81
81 -
 82
82 -
 83
83 -
 84
84 -
 85
85 -
 86
86 -
 87
87 -
 88
88 -
 89
89 -
 90
90 -
 91
91 -
92
-
93
-
94
-
95
-
96
-
97
-
98
-
99
-
100
-
101
-
102
-
103
-
104
-
105
-
106
-
107
-
108
-
109
-
110
-
111
-
112
-
113
-
114
-
115
-
116
-
117
-
118
-
119
-
120
-
121
-
122
-
123
-
124
-
125
-
126
-
127
-
128
-
129
-
130
-
131
-
132
-
133
-
134
-
135
-
136
-
137
-
138
-
139
-
140
-
141
-
142
-
143
-
144
-
145
-
146
-
147
-
148
 |
 |