Sony GC89 User Guide - Page 26
Create a Wireless LAN Connection, Setting Your Wireless Network Connection To Have No Security, Setting Your Wireless Network Connection With WEP Security
 |
UPC - 095673179566
View all Sony GC89 manuals
Add to My Manuals
Save this manual to your list of manuals |
Page 26 highlights
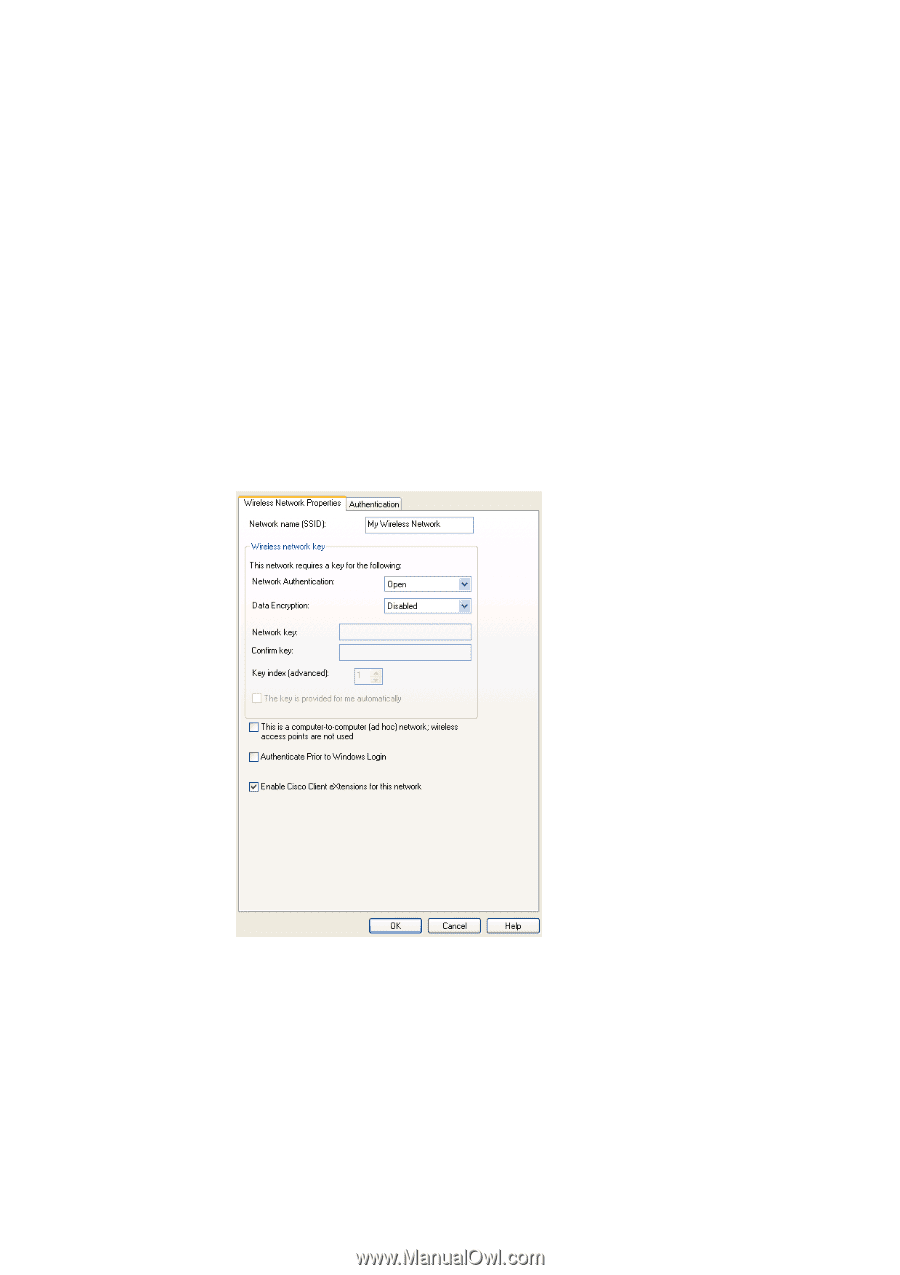
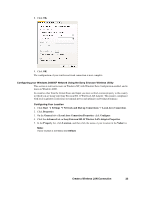
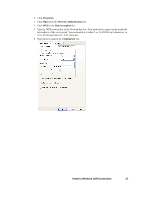
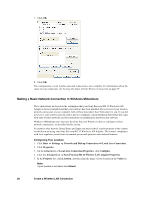
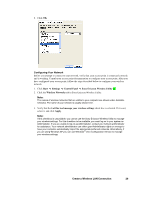
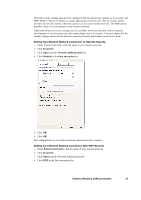
Note: Authenticate Prior to Windows® Login is used to guarantee a network connection (including association, authentication, and DHCP. To enable this feature, click the Authenticate Prior to Windows® Login check box. To disable this feature, clear the check box. Your network name is displayed on the Wireless Networks tab under Preferred networks. Network security settings must now be configured. The two most basic options are no security and WEP. Either of these two options is usually appropriate for home users. The no security option provides no network security, allowing anyone to access your wireless network. The WEP option provides a basic level of security to your wireless network. Additional advanced security settings are also available, which are typically used in corporate environments or for advanced users who require higher levels of security. You must ensure that the security settings chosen for the wireless connection exactly match those on the access point. Setting Your Wireless Network Connection To Have No Security 1. Under Preferred networks, click the name of your wireless network. 2. Click Properties. 3. Click Open from the Network Authentication list. 4. Click Disabled in the Data encryption list. 5. Click OK. 6. Click OK. The configuration of your wireless network connection is now complete. Setting Your Wireless Network Connection With WEP Security 1. Under Preferred networks, click the name of your wireless network. 26 Create a Wireless LAN Connection
-
 1
1 -
2
-
3
-
4
-
5
-
6
-
7
-
8
-
9
-
10
-
11
-
12
-
13
-
14
-
15
-
16
-
17
-
18
-
19
-
20
-
 21
21 -
 22
22 -
 23
23 -
 24
24 -
 25
25 -
 26
26 -
 27
27 -
 28
28 -
 29
29 -
 30
30 -
 31
31 -
32
-
33
-
34
-
35
-
36
-
37
-
38
-
39
-
40
-
41
-
42
-
43
-
44
-
45
-
46
-
47
-
48
-
49
-
50
-
51
-
52
-
53
-
54
-
55
-
56
-
57
-
58
-
59
-
60
-
61
-
62
-
63
-
64
-
65
-
66
-
67
-
68
-
69
-
70
-
71
-
72
-
73
-
74
-
75
-
76
-
77
-
78
-
79
-
80
-
81
-
82
-
83
-
84
-
85
-
86
-
87
-
88
-
89
-
90
-
91
-
92
-
93
-
94
-
95
-
96
-
97
-
98
-
99
-
100
-
101
-
102
-
103
-
104
-
105
-
106
-
107
-
108
-
109
-
110
-
111
-
112
-
113
 |
 |