Sony GC89 User Guide - Page 29
tab in Sony Ericsson Wireless Utility., Verify that - ericsson wireless manager
 |
UPC - 095673179566
View all Sony GC89 manuals
Add to My Manuals
Save this manual to your list of manuals |
Page 29 highlights
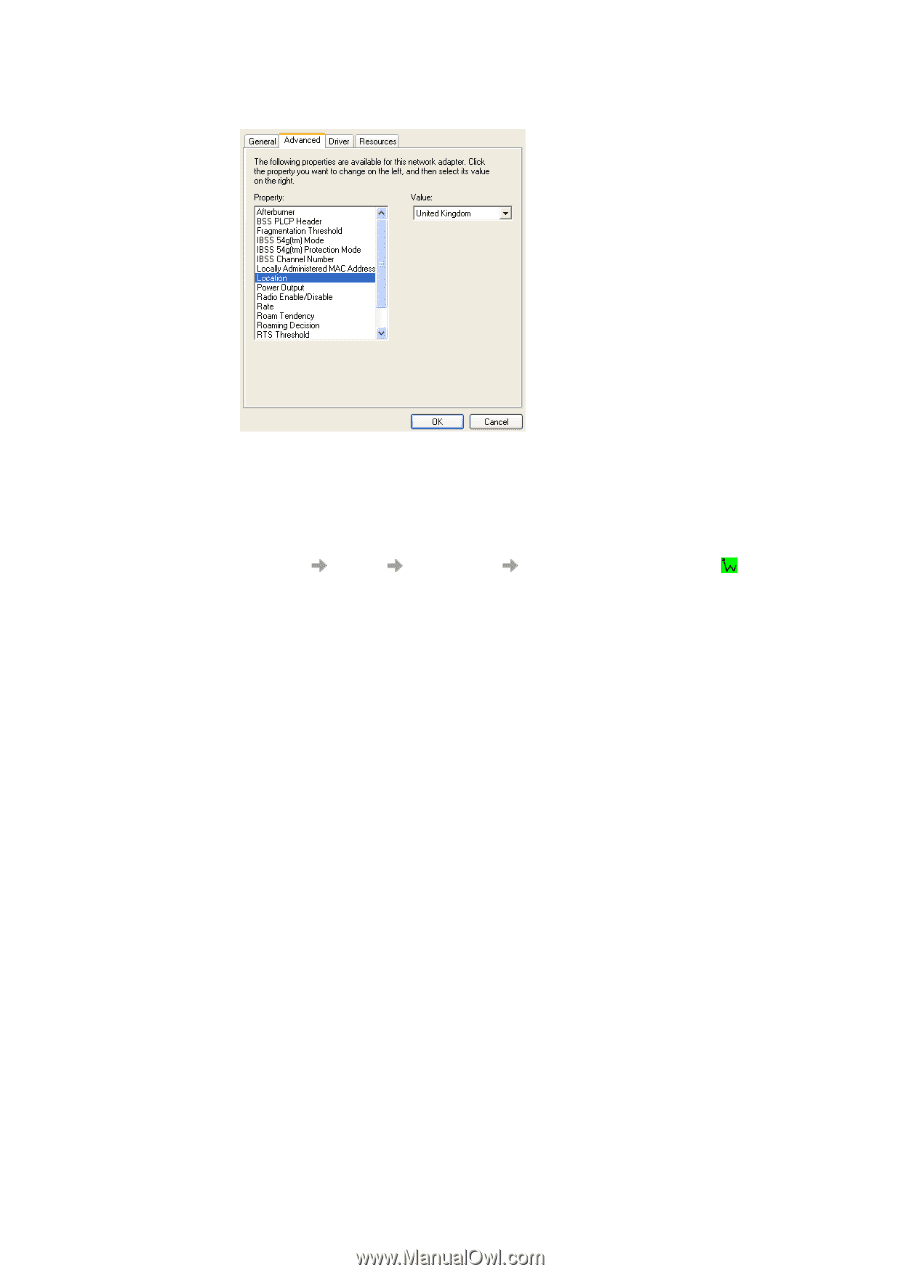
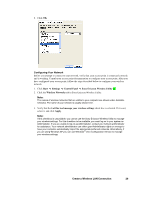
6. Click OK. Configuring Your Network Before you attempt to connect to your network, verify that your access point is connected correctly and is working. Consult your access point documentation to configure your access point. After you have configured your access point, follow the steps described below to configure your wireless network. 1. Click Start Settings Control Panel Sony Ericsson Wireless Utility . 2. Click the Wireless Networks tab in Sony Ericsson Wireless Utility. Note: The names of wireless networks that are visible to your computer are shown under Available networks. The name of your network is usually shown here. 3. Verify that the Let this tool manage your wireless settings check box is selected. If it is not, select it, and click Apply. Note: If this checkbox is unavailable, you cannot use the Sony Ericsson Wireless Utility to manage your wireless settings. For this checkbox to be available, you must log on to your system as Administrator. If you are unable to log on as Administrator, contact your network administrator for assistance. Your network administrator can either grant Administrator rights or arrange to have your computer automatically import the appropriate preferred networks. Alternatively, if you are using Windows XP you can use Windows® Zero Configuration Service to manage your wireless settings. Create a Wireless LAN Connection 29
-
 1
1 -
2
-
3
-
4
-
5
-
6
-
7
-
8
-
9
-
10
-
11
-
12
-
13
-
14
-
15
-
16
-
17
-
18
-
19
-
20
-
21
-
22
-
23
-
 24
24 -
 25
25 -
 26
26 -
 27
27 -
 28
28 -
 29
29 -
 30
30 -
 31
31 -
 32
32 -
 33
33 -
 34
34 -
35
-
36
-
37
-
38
-
39
-
40
-
41
-
42
-
43
-
44
-
45
-
46
-
47
-
48
-
49
-
50
-
51
-
52
-
53
-
54
-
55
-
56
-
57
-
58
-
59
-
60
-
61
-
62
-
63
-
64
-
65
-
66
-
67
-
68
-
69
-
70
-
71
-
72
-
73
-
74
-
75
-
76
-
77
-
78
-
79
-
80
-
81
-
82
-
83
-
84
-
85
-
86
-
87
-
88
-
89
-
90
-
91
-
92
-
93
-
94
-
95
-
96
-
97
-
98
-
99
-
100
-
101
-
102
-
103
-
104
-
105
-
106
-
107
-
108
-
109
-
110
-
111
-
112
-
113
 |
 |