Sony STR-DN1070 Help Guide Printable PDF - Page 135
Reducing the startup time Quick Start/Network
 |
View all Sony STR-DN1070 manuals
Add to My Manuals
Save this manual to your list of manuals |
Page 135 highlights
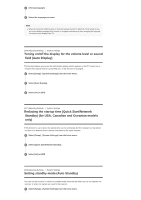
2 Select [Language]. 3 Select the language you want. Note When the Control for HDMI function on both the receiver and the TV (BRAVIA TV) is turned on, the on-screen display language of the receiver is changed simultaneously when changing the language for the on-screen display of the TV. [206] Adjusting Settings System Settings Tuning on/off the display for the volume level or sound field (Auto Display) This function allows you to turn the information display which appears on the TV screen on or off when the volume level or sound field, etc. of the receiver is changed. 1 Select [Setup] - [System Settings] from the home menu. 2 Select [Auto Display]. 3 Select [On] or [Off]. [207] Adjusting Settings System Settings Reducing the startup time (Quick Start/Network Standby) (for USA, Canadian and Oceanian models only) If this function is set to [On], the startup time can be shortened and the receiver can be turned on when it is detected from a device connected to the same network. 1 Select [Setup] - [System Settings] from the home menu. 2 Select [Quick Start/Network Standby]. 3 Select [On] or [Off]. [208] Adjusting Settings System Settings Setting standby mode (Auto Standby) You can set the receiver to switch to standby mode automatically when you do not operate the receiver or when no signals are input to the receiver. 1 Select [Setup] - [System Settings] from the home menu.
-
 1
1 -
2
-
3
-
4
-
5
-
6
-
7
-
8
-
9
-
10
-
11
-
12
-
13
-
14
-
15
-
16
-
17
-
18
-
19
-
20
-
21
-
22
-
23
-
24
-
25
-
26
-
27
-
28
-
29
-
30
-
31
-
32
-
33
-
34
-
35
-
36
-
37
-
38
-
39
-
40
-
41
-
42
-
43
-
44
-
45
-
46
-
47
-
48
-
49
-
50
-
51
-
52
-
53
-
54
-
55
-
56
-
57
-
58
-
59
-
60
-
61
-
62
-
63
-
64
-
65
-
66
-
67
-
68
-
69
-
70
-
71
-
72
-
73
-
74
-
75
-
76
-
77
-
78
-
79
-
80
-
81
-
82
-
83
-
84
-
85
-
86
-
87
-
88
-
89
-
90
-
91
-
92
-
93
-
94
-
95
-
96
-
97
-
98
-
99
-
100
-
101
-
102
-
103
-
104
-
105
-
106
-
107
-
108
-
109
-
110
-
111
-
112
-
113
-
114
-
115
-
116
-
117
-
118
-
119
-
120
-
121
-
122
-
123
-
124
-
125
-
126
-
127
-
128
-
129
-
 130
130 -
 131
131 -
 132
132 -
 133
133 -
 134
134 -
 135
135 -
 136
136 -
 137
137 -
 138
138 -
 139
139 -
 140
140 -
141
-
142
-
143
-
144
-
145
-
146
-
147
-
148
-
149
-
150
-
151
-
152
-
153
-
154
-
155
-
156
-
157
-
158
-
159
-
160
-
161
-
162
-
163
-
164
-
165
-
166
-
167
-
168
-
169
 |
 |
