Sony STR-DN1070 Help Guide Printable PDF - Page 15
Remote control lower - sound fields
 |
View all Sony STR-DN1070 manuals
Add to My Manuals
Save this manual to your list of manuals |
Page 15 highlights
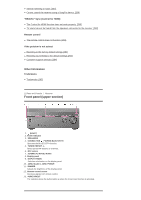
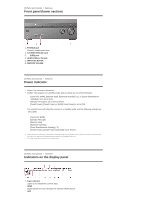
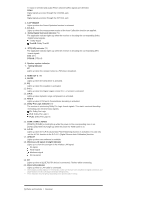
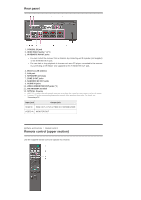
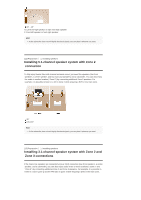
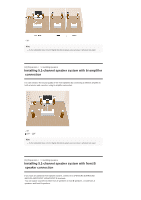
1. (power) Turns the receiver on or sets it to the standby mode. Saving power in standby mode Save power by setting up the receiver as follows: Set [Control for HDMI] to [Off] in the [HDMI Settings] menu. Set [Remote Start] to [Off] in the [Network Settings] menu. Set [Bluetooth Standby] to [Off] in the [Bluetooth Settings] menu. Set [Quick Start/Network Standby] (*) to [Off] in the [System Settings] menu. Set [Zone2 Power], [Zone3 Power] or [HDMI Zone Power] to [Off] in the [Zone Controls] menu. 2. Input buttons Select the input channel connected to the device you want to use. When you press any of the input buttons, the receiver turns on. 3. 2CH/MULTI, MOVIE, MUSIC, FRONT SURROUND Select a sound field. 4. DSD NATIVE Activates the DSD Native function. You can turn on or off this function only when playback on the source device is stopped. 5. RX/TX Switches the BLUETOOTH mode of the receiver. (Disabled while the BLUETOOTH function or Screen mirroring function is activated.) In BLUETOOTH RX mode, the receiver receives and outputs audio from the remote device. In BLUETOOTH TX mode, the receiver sends audio to the remote device. 6. HDMI OUT Switches the output for two monitors connected to the HDMI OUT A (TV) and HDMI OUT B/HDMI ZONE jacks. Output is toggled between [HDMI A], [HDMI B], [HDMI A+B] and [HDMI OFF] each time the button is pressed. Select [HDMI OFF] to turn off the output for HDMI OUT A (TV) and HDMI OUT B/HDMI ZONE jacks. 7. WATCH, LISTEN Selects [Watch] or [Listen] on the home menu directly. When pressing these buttons on the Watch or Listen screen, you can move the focus to select the desired input. 8. CUSTOM PRESET (1, 2) Saves and recalls various settings for the receiver. Press to select the custom preset setting(s). Press and hold to save the current settings to a preset. * For USA, Canadian and Oceanian models only. Note The above explanations are intended to serve as examples. Depending on the model of your connected device, some functions explained in this section may not work with the supplied remote control. [7] Parts and Controls Remote control Remote control (lower section) Use the supplied remote control to operate this receiver.
-
 1
1 -
2
-
3
-
4
-
5
-
6
-
7
-
8
-
9
-
 10
10 -
 11
11 -
 12
12 -
 13
13 -
 14
14 -
 15
15 -
 16
16 -
 17
17 -
 18
18 -
 19
19 -
 20
20 -
21
-
22
-
23
-
24
-
25
-
26
-
27
-
28
-
29
-
30
-
31
-
32
-
33
-
34
-
35
-
36
-
37
-
38
-
39
-
40
-
41
-
42
-
43
-
44
-
45
-
46
-
47
-
48
-
49
-
50
-
51
-
52
-
53
-
54
-
55
-
56
-
57
-
58
-
59
-
60
-
61
-
62
-
63
-
64
-
65
-
66
-
67
-
68
-
69
-
70
-
71
-
72
-
73
-
74
-
75
-
76
-
77
-
78
-
79
-
80
-
81
-
82
-
83
-
84
-
85
-
86
-
87
-
88
-
89
-
90
-
91
-
92
-
93
-
94
-
95
-
96
-
97
-
98
-
99
-
100
-
101
-
102
-
103
-
104
-
105
-
106
-
107
-
108
-
109
-
110
-
111
-
112
-
113
-
114
-
115
-
116
-
117
-
118
-
119
-
120
-
121
-
122
-
123
-
124
-
125
-
126
-
127
-
128
-
129
-
130
-
131
-
132
-
133
-
134
-
135
-
136
-
137
-
138
-
139
-
140
-
141
-
142
-
143
-
144
-
145
-
146
-
147
-
148
-
149
-
150
-
151
-
152
-
153
-
154
-
155
-
156
-
157
-
158
-
159
-
160
-
161
-
162
-
163
-
164
-
165
-
166
-
167
-
168
-
169
 |
 |
