Sony STR-DN1070 Help Guide Printable PDF - Page 96
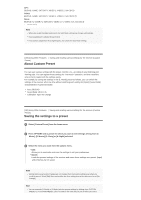
About Custom Preset, Saving the settings to a preset
 |
View all Sony STR-DN1070 manuals
Add to My Manuals
Save this manual to your list of manuals |
Page 96 highlights
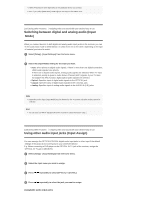
OPT: BD/DVD, GAME, SAT/CATV, VIDEO 1, VIDEO 2, SA-CD/CD COAX: BD/DVD, GAME, SAT/CATV, VIDEO 1, VIDEO 2, SA-CD/CD (*) None: BD/DVD (*), GAME (*), SAT/CATV, VIDEO 1 (*), VIDEO 2 (*), SA-CD/CD * Default setting Note When you assign the digital audio input, the Input Mode setting may change automatically. One reassignment is allowed for each input. If no sound is output from the assigned jacks, also check the Input Mode settings. [129] Using Other Features Saving and recalling various settings for the receiver (Custom Preset) About Custom Preset You can save various settings with the player, monitor, etc., according to your listening and viewing style. You can register those settings for "one-touch" operation, and then recall the environment created with the settings easily. For example, by saving the settings in the [1: Movie] preset as follows, you can switch the settings of the receiver all at one time without switching each setting for [Input], [Sound Field] and [Calibration Type] individually. Input: BD/DVD Sound Field: HD-D.C.S. Calibration Type: No Change [130] Using Other Features Saving and recalling various settings for the receiver (Custom Preset) Saving the settings to a preset 1 Select [Custom Preset] from the home menu. 2 Press OPTIONS with a preset for which you want to edit settings among from [1: Movie], [2: Music], [3: Party] or [4: Night] selected. 3 Select the menu you want from the options menu. Edit: Allows you to customize and save the settings to suit your preferences. Import: Loads the present settings of the receiver and saves those settings as a preset. [Input] and [Volume] are not saved. Note Settings items saved as [No Change] are not changed from the present settings even when you recall the preset. Select [Edit], then uncheck the box for a setting item on the edit screen to set [No Change]. Hint You can overwrite [1: Movie] or [2: Music] with the present settings by holding down CUSTOM PRESET 1 or CUSTOM PRESET 2 for 3 seconds in the same way as you do when you select
-
 1
1 -
2
-
3
-
4
-
5
-
6
-
7
-
8
-
9
-
10
-
11
-
12
-
13
-
14
-
15
-
16
-
17
-
18
-
19
-
20
-
21
-
22
-
23
-
24
-
25
-
26
-
27
-
28
-
29
-
30
-
31
-
32
-
33
-
34
-
35
-
36
-
37
-
38
-
39
-
40
-
41
-
42
-
43
-
44
-
45
-
46
-
47
-
48
-
49
-
50
-
51
-
52
-
53
-
54
-
55
-
56
-
57
-
58
-
59
-
60
-
61
-
62
-
63
-
64
-
65
-
66
-
67
-
68
-
69
-
70
-
71
-
72
-
73
-
74
-
75
-
76
-
77
-
78
-
79
-
80
-
81
-
82
-
83
-
84
-
85
-
86
-
87
-
88
-
89
-
90
-
 91
91 -
 92
92 -
 93
93 -
 94
94 -
 95
95 -
 96
96 -
 97
97 -
 98
98 -
 99
99 -
 100
100 -
 101
101 -
102
-
103
-
104
-
105
-
106
-
107
-
108
-
109
-
110
-
111
-
112
-
113
-
114
-
115
-
116
-
117
-
118
-
119
-
120
-
121
-
122
-
123
-
124
-
125
-
126
-
127
-
128
-
129
-
130
-
131
-
132
-
133
-
134
-
135
-
136
-
137
-
138
-
139
-
140
-
141
-
142
-
143
-
144
-
145
-
146
-
147
-
148
-
149
-
150
-
151
-
152
-
153
-
154
-
155
-
156
-
157
-
158
-
159
-
160
-
161
-
162
-
163
-
164
-
165
-
166
-
167
-
168
-
169
 |
 |
