Yamaha MU100R MU100R Owners Manual - Page 43
In this you'll learn how
 |
View all Yamaha MU100R manuals
Add to My Manuals
Save this manual to your list of manuals |
Page 43 highlights
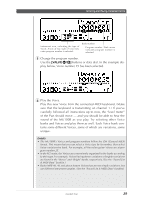
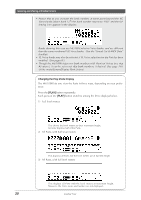
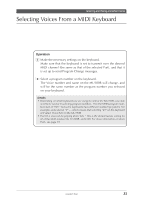
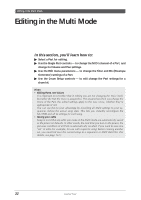
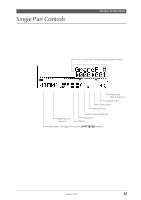
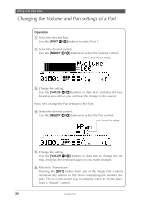
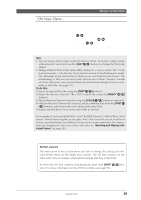
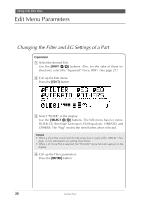
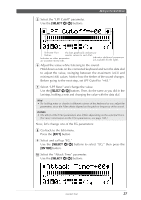
Editing in the Multi Mode Editing in the Multi Mode This section takes you step-by-step through an example editing session in the Multi mode. The operations and techniques you learn here enable you to perform any editing operation in the Multi mode. There are two separate sections of the Multi mode that are devoted to editing: the Single/All Part controls, and the Edit menus. In this section, you'll learn how to: ᮣ Select a Part for editing. ᮣ Use the Single Part controls - to change the MIDI channel of a Part, and change its Volume and Pan settings. ᮣ Use the Edit menu parameters - to change the filter and EG (Envelope Generator) settings of a Part. ᮣ Use the Drum Setup controls - to edit change the Part settings for a drum kit. Hints • Editing Parts, not Voices It is important to remember that in editing you are not changing the Voice itself, but rather the Part the Voice is assigned to. This means that when you change the Voice of the Part, the edited settings apply to the new voice, whether they're appropriate or not. You can use this to your advantage by recording all Multi settings to your sequencer, before the actual song data. This lets you instantly reconfigure the MU100R and all its settings for each song. • Saving your edits Keep in mind that any edits you make in the Multi mode are automatically saved as the power on defaults. In other words, the next time you turn on the power, the previous condition of all Parts is automatically recalled. If you want to save one "set" of edits (for example, for use with a specific song) before creating another set, you must first save the current setup to a sequencer or MIDI data filer. (For details, see page 161.) 32 Guided Tour
-
 1
1 -
2
-
3
-
4
-
5
-
6
-
7
-
8
-
9
-
10
-
11
-
12
-
13
-
14
-
15
-
16
-
17
-
18
-
19
-
20
-
21
-
22
-
23
-
24
-
25
-
26
-
27
-
28
-
29
-
30
-
31
-
32
-
33
-
34
-
35
-
36
-
37
-
 38
38 -
 39
39 -
 40
40 -
 41
41 -
 42
42 -
 43
43 -
 44
44 -
 45
45 -
 46
46 -
 47
47 -
 48
48 -
49
-
50
-
51
-
52
-
53
-
54
-
55
-
56
-
57
-
58
-
59
-
60
-
61
-
62
-
63
-
64
-
65
-
66
-
67
-
68
-
69
-
70
-
71
-
72
-
73
-
74
-
75
-
76
-
77
-
78
-
79
-
80
-
81
-
82
-
83
-
84
-
85
-
86
-
87
-
88
-
89
-
90
-
91
-
92
-
93
-
94
-
95
-
96
-
97
-
98
-
99
-
100
-
101
-
102
-
103
-
104
-
105
-
106
-
107
-
108
-
109
-
110
-
111
-
112
-
113
-
114
-
115
-
116
-
117
-
118
-
119
-
120
-
121
-
122
-
123
-
124
-
125
-
126
-
127
-
128
-
129
-
130
-
131
-
132
-
133
-
134
-
135
-
136
-
137
-
138
-
139
-
140
-
141
-
142
-
143
-
144
-
145
-
146
-
147
-
148
-
149
-
150
-
151
-
152
-
153
-
154
-
155
-
156
-
157
-
158
-
159
-
160
-
161
-
162
-
163
-
164
-
165
-
166
-
167
-
168
-
169
-
170
-
171
-
172
-
173
-
174
-
175
-
176
-
177
-
178
-
179
-
180
-
181
-
182
-
183
-
184
-
185
-
186
-
187
-
188
-
189
-
190
-
191
-
192
-
193
-
194
-
195
-
196
-
197
-
198
-
199
-
200
 |
 |
