Yamaha MU100R MU100R Owners Manual - Page 71
Select, Value, Enter]
 |
View all Yamaha MU100R manuals
Add to My Manuals
Save this manual to your list of manuals |
Page 71 highlights
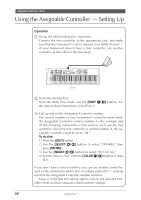
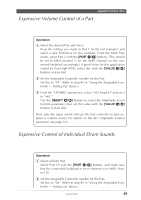
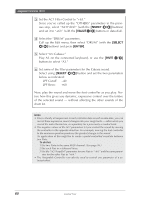
Assignable Controller (AC1) 3 Set the AC1 Filter Control to "+63." Since you've called up the "OTHERS" parameters in the previous step, select "AC1FilCtrl" (with the [SELECT ] buttons) and set it to "+63" (with the [VALUE -/+] buttons or data dial). 4 Select the "DRUM" parameters. Call up the Edit menu, then select "DRUM" (with the [SELECT ] buttons) and press [ENTER]. 5 Select "A3: Cabasa." Play A3 on the connected keyboard, or use the [PART -/+] buttons to select "A3." 6 Set some of the filter parameters for the Cabasa sound. Select using [SELECT ] button and set the two parameters below as indicated: LPF Cutoff: -40 LPF Reso: +60 Now, play the sound and move the foot controller as you play. Notice how this gives you dynamic, expressive control over the timbre of the selected sound - without affecting the other sounds of the drum kit. Hints • Since virtually all sequencers record controller data as well as note data, you can record these expressive sound changes into your song tracks - either while you record the notes themselves, or separately for a previously recorded track. • The negative values of the AC1 parameters let you control the sound by moving the controller in the opposite direction. For example, moving the foot controller to the minimum position produces the greatest change in the sound. An application of this might be to create a pedal-controlled crossfade between two Parts. To do this: 1) Set two Parts to the same MIDI channel. (See page 96.) 2) Set each Part to a different Voice. 3) Set the "AC1AmpCtrl" parameter for one Part to "-64," and the same param- eter for the other Part to "+64." • The Assignable Controller can also be used to control one parameter of a se- lected effect. 60 Guided Tour
-
 1
1 -
2
-
3
-
4
-
5
-
6
-
7
-
8
-
9
-
10
-
11
-
12
-
13
-
14
-
15
-
16
-
17
-
18
-
19
-
20
-
21
-
22
-
23
-
24
-
25
-
26
-
27
-
28
-
29
-
30
-
31
-
32
-
33
-
34
-
35
-
36
-
37
-
38
-
39
-
40
-
41
-
42
-
43
-
44
-
45
-
46
-
47
-
48
-
49
-
50
-
51
-
52
-
53
-
54
-
55
-
56
-
57
-
58
-
59
-
60
-
61
-
62
-
63
-
64
-
65
-
 66
66 -
 67
67 -
 68
68 -
 69
69 -
 70
70 -
 71
71 -
 72
72 -
 73
73 -
 74
74 -
 75
75 -
 76
76 -
77
-
78
-
79
-
80
-
81
-
82
-
83
-
84
-
85
-
86
-
87
-
88
-
89
-
90
-
91
-
92
-
93
-
94
-
95
-
96
-
97
-
98
-
99
-
100
-
101
-
102
-
103
-
104
-
105
-
106
-
107
-
108
-
109
-
110
-
111
-
112
-
113
-
114
-
115
-
116
-
117
-
118
-
119
-
120
-
121
-
122
-
123
-
124
-
125
-
126
-
127
-
128
-
129
-
130
-
131
-
132
-
133
-
134
-
135
-
136
-
137
-
138
-
139
-
140
-
141
-
142
-
143
-
144
-
145
-
146
-
147
-
148
-
149
-
150
-
151
-
152
-
153
-
154
-
155
-
156
-
157
-
158
-
159
-
160
-
161
-
162
-
163
-
164
-
165
-
166
-
167
-
168
-
169
-
170
-
171
-
172
-
173
-
174
-
175
-
176
-
177
-
178
-
179
-
180
-
181
-
182
-
183
-
184
-
185
-
186
-
187
-
188
-
189
-
190
-
191
-
192
-
193
-
194
-
195
-
196
-
197
-
198
-
199
-
200
 |
 |
