Yamaha MU100R MU100R Owners Manual - Page 95
To do this, EDIT], SELECT, ENTER], VALUE
 |
View all Yamaha MU100R manuals
Add to My Manuals
Save this manual to your list of manuals |
Page 95 highlights
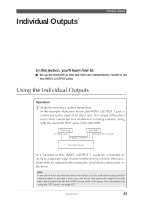
Individual Outputs 2 Select the desired Part. From the Multi mode Single Part display, use the [PART -/+] buttons to select the desired Part for using with the individual output. 3 Set the Output Select parameter to the desired setting. Here, we'll set the selected Part to output from the INDIV. OUTPUT 1 jack. To do this: 1) Press the [EDIT] button. 2) Select "OTHERS" with the [SELECT >] button, and press the [ENTER] button. 3) Select "OutPtSel" (Output Select) with the [SELECT >] button. 4) Set the parameter to "ind1" with the [VALUE -/+] buttons or data dial. The selected Part will now be output only through the INDIV. OUTPUT 1 jack. (Output through the main OUTPUT jacks and PHONES jack is cancelled.) To select another Part for individual output, repeat steps #2 and #3 above. You can set additional Parts to be output through the same jack, or select "ind2" to output a Part or Parts through INDIV. OUTPUT 2. For more information on the individual outputs, refer to the Output Select parameter (page 113) and the Output Select Lock parameter (page 158). Routing Drum Sounds to the Individual Outputs Individual drum sounds can also be routed to the individual outputs. To do this: 1) Select a Drum Part. 2) Press the [EDIT] button. 3) Select "DRUM," and press the [ENTER] button. 4) Select the desired drum sound (either from the connected MIDI keyboard or with the [PART -/+] buttons). 5) Call up the Output Select parameter (with the [SELECT >] button) and make the desired setting (with the [VALUE -/+] buttons or data dial). For more information on using Drum Parts with the individual outputs, refer to the Output Select parameter (page 118). 84 Guided Tour
-
 1
1 -
2
-
3
-
4
-
5
-
6
-
7
-
8
-
9
-
10
-
11
-
12
-
13
-
14
-
15
-
16
-
17
-
18
-
19
-
20
-
21
-
22
-
23
-
24
-
25
-
26
-
27
-
28
-
29
-
30
-
31
-
32
-
33
-
34
-
35
-
36
-
37
-
38
-
39
-
40
-
41
-
42
-
43
-
44
-
45
-
46
-
47
-
48
-
49
-
50
-
51
-
52
-
53
-
54
-
55
-
56
-
57
-
58
-
59
-
60
-
61
-
62
-
63
-
64
-
65
-
66
-
67
-
68
-
69
-
70
-
71
-
72
-
73
-
74
-
75
-
76
-
77
-
78
-
79
-
80
-
81
-
82
-
83
-
84
-
85
-
86
-
87
-
88
-
89
-
 90
90 -
 91
91 -
 92
92 -
 93
93 -
 94
94 -
 95
95 -
 96
96 -
 97
97 -
 98
98 -
 99
99 -
 100
100 -
101
-
102
-
103
-
104
-
105
-
106
-
107
-
108
-
109
-
110
-
111
-
112
-
113
-
114
-
115
-
116
-
117
-
118
-
119
-
120
-
121
-
122
-
123
-
124
-
125
-
126
-
127
-
128
-
129
-
130
-
131
-
132
-
133
-
134
-
135
-
136
-
137
-
138
-
139
-
140
-
141
-
142
-
143
-
144
-
145
-
146
-
147
-
148
-
149
-
150
-
151
-
152
-
153
-
154
-
155
-
156
-
157
-
158
-
159
-
160
-
161
-
162
-
163
-
164
-
165
-
166
-
167
-
168
-
169
-
170
-
171
-
172
-
173
-
174
-
175
-
176
-
177
-
178
-
179
-
180
-
181
-
182
-
183
-
184
-
185
-
186
-
187
-
188
-
189
-
190
-
191
-
192
-
193
-
194
-
195
-
196
-
197
-
198
-
199
-
200
 |
 |
