ZyXEL NBG6716 User Guide - Page 68
Configuration >, Network, Wireless LAN 2.4G > General, SSID_Example3, Channel-06, WPA2-PSK,
 |
View all ZyXEL NBG6716 manuals
Add to My Manuals
Save this manual to your list of manuals |
Page 68 highlights
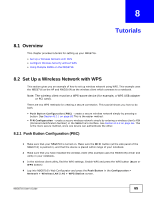
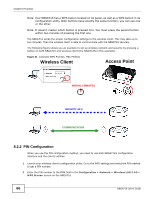
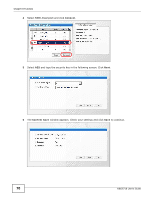
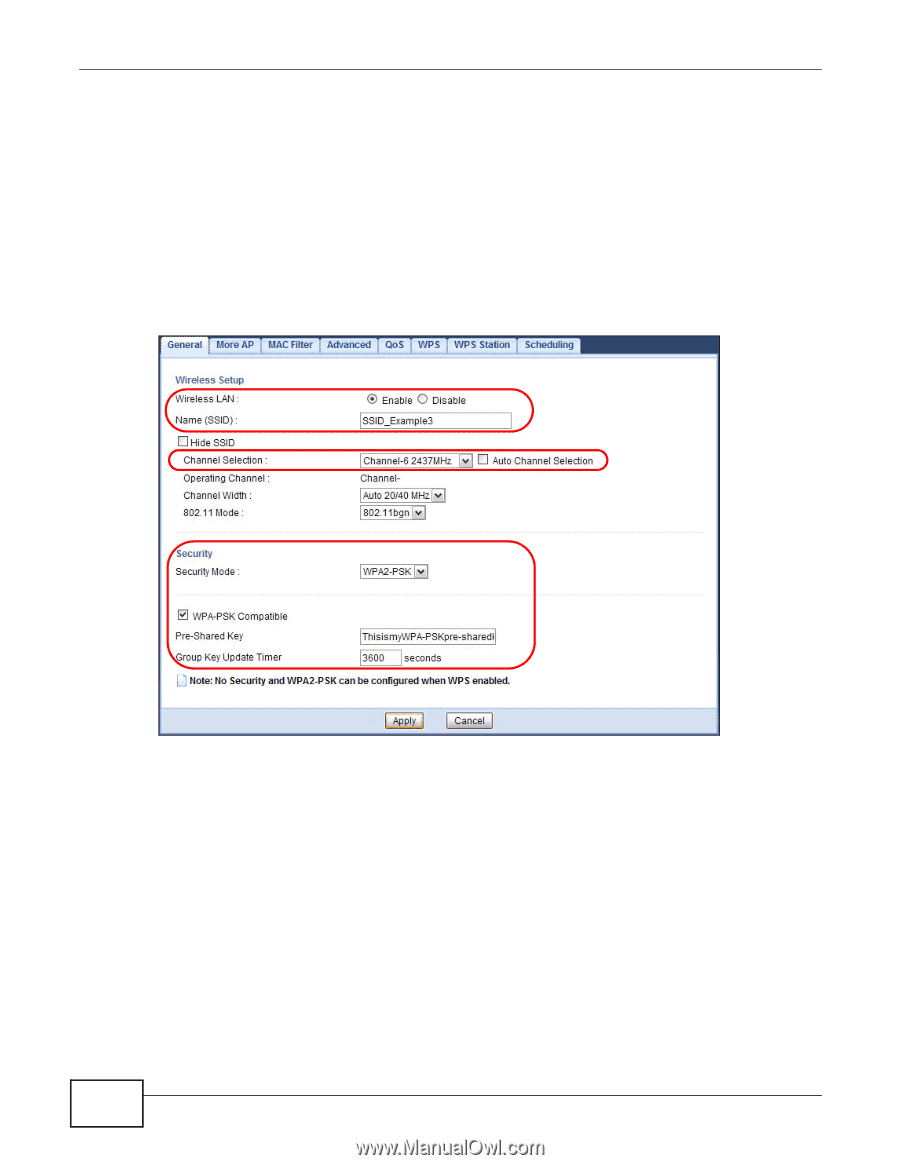
Chapter 8 Tutorials The instructions require that your hardware is connected (see the Quick Start Guide) and you are logged into the Web Configurator through your LAN connection (see Section 3.2 on page 31). 1 Make sure the WIFI switch (at the back panel of the NBG6716) is set to ON. 2 Open the Configuration > Network > Wireless LAN 2.4G > General screen in the AP's Web Configurator. 3 Confirm that the wireless LAN is enabled on the NBG6716. 4 Enter SSID_Example3 as the SSID and select Channel-06 as the channel. Set security mode to WPA2-PSK and enter ThisismyWPA-PSKpre-sharedkey in the Pre-Shared Key field. Click Apply. 68 NBG6716 User's Guide
-
 1
1 -
2
-
3
-
4
-
5
-
6
-
7
-
8
-
9
-
10
-
11
-
12
-
13
-
14
-
15
-
16
-
17
-
18
-
19
-
20
-
21
-
22
-
23
-
24
-
25
-
26
-
27
-
28
-
29
-
30
-
31
-
32
-
33
-
34
-
35
-
36
-
37
-
38
-
39
-
40
-
41
-
42
-
43
-
44
-
45
-
46
-
47
-
48
-
49
-
50
-
51
-
52
-
53
-
54
-
55
-
56
-
57
-
58
-
59
-
60
-
61
-
62
-
 63
63 -
 64
64 -
 65
65 -
 66
66 -
 67
67 -
 68
68 -
 69
69 -
 70
70 -
 71
71 -
 72
72 -
 73
73 -
74
-
75
-
76
-
77
-
78
-
79
-
80
-
81
-
82
-
83
-
84
-
85
-
86
-
87
-
88
-
89
-
90
-
91
-
92
-
93
-
94
-
95
-
96
-
97
-
98
-
99
-
100
-
101
-
102
-
103
-
104
-
105
-
106
-
107
-
108
-
109
-
110
-
111
-
112
-
113
-
114
-
115
-
116
-
117
-
118
-
119
-
120
-
121
-
122
-
123
-
124
-
125
-
126
-
127
-
128
-
129
-
130
-
131
-
132
-
133
-
134
-
135
-
136
-
137
-
138
-
139
-
140
-
141
-
142
-
143
-
144
-
145
-
146
-
147
-
148
-
149
-
150
-
151
-
152
-
153
-
154
-
155
-
156
-
157
-
158
-
159
-
160
-
161
-
162
-
163
-
164
-
165
-
166
-
167
-
168
-
169
-
170
-
171
-
172
-
173
-
174
-
175
-
176
-
177
-
178
-
179
-
180
-
181
-
182
-
183
-
184
-
185
-
186
-
187
-
188
-
189
-
190
-
191
-
192
-
193
-
194
-
195
-
196
-
197
-
198
-
199
-
200
-
201
-
202
-
203
-
204
-
205
-
206
-
207
-
208
-
209
-
210
-
211
-
212
-
213
-
214
-
215
-
216
-
217
-
218
-
219
-
220
-
221
-
222
-
223
-
224
-
225
-
226
-
227
-
228
-
229
-
230
-
231
-
232
-
233
-
234
-
235
-
236
-
237
-
238
-
239
-
240
-
241
-
242
-
243
-
244
-
245
-
246
-
247
-
248
-
249
-
250
 |
 |
Chapter 8 Tutorials
NBG6716 User’s Guide
68
The instructions require that your hardware is connected (see the Quick Start Guide) and you are
logged into the Web Configurator through your LAN connection (see
Section 3.2 on page 31
).
1
Make sure the
WIFI
switch (at the back panel of the NBG6716) is set to
ON
.
2
Open the
Configuration >
Network
>
Wireless LAN 2.4G > General
screen in the AP’s Web
Configurator.
3
Confirm that the wireless LAN is enabled on the NBG6716.
4
Enter
SSID_Example3
as the SSID and select
Channel-06
as the channel. Set security mode to
WPA2-PSK
and enter
ThisismyWPA-PSKpre-sharedkey
in the
Pre-Shared Key
field. Click
Apply
.