Brother International PC-8500 Users Manual - English - Page 110
Fitting embroidery unit, Always turn off the power supply before carrying out
 |
View all Brother International PC-8500 manuals
Add to My Manuals
Save this manual to your list of manuals |
Page 110 highlights
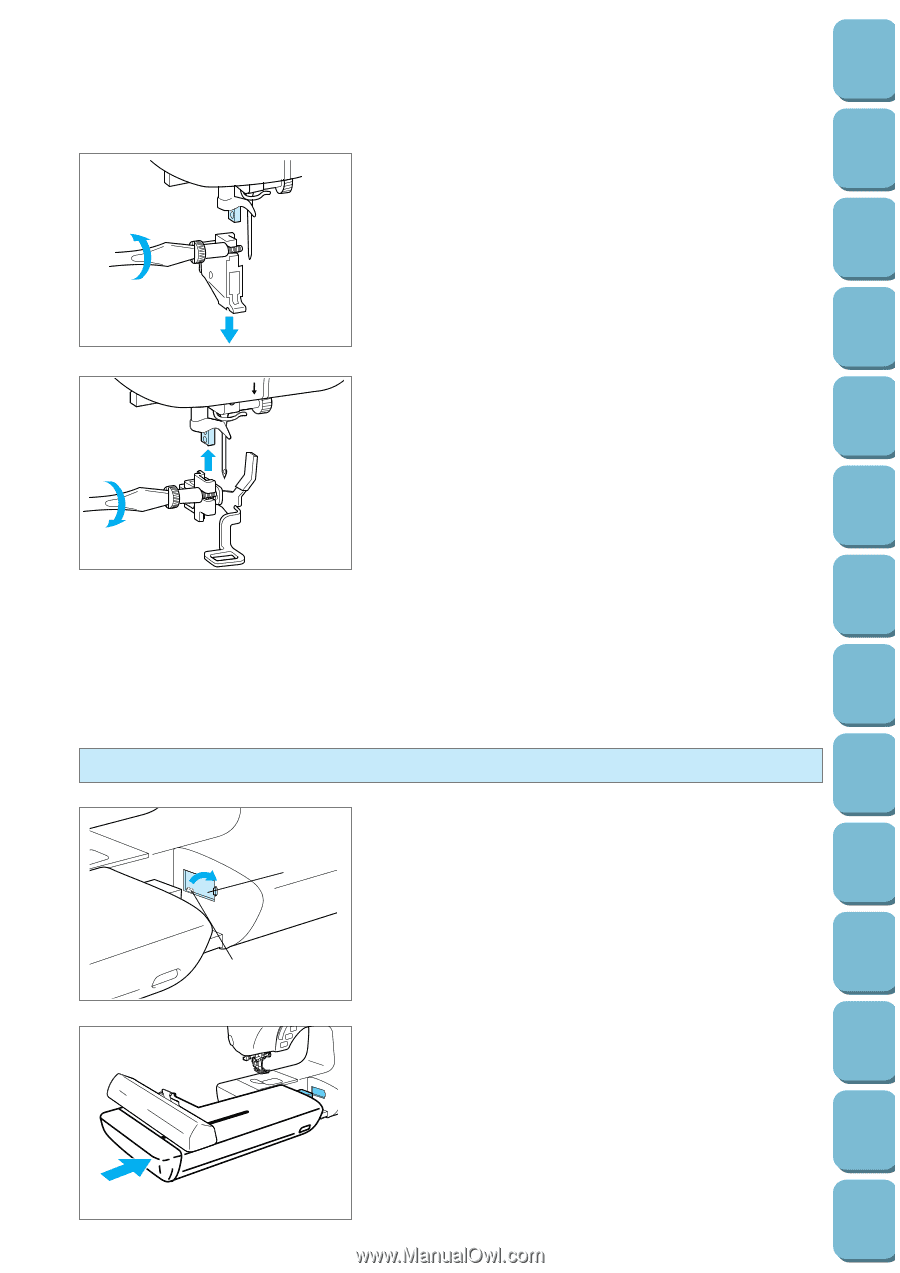
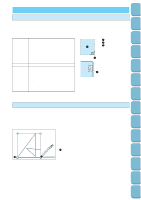
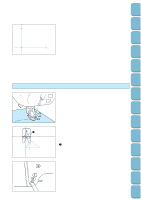
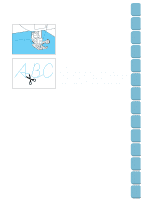
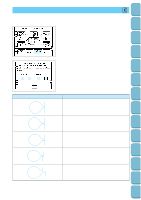
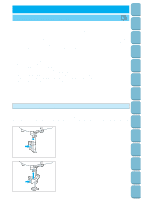
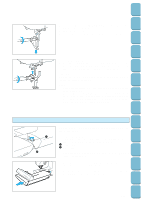
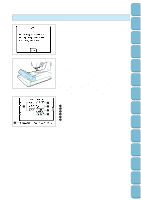
Setting Up Sewing 1. Press the "NEEDLE POSITION" button to raise the needle, and then turn off the power. 2. Raise the presser foot lever. 3. Loosen the set screw to remove the presser foot holder. Utility Stitches Characters and Decorative Stitches Embroidering Editing Embroidery Patterns Retrieving My Custom Stitch TM Error Maintenance Messages 5 4. Attach the embroidery foot "Q". 5. Set arm of embroidery foot "Q" on needle holder, use the metal disk provided with your machine (accessory #14 on page 7) or a screwdriver to tighten the screw firmly. CAUTION Be careful not to touch the needle during this time, otherwise injury may result. NOTE - Make sure that there is no gap between the needle bar and embroidery foot "Q". - It is recommended that a 90/14 needle should be used when embroidering on thicker fabrics or stabilizing products. (for example denim, puffy foam . .) A 75/11 needle might be bent or broken, which could result in injury. Fitting embroidery unit 1 2 Always turn off the power supply before carrying out the procedure below. 1. Turn off the power. 2. Open the cover of the connecting slot by rotating the plastic bracket in the direction indicated by the arrow. 1 Connecting slot 2 Plastic bracket * When the embroidery unit is not being used, close the cover of the connecting slot. 3. Insert the connector of the embroidery unit into the slot and check that it is connected properly. * Put the machine on a flat and horizontal surface and slide the embroidery unit towards the machine. 107 Trouble shooting Sewing Chart Patterns (Programmed in Machine) Patterns (Memory Card)
-
 1
1 -
2
-
3
-
4
-
5
-
6
-
7
-
8
-
9
-
10
-
11
-
12
-
13
-
14
-
15
-
16
-
17
-
18
-
19
-
20
-
21
-
22
-
23
-
24
-
25
-
26
-
27
-
28
-
29
-
30
-
31
-
32
-
33
-
34
-
35
-
36
-
37
-
38
-
39
-
40
-
41
-
42
-
43
-
44
-
45
-
46
-
47
-
48
-
49
-
50
-
51
-
52
-
53
-
54
-
55
-
56
-
57
-
58
-
59
-
60
-
61
-
62
-
63
-
64
-
65
-
66
-
67
-
68
-
69
-
70
-
71
-
72
-
73
-
74
-
75
-
76
-
77
-
78
-
79
-
80
-
81
-
82
-
83
-
84
-
85
-
86
-
87
-
88
-
89
-
90
-
91
-
92
-
93
-
94
-
95
-
96
-
97
-
98
-
99
-
100
-
101
-
102
-
103
-
104
-
 105
105 -
 106
106 -
 107
107 -
 108
108 -
 109
109 -
 110
110 -
 111
111 -
 112
112 -
 113
113 -
 114
114 -
 115
115 -
116
-
117
-
118
-
119
-
120
-
121
-
122
-
123
-
124
-
125
-
126
-
127
-
128
-
129
-
130
-
131
-
132
-
133
-
134
-
135
-
136
-
137
-
138
-
139
-
140
-
141
-
142
-
143
-
144
-
145
-
146
-
147
-
148
-
149
-
150
-
151
-
152
-
153
-
154
-
155
-
156
-
157
-
158
-
159
-
160
-
161
-
162
-
163
-
164
-
165
-
166
-
167
-
168
-
169
-
170
-
171
-
172
-
173
-
174
-
175
-
176
-
177
-
178
-
179
-
180
-
181
-
182
-
183
-
184
-
185
-
186
-
187
-
188
-
189
-
190
-
191
-
192
-
193
-
194
-
195
-
196
 |
 |