Brother International PC-8500 Users Manual - English - Page 126
Moving the Location (Layout), like to set the embroidering position.
 |
View all Brother International PC-8500 manuals
Add to My Manuals
Save this manual to your list of manuals |
Page 126 highlights
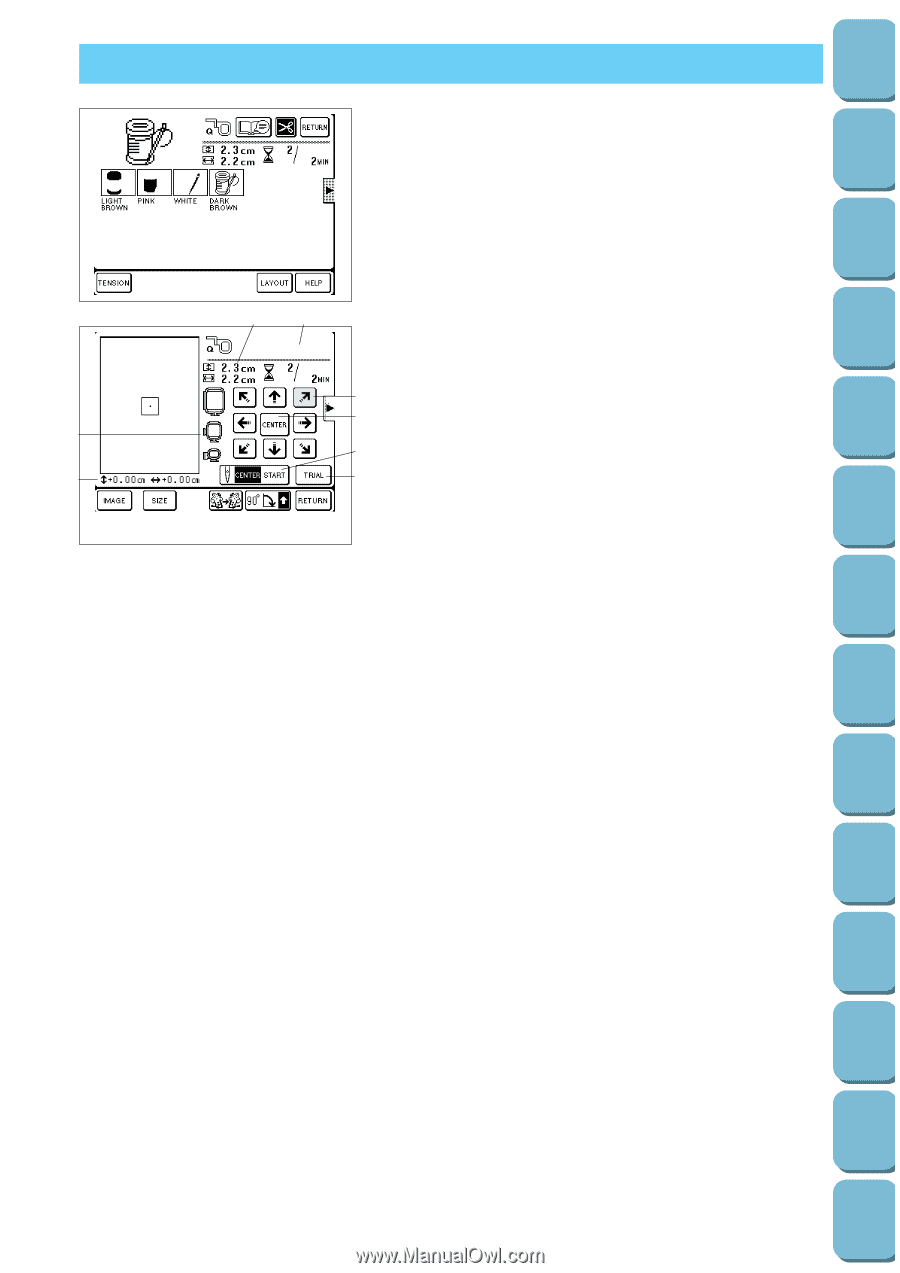
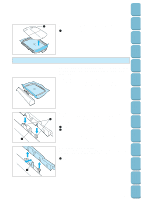
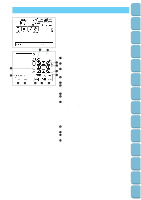
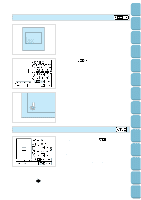
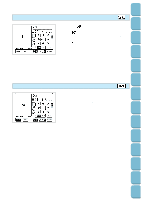
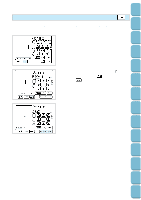
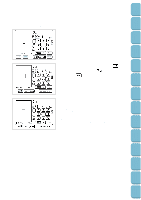
Setting Up Sewing Utility Stitches Characters and Decorative Stitches Embroidering Editing Embroidery Patterns MOVING THE LOCATION (LAYOUT) The position for embroidering the pattern can be changed by touching the "LAYOUT" key. This is useful if you want to embroider a pattern at a location such as in the corner of the fabric or if you want to align a pattern away from the center of the embroidery area of the frame. 9 0 5C AB 67 8 Touch the "LAYOUT" key. The layout screen will be displayed. 1 Touch these keys to move the embroidering position within the embroidery area. 1 2 If you touch this key, the embroidering position will be 2 returned to the center of the embroidery area. 3 This moves the needle position to the middle of the pattern 3 or to the sewing start position, etc. Use it when you would 4 like to set the embroidering position. 4 If you touch this key, the embroidery frame will move so that you can check the embroidering position. 5 If you touch this key, the pattern image will be displayed. 6 If you touch this key, the pattern will be reversed horizontally. This function cannot be used with some patterns. 7 Touch this key to rotate the selected pattern in 90˚ steps. 8 If you touch this key, the display will change from the layout screen back to the original screen. 9 This displays the different types of embroidery frames that can be used. (The frames that can be used will be shown in solid color, and the frames that cannot be used will be grayed out.) CAUTION Do not use any embroidery frames other than those shown here, otherwise injury could result. 0 This shows the distance from the center when the embroidering position has been moved. A Indicates the current pattern size. B If a character has been selected, this shows details about the character. C If you touch this key changing the size of pattern. (Refer to page 129) Retrieving My Custom Stitch TM Error Maintenance Messages Trouble shooting Sewing Chart Patterns (Programmed in Machine) Patterns (Memory Card) 123
-
 1
1 -
2
-
3
-
4
-
5
-
6
-
7
-
8
-
9
-
10
-
11
-
12
-
13
-
14
-
15
-
16
-
17
-
18
-
19
-
20
-
21
-
22
-
23
-
24
-
25
-
26
-
27
-
28
-
29
-
30
-
31
-
32
-
33
-
34
-
35
-
36
-
37
-
38
-
39
-
40
-
41
-
42
-
43
-
44
-
45
-
46
-
47
-
48
-
49
-
50
-
51
-
52
-
53
-
54
-
55
-
56
-
57
-
58
-
59
-
60
-
61
-
62
-
63
-
64
-
65
-
66
-
67
-
68
-
69
-
70
-
71
-
72
-
73
-
74
-
75
-
76
-
77
-
78
-
79
-
80
-
81
-
82
-
83
-
84
-
85
-
86
-
87
-
88
-
89
-
90
-
91
-
92
-
93
-
94
-
95
-
96
-
97
-
98
-
99
-
100
-
101
-
102
-
103
-
104
-
105
-
106
-
107
-
108
-
109
-
110
-
111
-
112
-
113
-
114
-
115
-
116
-
117
-
118
-
119
-
120
-
 121
121 -
 122
122 -
 123
123 -
 124
124 -
 125
125 -
 126
126 -
 127
127 -
 128
128 -
 129
129 -
 130
130 -
 131
131 -
132
-
133
-
134
-
135
-
136
-
137
-
138
-
139
-
140
-
141
-
142
-
143
-
144
-
145
-
146
-
147
-
148
-
149
-
150
-
151
-
152
-
153
-
154
-
155
-
156
-
157
-
158
-
159
-
160
-
161
-
162
-
163
-
164
-
165
-
166
-
167
-
168
-
169
-
170
-
171
-
172
-
173
-
174
-
175
-
176
-
177
-
178
-
179
-
180
-
181
-
182
-
183
-
184
-
185
-
186
-
187
-
188
-
189
-
190
-
191
-
192
-
193
-
194
-
195
-
196
 |
 |