Brother International PC-8500 Users Manual - English - Page 91
Characters and Decorative Stitches, CHARACTER SEWING
 |
View all Brother International PC-8500 manuals
Add to My Manuals
Save this manual to your list of manuals |
Page 91 highlights
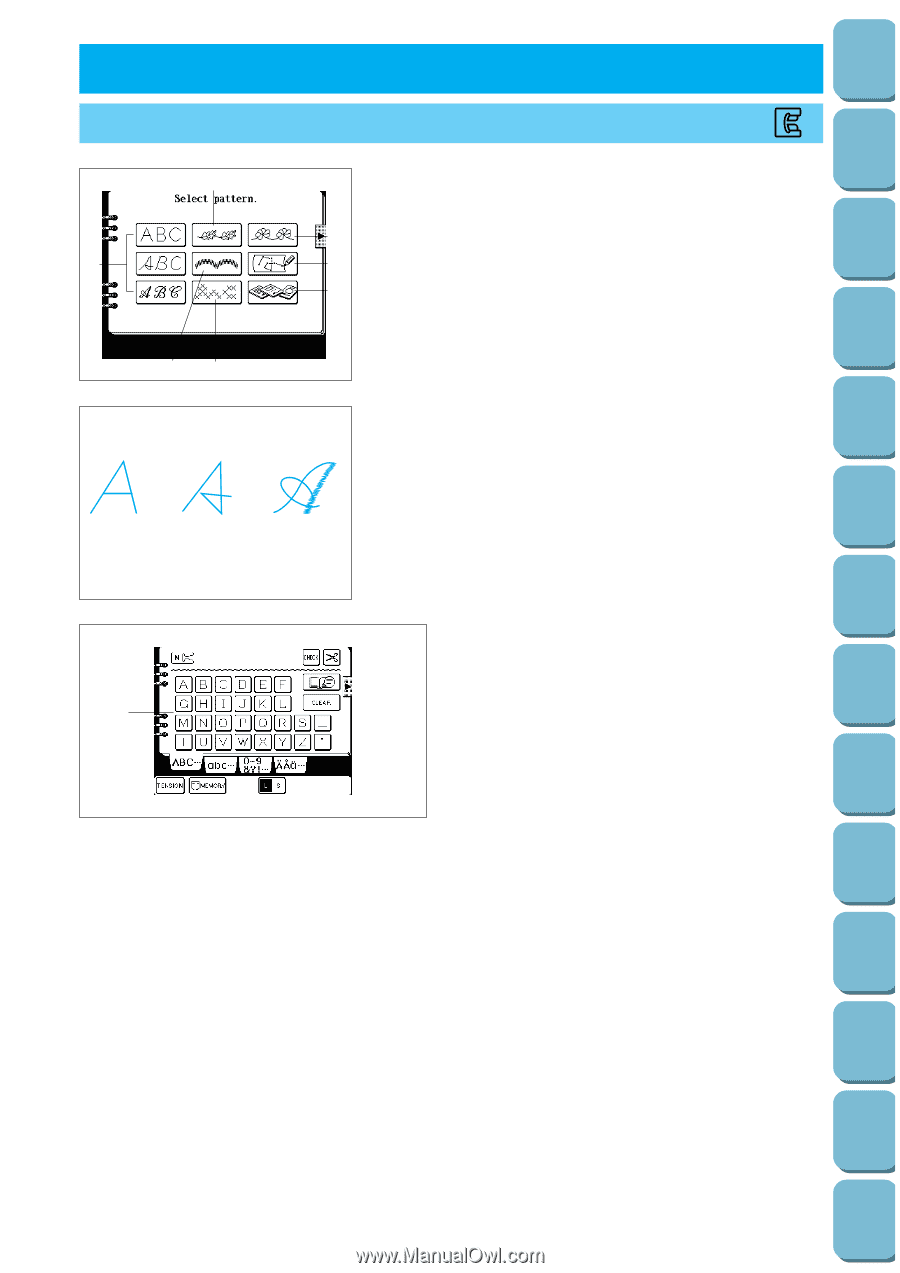
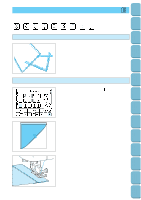
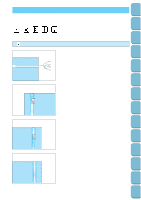
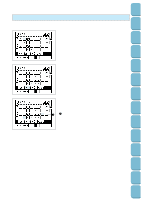
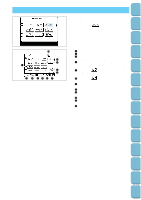
Setting Up Sewing Utility Stitches Characters and Decorative Stitches Embroidering Editing Embroidery Patterns 3. CHARACTERS AND DECORATIVE STITCHES CHARACTER SEWING N 2 1 34 1. Touch the "CHARACTER/DECORATIVE STITCH" key. 1 Alphabetical characters 6 2 Decorative stitch 3 Satin stitch 5 4 Cross stitch 7 5 MY CUSTOM STITCHTM (Function for creating your own stitches) 6 Decorative stitch (7 mm width) 7 Card 2. Select the style. 1 Block style 2 Alphabet 3 Italic style 1 2 3 87 6 5 1 23 4 1 Character selection keys 2 Touch this key to change the thread tension. 3 Touch this key to save a pattern combination to memory. (Refer to page 100.) 4 Touch this key to change the character size. (Refer to page 94.) "L": Larger "S": Smaller 5 Touch this key to cancel your last entry. 6 An advice screen will appear if you touch this key while sewing. (Refer to page 42.) 7 Touch this key to cut the thread automatically after sewing is completed. (Refer to page 39.) 8 Touch this key to confirm your entry. (Refer to page 100.) Retrieving My Custom Stitch TM Error Maintenance Messages Trouble shooting Sewing Chart Patterns (Programmed in Machine) Patterns (Memory Card) 88
-
 1
1 -
2
-
3
-
4
-
5
-
6
-
7
-
8
-
9
-
10
-
11
-
12
-
13
-
14
-
15
-
16
-
17
-
18
-
19
-
20
-
21
-
22
-
23
-
24
-
25
-
26
-
27
-
28
-
29
-
30
-
31
-
32
-
33
-
34
-
35
-
36
-
37
-
38
-
39
-
40
-
41
-
42
-
43
-
44
-
45
-
46
-
47
-
48
-
49
-
50
-
51
-
52
-
53
-
54
-
55
-
56
-
57
-
58
-
59
-
60
-
61
-
62
-
63
-
64
-
65
-
66
-
67
-
68
-
69
-
70
-
71
-
72
-
73
-
74
-
75
-
76
-
77
-
78
-
79
-
80
-
81
-
82
-
83
-
84
-
85
-
 86
86 -
 87
87 -
 88
88 -
 89
89 -
 90
90 -
 91
91 -
 92
92 -
 93
93 -
 94
94 -
 95
95 -
 96
96 -
97
-
98
-
99
-
100
-
101
-
102
-
103
-
104
-
105
-
106
-
107
-
108
-
109
-
110
-
111
-
112
-
113
-
114
-
115
-
116
-
117
-
118
-
119
-
120
-
121
-
122
-
123
-
124
-
125
-
126
-
127
-
128
-
129
-
130
-
131
-
132
-
133
-
134
-
135
-
136
-
137
-
138
-
139
-
140
-
141
-
142
-
143
-
144
-
145
-
146
-
147
-
148
-
149
-
150
-
151
-
152
-
153
-
154
-
155
-
156
-
157
-
158
-
159
-
160
-
161
-
162
-
163
-
164
-
165
-
166
-
167
-
168
-
169
-
170
-
171
-
172
-
173
-
174
-
175
-
176
-
177
-
178
-
179
-
180
-
181
-
182
-
183
-
184
-
185
-
186
-
187
-
188
-
189
-
190
-
191
-
192
-
193
-
194
-
195
-
196
 |
 |