Brother International PC-8500 Users Manual - English - Page 60
Buttons that do not fit into the guide plate Odd-shaped buttons, Changing the stitch length,
 |
View all Brother International PC-8500 manuals
Add to My Manuals
Save this manual to your list of manuals |
Page 60 highlights
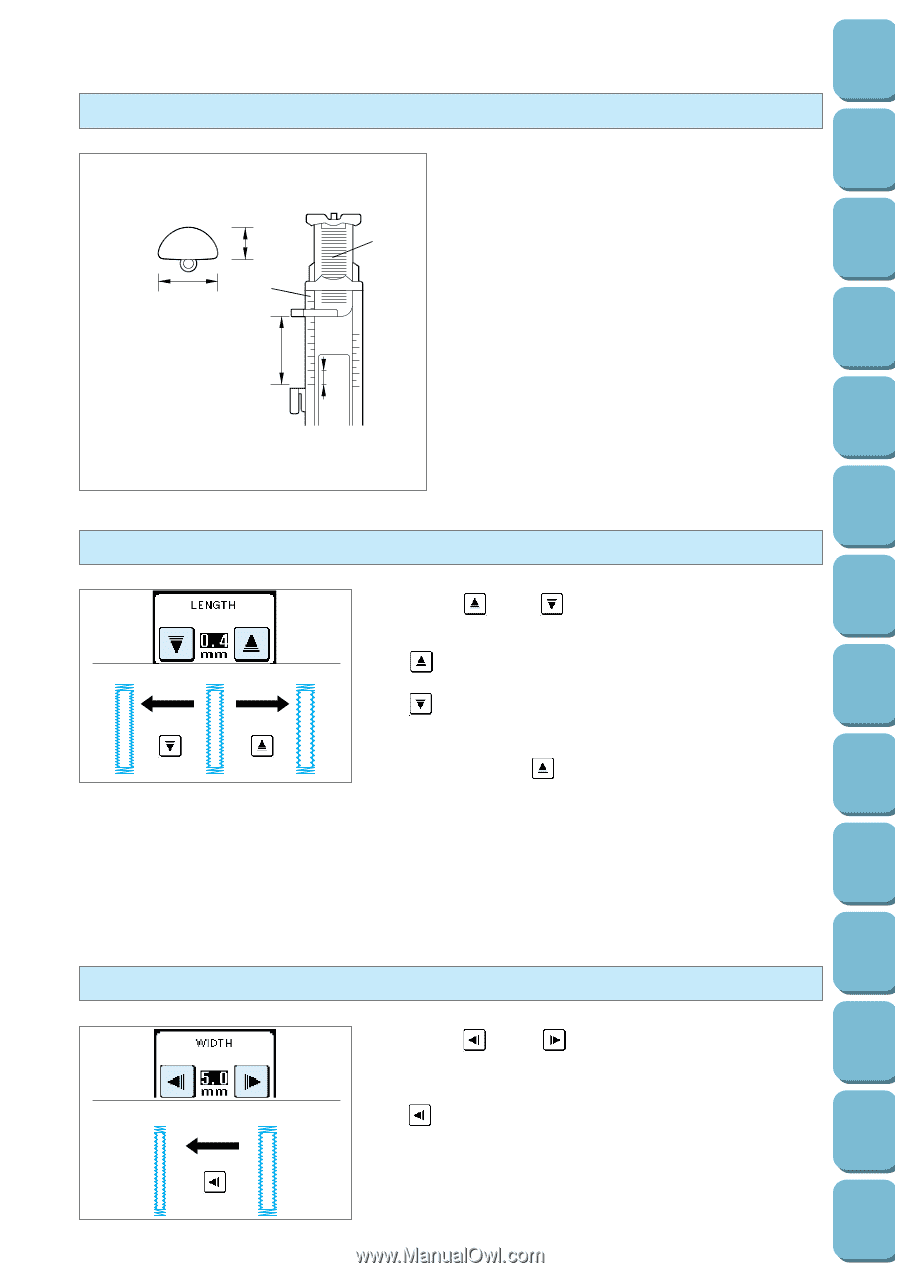
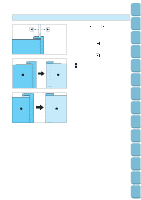
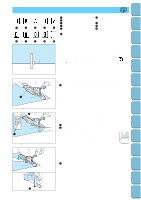
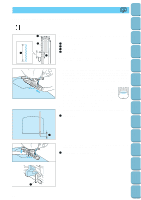
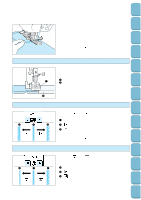
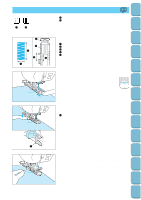
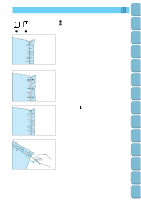
Setting Up Sewing Utility Stitches Characters and Decorative Stitches Embroidering Buttons that do not fit into the guide plate (Odd-shaped buttons) 1 3 4 2 5 6 Measure the button diameter + thickness to set the plate. Example: For a button with a diameter of 1.5 cm (9/16") and a thickness of 1 cm (3/8"), the scale should be set at 2.5 cm (1") 1 Thickness [1 cm (3/8")] 2 Diameter [1.5 cm (9/16")] 3 Button holder plate 4 Scale 5 Diameter + thickness [2.5 cm (1")] [0.5 cm (3/16") in one scale.] 6 0.5 cm (3/16") Changing the stitch length Touch the " " and " " stitch length setting keys to adjust the stitch length. 3 2 1 1 " ": Longer 2 Normal length 0.4 mm (1/64") 3 " ": Shorter * If the fabric will not feed (for instance, because it is too thick), touch the " " stitch length setting key to increase the stitch length. Editing Embroidery Patterns Retrieving My Custom Stitch TM Error Maintenance Messages Trouble shooting Sewing Chart Patterns (Programmed in Machine) Changing the stitch width 2 1 Touch the " " and " " stitch width setting keys to adjust the stitch width. 1 "AUTO" width 5.0 mm (3/16") 2 " " : Narrower 57 Patterns (Memory Card)
-
 1
1 -
2
-
3
-
4
-
5
-
6
-
7
-
8
-
9
-
10
-
11
-
12
-
13
-
14
-
15
-
16
-
17
-
18
-
19
-
20
-
21
-
22
-
23
-
24
-
25
-
26
-
27
-
28
-
29
-
30
-
31
-
32
-
33
-
34
-
35
-
36
-
37
-
38
-
39
-
40
-
41
-
42
-
43
-
44
-
45
-
46
-
47
-
48
-
49
-
50
-
51
-
52
-
53
-
54
-
 55
55 -
 56
56 -
 57
57 -
 58
58 -
 59
59 -
 60
60 -
 61
61 -
 62
62 -
 63
63 -
 64
64 -
 65
65 -
66
-
67
-
68
-
69
-
70
-
71
-
72
-
73
-
74
-
75
-
76
-
77
-
78
-
79
-
80
-
81
-
82
-
83
-
84
-
85
-
86
-
87
-
88
-
89
-
90
-
91
-
92
-
93
-
94
-
95
-
96
-
97
-
98
-
99
-
100
-
101
-
102
-
103
-
104
-
105
-
106
-
107
-
108
-
109
-
110
-
111
-
112
-
113
-
114
-
115
-
116
-
117
-
118
-
119
-
120
-
121
-
122
-
123
-
124
-
125
-
126
-
127
-
128
-
129
-
130
-
131
-
132
-
133
-
134
-
135
-
136
-
137
-
138
-
139
-
140
-
141
-
142
-
143
-
144
-
145
-
146
-
147
-
148
-
149
-
150
-
151
-
152
-
153
-
154
-
155
-
156
-
157
-
158
-
159
-
160
-
161
-
162
-
163
-
164
-
165
-
166
-
167
-
168
-
169
-
170
-
171
-
172
-
173
-
174
-
175
-
176
-
177
-
178
-
179
-
180
-
181
-
182
-
183
-
184
-
185
-
186
-
187
-
188
-
189
-
190
-
191
-
192
-
193
-
194
-
195
-
196
 |
 |