Brother International PC-8500 Users Manual - English - Page 163
My Custom Stitch (Create your own stitch designs), Making the Illustration
 |
View all Brother International PC-8500 manuals
Add to My Manuals
Save this manual to your list of manuals |
Page 163 highlights
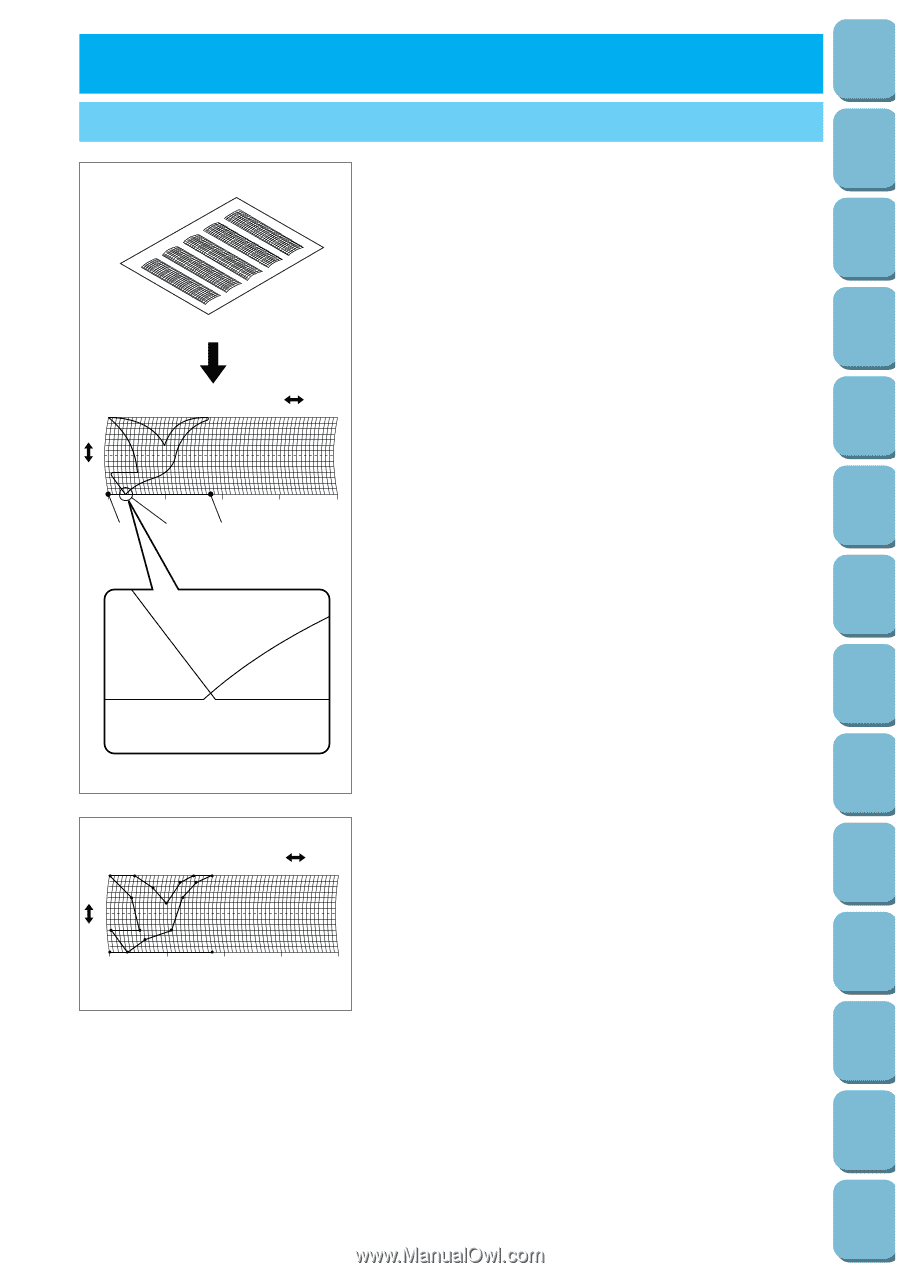
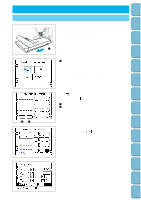
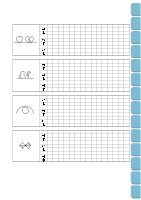
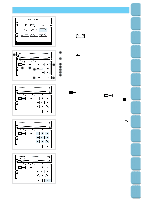
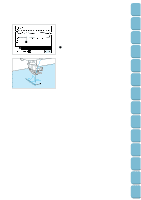
Setting Up Sewing Utility Stitches Characters and Decorative Stitches Embroidering Editing Embroidery Patterns 7. MY CUSTOM STITCHTM (CREATE YOUR OWN STITCH DESIGNS) MAKING THE ILLUSTRATION "Grid sheet" You can use the "MY CUSTOM STITCHTM" to sew patterns that you have drawn yourself. * Illustrations that are to be used with the "MY CUSTOM STITCHTM" can be a maximum of 7 mm wide and 33 mm long. * Patterns for the "MY CUSTOM STITCHTM" can be drawn more easily if you use the included grid sheet. 0 5 10 15 20 25 30 35 40 45 50 55 14 10 5 0 0mm 1 5mm 3 10mm 2 15mm 20mm 1. Draw the illustration onto the grid sheet (SA500, X80948001). 1 Start point 2 End point 3 Intersection * Simplify the drawing so that it can be drawn as a continuous line. If sewing continuous patterns, the height of the start point and end point should be the same. You can obtain a more attractive finish if you make the intersections cross over to make a closed design. 0 5 10 15 20 25 30 35 40 45 50 55 14 10 5 0 0mm 5mm 10mm 15mm 20mm 2. Mark coordinate points at each point in the pattern where the direction of the stitching changes, this will maintain the shape of the pattern as it is sewn. Retrieving My Custom Stitch TM Error Maintenance Messages Trouble shooting Sewing Chart Patterns (Programmed in Machine) Patterns (Memory Card) 160
-
 1
1 -
2
-
3
-
4
-
5
-
6
-
7
-
8
-
9
-
10
-
11
-
12
-
13
-
14
-
15
-
16
-
17
-
18
-
19
-
20
-
21
-
22
-
23
-
24
-
25
-
26
-
27
-
28
-
29
-
30
-
31
-
32
-
33
-
34
-
35
-
36
-
37
-
38
-
39
-
40
-
41
-
42
-
43
-
44
-
45
-
46
-
47
-
48
-
49
-
50
-
51
-
52
-
53
-
54
-
55
-
56
-
57
-
58
-
59
-
60
-
61
-
62
-
63
-
64
-
65
-
66
-
67
-
68
-
69
-
70
-
71
-
72
-
73
-
74
-
75
-
76
-
77
-
78
-
79
-
80
-
81
-
82
-
83
-
84
-
85
-
86
-
87
-
88
-
89
-
90
-
91
-
92
-
93
-
94
-
95
-
96
-
97
-
98
-
99
-
100
-
101
-
102
-
103
-
104
-
105
-
106
-
107
-
108
-
109
-
110
-
111
-
112
-
113
-
114
-
115
-
116
-
117
-
118
-
119
-
120
-
121
-
122
-
123
-
124
-
125
-
126
-
127
-
128
-
129
-
130
-
131
-
132
-
133
-
134
-
135
-
136
-
137
-
138
-
139
-
140
-
141
-
142
-
143
-
144
-
145
-
146
-
147
-
148
-
149
-
150
-
151
-
152
-
153
-
154
-
155
-
156
-
157
-
 158
158 -
 159
159 -
 160
160 -
 161
161 -
 162
162 -
 163
163 -
 164
164 -
 165
165 -
 166
166 -
 167
167 -
 168
168 -
169
-
170
-
171
-
172
-
173
-
174
-
175
-
176
-
177
-
178
-
179
-
180
-
181
-
182
-
183
-
184
-
185
-
186
-
187
-
188
-
189
-
190
-
191
-
192
-
193
-
194
-
195
-
196
 |
 |