Dell PowerVault 56F Dell PowerVault 51F 8-Port Fibre Channel Switch Insta - Page 112
Replacing the Fan Assembly, Removing the Switch Cover
 |
View all Dell PowerVault 56F manuals
Add to My Manuals
Save this manual to your list of manuals |
Page 112 highlights
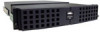
Replacing the Fan Assembly Replacing the fan assembly involves removing the switch's cover, the existing fan assembly, and installing a new assembly. NOTICE: See "Protecting Against Electrostatic Discharge" in the safety instructions at the front of this guide. You do not need to power off the switch during this replacement. The switch can safely run at the following temperatures while the fans are replaced: • 25 minutes at 23 degrees C at sea level (average conditions) • 4 minutes at 40 degrees C at three kilometers (km) altitude (extreme conditions) Figure 6-4. Removing the Switch Cover Removing the Switch Cover NOTICE: See "Protecting Against Electrostatic Discharge" in the safety instructions at the front of this guide. To remove the switch cover, you must perform the following steps. NOTICE: When removing the cover, you must slide it back and then lift it away from the system to avoid damaging it. 1. Unscrew the two captive screws at the back of the unit by turning them a quarter turn to the left. See Figure 6-4. 2. Slide the cover at least one 1/2-inch back from the front of the unit. 3. Lift the cover off. 6-4 Dell PowerVault 51F 8-Port Fibre Channel Switch Installation and Troubleshooting Guide
-
 1
1 -
2
-
3
-
4
-
5
-
6
-
7
-
8
-
9
-
10
-
11
-
12
-
13
-
14
-
15
-
16
-
17
-
18
-
19
-
20
-
21
-
22
-
23
-
24
-
25
-
26
-
27
-
28
-
29
-
30
-
31
-
32
-
33
-
34
-
35
-
36
-
37
-
38
-
39
-
40
-
41
-
42
-
43
-
44
-
45
-
46
-
47
-
48
-
49
-
50
-
51
-
52
-
53
-
54
-
55
-
56
-
57
-
58
-
59
-
60
-
61
-
62
-
63
-
64
-
65
-
66
-
67
-
68
-
69
-
70
-
71
-
72
-
73
-
74
-
75
-
76
-
77
-
78
-
79
-
80
-
81
-
82
-
83
-
84
-
85
-
86
-
87
-
88
-
89
-
90
-
91
-
92
-
93
-
94
-
95
-
96
-
97
-
98
-
99
-
100
-
101
-
102
-
103
-
104
-
105
-
106
-
 107
107 -
 108
108 -
 109
109 -
 110
110 -
 111
111 -
 112
112 -
 113
113 -
 114
114 -
 115
115 -
 116
116 -
 117
117 -
118
-
119
-
120
-
121
-
122
-
123
-
124
-
125
-
126
-
127
-
128
-
129
-
130
-
131
-
132
-
133
-
134
-
135
-
136
-
137
-
138
-
139
-
140
-
141
-
142
-
143
-
144
-
145
-
146
-
147
-
148
-
149
-
150
-
151
-
152
-
153
-
154
-
155
-
156
 |
 |
