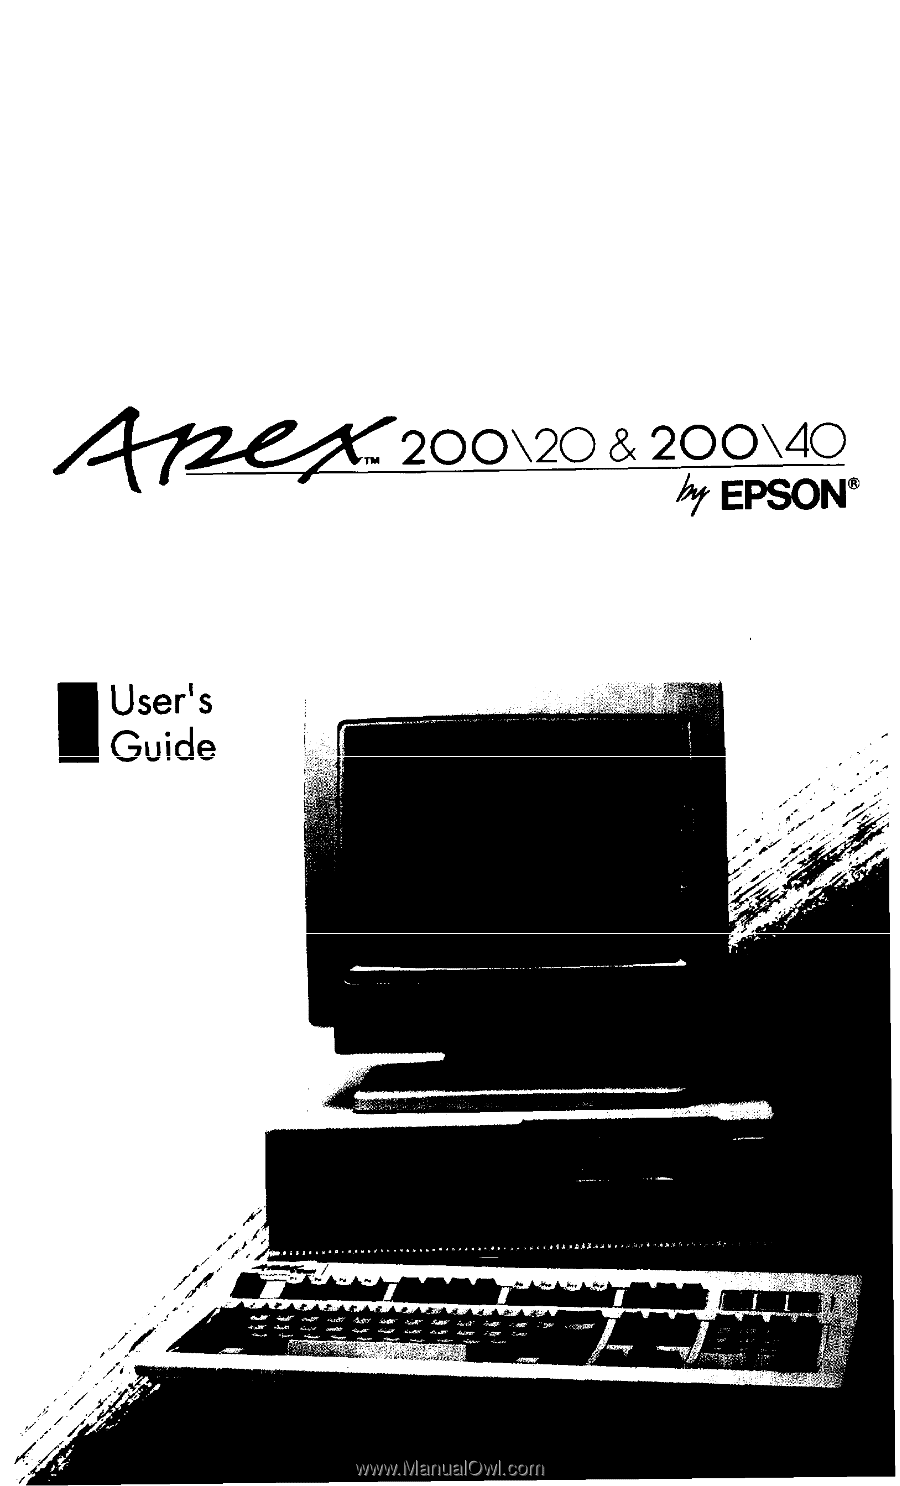
Epson Apex 200 User Manual
Epson Apex 200 Manual
 |
View all Epson Apex 200 manuals
Add to My Manuals
Save this manual to your list of manuals |
Epson Apex 200 manual content summary:
- Epson Apex 200 | User Manual - Page 1
- Epson Apex 200 | User Manual - Page 2
Apex 200\20 and Apex 200\40 Please use this card to evaluate this manual. Your comments and suggestions will help us improve our publications. Please rate the following: n Organization of this manual Technical accuracy Completeness of instructions : Please cut out and mail in. Thank you! EPSON - Epson Apex 200 | User Manual - Page 3
PLACE STAMP HERE EPSON America, Inc. 2780 Lomita Blvd. Torrance, CA 90505 M S 4-1 Fold Here - Epson Apex 200 | User Manual - Page 4
- Epson Apex 200 | User Manual - Page 5
OF WARRANTY Epson America makes no representations or warranties, either express or implied, by or with respect to anything in this manual, and notice. TRADEMARKS ActionPrinter and Apex are trademarks of Epson America, Inc. Epson is a registered trademark of Seiko Epson Corporation. Hercules is - Epson Apex 200 | User Manual - Page 6
accordance with the manufacturer's instructions, may cause interference to devices. To further isolate the problem: Disconnect the peripheral devices and Epson peripheral devices, you can obtain the proper shielded cable from your dealer. For non-Epson radio interference regulations of the Canadian - Epson Apex 200 | User Manual - Page 7
Contents Introduction 1 How to Use This Manual 2 Where to Get Help 3 Chapter 1 Setting Up Your System 1 Unpacking 1-1 Removing the Diskette Drive Protector Card 1-3 2 Choosing a Location 1-4 3 Connecting a Monitor 1-5 4 Connecting a Printer, Mouse, or Modem 1-7 - Epson Apex 200 | User Manual - Page 8
Chapter 3 Using Your Computer Changing the Operating Speed 3-1 Special Keys on the Apex Keyboard 3-2 Stopping a Command or Program 3-4 Resetting the Computer 3-5 Turning Off the Computer 3-6 Using Disks and Disk Drives 3-6 How Disks Store Data 3-6 Types of Diskette Drives 3-8 - Epson Apex 200 | User Manual - Page 9
Using Directories 4-16 The Default Directory 4-18 Changing the Default Directory 4-18 Using Pathname 4-19 Including Filenames With Pathnames 4-20 Including Drive Letters With Pathnames and Filenames 4-20 Creating Directories 4-22 Listing the Contents of a Directory 4-23 Displaying a List of - Epson Apex 200 | User Manual - Page 10
Chapter 6 Troubleshooting The Computer Won't Start 6-1 The Computer Does Not Respond 6-2 Keyboard Problems 6-3 Monitor Problems 6-4 Diskette Problems 6-5 Diskette Drive Problems 6-8 Hard Disk Problems 6-9 Software Problems 6-11 Printer Problems 6- 12 Option Card Problems 6- 13 Appendix A - Epson Apex 200 | User Manual - Page 11
Appendix B Power-on Diagnostics System Device Check B-1 Timer and CMOS RAM Check B-2 RAM Check B-3 Keyboard Controller and Keyboard Check B-3 Display Card Check B-4 Optional RAM Check B-4 Diskette Drive Seek Check B-4 Hard Disk Controller and Hard Disk Check B-5 Appendix C Performing System - Epson Apex 200 | User Manual - Page 12
Floppy Disk Drives and Controller Check C-21 Sequential Seek Check C-22 Random Seek Check C-22 Write, Read Check C-23 Speed Check C-23 Disk Change Check C-24 Run All Above Checks C-25 Math Coprocessor Check (80287 C-25 Parallel Port (Printer Interface) Check C-25 Parallel Port (on Video - Epson Apex 200 | User Manual - Page 13
Appendix E Preparing a Hard Disk for Use Partitioning the Hard Disk E-2 Creating the MS-DOS Partition E-3 Creating the Extended Partition E-4 Formatting the Primary Partition E-6 Formatting the Extended Partition E-8 Copying the Remaining Files to the Hard Disk E-9 Creating the AUTOEXEC.BAT - Epson Apex 200 | User Manual - Page 14
- Epson Apex 200 | User Manual - Page 15
instructions in this manual, you'll soon be using your favorite software programs. The Apex 200 computer is available in these configurations: The Apex 200\ manual, you'll find a complete reference manual for the operating system packed in the box with the computer. As a supplement to MS-DOS, Epson - Epson Apex 200 | User Manual - Page 16
instructions for using MS-DOS with your computer. Chapter 5 describes how to install option cards in your computer. Chapter 6 contains troubleshooting tips in case you encounter any problems while using your computer. Appendix A gives the technical specifications for the Apex 200\20 and Apex 200 - Epson Apex 200 | User Manual - Page 17
trouble if you are having serious problems with the hard disk in need to follow these instructions only if you have manual you'll find a glossary of the computer terms used in this manual and an index. Where to Get Help Customer service for Epson products is provided by a network of authorized Epson - Epson Apex 200 | User Manual - Page 18
- Epson Apex 200 | User Manual - Page 19
Setting up your Apex personal computer is instructions on the Read This First card included with this manual. (Turn to this chapter if you have any questions, and for instructions obtain the necessary part or parts, call your Epson Customer Care Center for assistance. Please have the computer's serial - Epson Apex 200 | User Manual - Page 20
and Operating 2), and a Reference diskette An MS-DOS Reference Manual. In addition to these items, you need a compatible monitor Epson can send you update information. You also should retain the computer's receipt from the place of purchase. The receipt is all that is required for warranty service - Epson Apex 200 | User Manual - Page 21
Removing the Diskette Drive Protector Card A protective piece of cardboard occupies the slot of the diskette drive in your computer. This card is inserted at the factory to protect the read/write heads in the drive. Be sure to remove the card from the diskette drive before you turn on the computer. - Epson Apex 200 | User Manual - Page 22
up your computer, it is important to choose the right location. Select a spot that provides the following: A large, sturdy desk or table that can easily support the weight of your system, including all of its components. Make sure the surface is hard and flat. Soft surfaces like beds and carpeted - Epson Apex 200 | User Manual - Page 23
to the computer depends on the type of monitor you have. See your monitor manual for detailed instructions, or follow these general guidelines: 1. Place your monitor on top of or near . (Some monitors, such as the color Apex monitor, come with permanently attached cables.) Setting Up Your System 1-5 - Epson Apex 200 | User Manual - Page 24
the plug has retaining screws, tighten them securely. 4. If necessary, plug the monitor's power cord into the monitor's power inlet. (The power cord on Apex monitors is already attached.) 5. Plug the other end of the monitor's power cord into an electrical outlet. Note If the monitor has the proper - Epson Apex 200 | User Manual - Page 25
Note Many color monitors display in only one color (such as green or amber), but are not monochrome monitors. If your monitor is not specifically a monochrome monitor, you should set the color/mono switch to color. Check the documentation that came with your monitor to verify the type of monitor. 4 - Epson Apex 200 | User Manual - Page 26
Using the Parallel Interface The parallel interface on your computer is Centronics® compatible and uses a 25-pin connector. To connect a parallel printer to your computer, you need an IBM-compatible printer cable. If you are not sure which one you need, or whether you have the right one, check with - Epson Apex 200 | User Manual - Page 27
3. Connect the other end of the cable to the printer, as shown below. If the printer has retaining clips on each side of the printer port, squeeze the clips together to secure the cable. 4. Plug the printer's power cord into an electrical outlet. Using the Serial Interface If you have a serial - Epson Apex 200 | User Manual - Page 28
serial port for a printer If you are using a serial printer but your software does not support a serial printer, you must do two things before you can print: Set up the data easy way to use MODE. For instructions, see the description of the Mode Settings option of the MENU program in your MS-DOS - Epson Apex 200 | User Manual - Page 29
5 Connecting the Power Cord Follow these steps to connect the power cord: 1. Insert the power cord into the AC inlet on the computer's back panel, as shown below. To avoid an electric shock, be sure to plug the cord into the computer before plugging it into the wall socket. 2. Plug the other end of - Epson Apex 200 | User Manual - Page 30
6 Connecting the Keyboard Follow these steps to connect the keyboard: 1. Facing the front of the computer, open the cover on the lower left comer. Push the top of the cover inward and then release it. 2. Plug the keyboard cable into the socket, as shown in the following illustration. Do not force - Epson Apex 200 | User Manual - Page 31
3 . Push the cable into the notch at the left side of the computer, as shown below, so the cable leads away to the left side of the computer. 4. Close the keyboard cable cover, Setting Up Your System 1-13 - Epson Apex 200 | User Manual - Page 32
Adjusting the Keyboard Angle You can change the angle of the keyboard by adjusting the legs on the bottom. Turn the keyboard over and lift each leg upward until it locks into place, as shown below. You can lock the legs into a low or high position, or leave them flat. 7 Setting the Front Monitor - Epson Apex 200 | User Manual - Page 33
Move the switch to the right to select color and to the left to select monochrome. If you have an EGA or VGA monitor, set the switch to color. 8 Turning On the Computer Before you turn on your computer, read the following safety rules to avoid accidentally damaging the computer or injuring yourself: - Epson Apex 200 | User Manual - Page 34
the computer. Only remove the cover to install and remove optional devices. If there is a hardware problem you cannot solve after reading the appropriate section in Chapter 6, contact your Epson Customer Care Center. Always turn off the power, disconnect all cables, and wait five seconds before you - Epson Apex 200 | User Manual - Page 35
the hard disk., If your computer does not have a hard disk, you must use this method. See "Loading MS-DOS From a Diskette" in Chapter 4 for instructions. Setting Up Your System 1-17 - Epson Apex 200 | User Manual - Page 36
the hard disk, you see the MS-DOS command prompt on the screen: C:\> The command prompt tells you that your computer is ready to receive instructions. It also identifies the current operating drive: A or C, for example. The command prompt appears on the screen whenever you load MS-DOS, complete an - Epson Apex 200 | User Manual - Page 37
Note If you do not have any 360KB diskettes, you can use unformatted 1.2MB, high-density diskettes. When copying from 360KB diskettes, the DISKCOPY program fomats the 1.2MB high-density diskettes for 360KB. Follow these steps: 1. The C : \> prompt should be on the screen. If not, type C : and press - Epson Apex 200 | User Manual - Page 38
When the diskette is in all the way, turn the latch down (clockwise) to lock the diskette in place. 4. Press any key. The DISKCOPY program copies the contents of the Startup diskette to the computer's memory, and then you see the following: Insert TARGET diskette in drive A: Press any key when ready - Epson Apex 200 | User Manual - Page 39
After you have copied the four diskettes, be sure to label them carefully so you know which one is which. Write on the labels before you attach them to the diskettes in order to prevent damaging the diskettes. Store the originals in a safe place and use the copies as they are needed. You are now - Epson Apex 200 | User Manual - Page 40
- Epson Apex 200 | User Manual - Page 41
Chapter 2 Running the Setup Program The first time you use your computer after setting it up, you need to run the Setup program on the Reference diskette. The Setup program lets you update the following for your computer: The amount of memory installed The type of video display adapter installed The - Epson Apex 200 | User Manual - Page 42
you do not want to make any changes, or when you have finished making changes, select the E x i t option. See "Leaving the Setup Program" below for instructions. Note Another way to start the Setup program is to turn on or reset the computer with the Reference diskette in the drive. If you - Epson Apex 200 | User Manual - Page 43
Follow the instructions below to verify or change the values for the Setup options extended memory to set up RAM disks for temparary storage, using the VDISK.SYS driver. See your MS-DOS manual for information regarding VDISK.SYS. If you have changed the amount of memory in the computer, follow these - Epson Apex 200 | User Manual - Page 44
monitor. One monitor switch is on the MGA card on the back of the compuer and the other is on the front. See Chapter 1 for instructions. - Epson Apex 200 | User Manual - Page 45
select * Special Options *. You may also need to set a DIP switch on the video card which overrides the display setting in CMOS RAM. See the instructions that came with the video card. If you have a composite color monitor, such as a color television with a video input, try selecting Color/graph. 80 - Epson Apex 200 | User Manual - Page 46
If you have any other combination of monitor and video card, consult the documentation supplied with your video card. 3. Highlight the appropriate option and press Enter. 4. Highlight ** SAVE SETTINGS ** and then press Enter to save the setting. Adding an 80287 Coprocessor Use the Coprocessor option - Epson Apex 200 | User Manual - Page 47
Changing the Disk Drive Settings Use the Mass storage option of the main menu if you install an additional diskette drive or hard disk drive, or if you remove an existing drive. Follow these steps: 1. Highlight Mass storage and press Enter. You see a menu like this: Drive A: 1.2 MB Drive B: None - Epson Apex 200 | User Manual - Page 48
the real-time clock's time and date is with the MS-DOS (version 3.3 or later) TIME and DATE commands. See your MS-DOS Reference Manual for instructions. Follow these steps to set the real-time clock: 1. Highlight Real-time clock and press Enter. You see the current setting for the time and - Epson Apex 200 | User Manual - Page 49
3. Using a 24-hour time period, enter the time in the exact format shown in the box. Use two digits for each part (you can omit the seconds, if desired); the Setup program automatically inserts the colons (:). For example, to change the time to 1:30 p.m., you would type the following: 1330 If you - Epson Apex 200 | User Manual - Page 50
The time and date are set automatically as soon as you press Enter after typing the time and date; you do not need to save these settings. Therefore, if you change either setting in the Setup program and then exit the program without saving your changes, the new time or date still takes effect. - Epson Apex 200 | User Manual - Page 51
If you did not make any changes or you want to cancel the changes you made, highlight Exit without saving and press Enter. The command prompt appears on the screen. (If you turned on or reset the computer with the Reference diskette in the drive, the Operation menu appears on the screen. Press 0 and - Epson Apex 200 | User Manual - Page 52
- Epson Apex 200 | User Manual - Page 53
programs may be run at 12 MHz. However, some option cards and application programs require the lower speed. See your option card or application program manual to make sure that you can use the higher speed before selecting it. Use the CPU SPEED switch on the front panel to change the - Epson Apex 200 | User Manual - Page 54
prompt, and then change the speed. Special Keys on the Apex Keyboard Certain keys on your keyboard serve special functions when your computer programs. (Some keys also function with MS-DOS. See your MS-DOS Reference Manual for more information.) Moves the cursor one tab to the right in normal - Epson Apex 200 | User Manual - Page 55
character to the left of the cursor. Ends a line of keyboard input or executes a command (may be called the Return key in some application program manuals). Changes the letter keys from lower- to uppercase; changes back to lowercase when pressed again. The numeric/symbol keys on the top row of the - Epson Apex 200 | User Manual - Page 56
The Num Lock, Scroll Lock, and Caps Lock keys work as toggles; press the key once to turn on a function and again to turn it off. When the function is enabled, the corresponding light on the top right comer of the keyboard is on. When the function is disabled, the light is off. Stopping a Command or - Epson Apex 200 | User Manual - Page 57
and then the computer reloads MS-DOS. If this does not correct the problem, try the second method. 2. Press the RESET button on the front panel keyboard does not respond to your commands. If this does not correct the problem, try the third method. 3. Remove any diskettes from the diskette drive. - Epson Apex 200 | User Manual - Page 58
drives in your computer allow you to store data on disk and retrieve it when you want it. The Apex 200\20 has one 1.2MB diskette drive and one 20MB hard disk. The Apex 200\40 has one 1.2MB diskette drive and one 40MB hard disk. This section explains how disks work and tells - Epson Apex 200 | User Manual - Page 59
with many more tracks than a diskette. A disk is further divided by sectors. To understand what a sector is, picture the spokes on a bicycle wheel radiating from the center of the wheel to the tire. The space between one spoke and the next is like a sector on a diskette. (See the figure below.) Each - Epson Apex 200 | User Manual - Page 60
to 1.2MB of information, which is approximately 500 pages of text. You can also format these diskettes for 360KB-see your MS-DOS Reference Manual for more information. In addition, you may have a diskette drive of a different type. The following list describes the types of optional diskette drives - Epson Apex 200 | User Manual - Page 61
new data, so be sure to format only new blank diskettes or diskettes that contains data you want to erase. See Chapter 4 for instructions on formatting diskettes. Drive and diskette incompatibilities Because of the size difference, you cannot use 3½-inch diskettes in a 5¼-inch drive or vice versa - Epson Apex 200 | User Manual - Page 62
WARNING If you write to a 360KB (or 160KB, 180KB, or 320KB) diskette while it is in a 1.2MB drive, you may not be able to read it or write it in a 360KB drive later. 3½-inch drive/diskette compatibility Drive type 720KB 1.44MB Diskette types it can read from and write to 720KB 720KB, or 1.44MB - Epson Apex 200 | User Manual - Page 63
Never wipe, brush, or try to clean diskettes in any way. Keep diskettes in a moderate environment. They work best at normal room temperature and in normal humidity. Do not leave your diskettes sitting in the sun, or in extreme cold or heat. Keep diskettes away from magnetic fields. (Remember that - Epson Apex 200 | User Manual - Page 64
Follow these additional precautions to protect your hard disk drive and its data: Never turn off the computer when the hard disk drive light is on. This light indicates that the computer is copying data to or from the hard disk. If you interrupt this process, you can lose data. Never attempt to open - Epson Apex 200 | User Manual - Page 65
Slide the diskette into the slot until it is in all the way. Then turn the drive latch down to lock it in a vertical position. This keeps the diskette in place and enables the read/write heads in the diskette drive to access the diskette, If a diskette is in the drive but the latch is up (horizontal - Epson Apex 200 | User Manual - Page 66
To remove a 3½-inch diskette, press the release button to release it. When the edge pops out of the drive, pull out the diskette and store it properly. WARNING Never remove a diskette or turn off the computer while the drive indicator light is on. You could lose data. Also, be sure to remove all - Epson Apex 200 | User Manual - Page 67
Note Some program diskettes, such as your MS-DOS diskettes, have no notch so they are permanently write-protected. This protects them from being accidentally erased or altered. On a 3½-inch diskette, the write-protect device is a small switch on the lower-right comer on the back, shown below. To - Epson Apex 200 | User Manual - Page 68
, use the DISKCOPY command or the MENU program. See Chapter 4 for more instructions on using DISKCOPY and MENU. It is best to put most of the programs "Backing Up Data" in Chapter 4 and check your MS-DOS Reference Manual. Using a Single Diskette Drive The operating system expects the computer to have - Epson Apex 200 | User Manual - Page 69
you can remove that diskette and insert the program diskette you want to use, and load that into memory too. See your application program manual for detailed instructions. Using the Hard Disk Drive You can create and revise files on a hard disk just as you can on a diskette. The hard disk, however - Epson Apex 200 | User Manual - Page 70
. These capabilities are especially useful on the hard disk drive. See Chapter 4 for an introduction to XTREE or see your MS-DOS Reference Manual for complete instructions. The hard disk in your computer has been prepared at the factory so it contains all the MS-DOS system files and automatically - Epson Apex 200 | User Manual - Page 71
To secure the read/write heads for moving, run the HDSIT program. Follow these steps to run HDSIT: 1. Exit any program you are using so the MS-DOS command prompt is on the screen, 2. Insert the Reference diskette in drive A. 3. Type the following and press Enter: A:HDSIT You see a message on the - Epson Apex 200 | User Manual - Page 72
- Epson Apex 200 | User Manual - Page 73
are introduced in this chapter. If you need more information, see your MS-DOS Reference Manual for a complete description of MS-DOS. This chapter covers the following topics: Starting and Backing up data Using special Epson utilities Using an AUTOEXEC.BAT file. Using MS-DOS With Your Computer 4-1 - Epson Apex 200 | User Manual - Page 74
this method if your computer does not have a hard disk. Follow the instructions in the next section. Loading MS-DOS From a Diskette Follow these steps off, insert the Startup diskette into drive A. (For detailed instructions on inserting diskettes, see "Inserting and Removing Diskettes" in Chapter - Epson Apex 200 | User Manual - Page 75
this point on, until you return to the MS-DOS command prompt, refer to the application program manual for any instructions on using the program. Using Drive Designators MS-DOS uses letters to identify the disk drives in your computer. If you have one diskette drive, - Epson Apex 200 | User Manual - Page 76
The Default Drive At any given time, MS-DOS considers one disk drive to be the default drive. The default drive is the one on which MS-DOS executes your next command, unless you tell it to do otherwise. For example, if the default drive is C, and you issue the DIR (directory) command, MS-DOS lists - Epson Apex 200 | User Manual - Page 77
Specifying the Drive Designator If you want to access a program or file on another drive without first changing the default drive, type the drive designator along with the filename. For example, if you are logged onto drive A and want to use a file named PROGRAM on drive C, you would type the - Epson Apex 200 | User Manual - Page 78
.EXE SETFC.EXE SETMODE.EXE SETPRINT.EXE DU.EXE GRAPH24.COM EPSON.TXT HELP.COM HELP.TXT Reference diskette ALTPTST.DIG ALTSTST.DIG AUTOEXEC external command, MS-DOS must be able to locate the file containing the command's instructions. If it cannot find the file, MS-DOS gives you an error message. - Epson Apex 200 | User Manual - Page 79
For example, if you have two diskette drives, and are logged onto drive A, you could format a diskette in drive B with the command: FORMAT B: In this case, MS-DOS looks on drive A, the default drive, for the file named FORMAT.COM. If the diskette in that drive contains the file FORMAT.COM (as does - Epson Apex 200 | User Manual - Page 80
expect the diskette to be double-sided. Switches are preceded by a forward slash: 1. See your MS-DOS Reference Manual for more information on the command format. Also see your MS-DOS manual for command descriptions that tell you which parameters and delimiters are required for each command and which - Epson Apex 200 | User Manual - Page 81
information, such as words, numbers, or pictures. A program file contains instructions that the computer can understand and execute. The kind of file you If you use a different application program to read that file, you may encounter problems. When you create a file, you need to give it a name. You - Epson Apex 200 | User Manual - Page 82
files. The .BAT extension denotes a particular kind of executable file called a batch file. Batch files can be used to automate sequences of MS-DOS instructions. Even if you are not a programmer, you may want to create some batch files to assist you in your work. A particularly useful kind of - Epson Apex 200 | User Manual - Page 83
You can use the COPY command to copy files in several ways: You can copy individual files from one disk to another You can copy a group of files at once using wildcard characters You can copy one or more files and give them new names You can combine or merge files into one file. To use the COPY - Epson Apex 200 | User Manual - Page 84
Now you have two files on the default drive that have the same contents but different names. In this example, you can omit the drive designators because the original file and the copy are both on the default drive. Using wildcards An easy way to copy a group of files is by using wildcard characters - Epson Apex 200 | User Manual - Page 85
of files. XCOPY, an external command, offers an efficient way to copy certain groups of files. For details about XCOPY, see your MS-DOS Reference Manual. Renaming Files You can use the RENAME command to change the name of a file or group of files on the same disk and directory. For - Epson Apex 200 | User Manual - Page 86
: REN MEMOS? MEMOS?.OLD This command would rename files such as MEMOS1 and MEMOS2 to MEMOS1.OLD and MEMOS2,OLD. See your MS-DOS Reference Manual for more information on the RENAME command, Deleting Files You can delete files you no longer need with the DEL (delete) command. For example, to - Epson Apex 200 | User Manual - Page 87
You can use wildcards to delete groups of files. For example, to delete all files on the diskette in drive A (in the current directory), type the following and press Enter: DEL A:*.* Because deleting all files is a serious procedure, MS-DOS prompts you to confirm the command when you use the * . * - Epson Apex 200 | User Manual - Page 88
3. Type the name of the device, such as PRN, and press Enter. MS-DOS prints the file on your printer. See your MS-DOS Reference Manual for more information on the PRINT command. Using Directories You can create many files on a diskette, and a hard disk can store thousands of files. To - Epson Apex 200 | User Manual - Page 89
As the number of files in your WORDPROC and SPDSHEET directories grows, you can create additional directories subordinate to those two-like this, for example: Root directory WORDPROC DOS BUSINESS PERSONAL SPDSHEET I SALES PROJ This structure would let you segregate your business word processing - Epson Apex 200 | User Manual - Page 90
The following sections discuss the basics of creating and using directories. Note The XTREE utility provides a simple way to see and organize your directories. See the description of XTREE later in this chapter. The Default Directory MS-DOS always recognizes one directory as the default or current - Epson Apex 200 | User Manual - Page 91
To change from PERSONAL back to WORDPROC, you can use the special symbol . . (two periods). The . . symbol always designates the parent directory. In other words, you can type: CD . . Using Pathnames A pathname tells MS-DOS how to find its way to the directory you want to access. There are two basic - Epson Apex 200 | User Manual - Page 92
Thus, if the default directory were WORDPROC (in the above example), the pathname . . \DOS would tell MS-DOS to move up one level from WORDPROC (in this case to the root directory) and then find a subdirectory called DOS. You can use either relative or absolute pathnames at any time, as long as you - Epson Apex 200 | User Manual - Page 93
Note that if you change from one drive to another and then try to access a file on the previous drive, MS-DOS remembers which was the default directory when you were last logged onto that drive. For example, suppose the last time you were logged onto drive C, the default directory was the root - Epson Apex 200 | User Manual - Page 94
SUBST lets you substitute a drive letter for a directory path, which is convenient if you frequently type long pathnames. See your MS-DOS Reference Manual for information on these helpful commands. Creating Directories You use the MKDIR command to create directories in MS-DOS. For example, to create - Epson Apex 200 | User Manual - Page 95
Listing the Contents of a Directory You can use the DIR command to list all the files in a particular directory. For example, to list the files in the current directory, type the following and press Enter: DIR MS-DOS lists the names of the files in the current directory on the current drive, in a - Epson Apex 200 | User Manual - Page 96
Another way to view a long directory listing is to use the /W switch: DIR /W This displays the directory listing in a wide format, as follows: Directory of C:\WORDPROC\PERSONAL . . LETTER.713 RESUME BOOKRPRT 5 File(s) 16013560 bytes free As you can see, this type of listing does not show the size of - Epson Apex 200 | User Manual - Page 97
The screen displays a report for every directory on the drive, for example: Path: C:\LEDGER Sub-directories:RECEIV PAYABL SALES If you would also like to see a list of all the files in the directories, add the /F switch to the command: TREE /F The screen displays the directory information shown - Epson Apex 200 | User Manual - Page 98
been formatted. (See the description of DISKCOPY later in this chapter.) Note Besides the method described below, you can also format diskettes using the Epson MENU utility. This program is easy to use because it lets you select options from a menu. For more information, see the section on MENU - Epson Apex 200 | User Manual - Page 99
command prompt by pressing N and Enter. The formatted diskette is now ready to store data. Note You can also format diskettes for 360KB in your Apex computer. See the MS-DOS Reference Manual for information about options you can use with the FORMAT command. Using MS-DOS With Your Computer 4-27 - Epson Apex 200 | User Manual - Page 100
command prompt by pressing N and Enter. The formatted diskette is now ready to store data. Note You can also format diskettes for 360KB in your Apex computer. See the MS-DOS Reference Manual for information about options you can use with the FORMAT command. - Epson Apex 200 | User Manual - Page 101
your diskettes. DISKCOPY and BACKUP are described below. The COPY command is described in the previous section, "Copying Files." See your MS-DOS manual for information on XCOPY. Note Alternative ways to perform the functions listed above are through the MENU and XTREE programs. See the sections on - Epson Apex 200 | User Manual - Page 102
two diskette drives" below. 1. Make sure the diskette you want to copy is write-protected. (See "Write-protecting Diskettes" in Chapter 3 for instructions.) 2. If necessary, type C : and press Enter to log onto drive C. 3. At the C : \> prompt, type the following and press Enter: DISKCOPY A: A: MS - Epson Apex 200 | User Manual - Page 103
with two diskette drives 1. Make sure the diskette you want to copy is write-protected. (See "Write-protecting Diskettes" in Chapter 3 for instructions.) 2. If necessary, type C : and press Enter to log onto drive C. 3. At the C : \> prompt, type the following and press Enter: DISKCOPY A: B: MS-DOS - Epson Apex 200 | User Manual - Page 104
steps to copy a diskette: 1. Make sure the diskette you want to copy is write-protected. (See "Write-protecting Diskettes" in Chapter 3 for instructions.) 2. Insert the Operating 1 diskette in the diskette drive. 3. At the A> prompt, type the following and press Enter: DISKCOPY A: A: MS-DOS displays - Epson Apex 200 | User Manual - Page 105
5. Remove the original diskette from drive A and insert the blank diskette (the target) in the drive. Press any key. If the new diskette is not formatted, DISKCOPY formats it and then copies the contents of memory to the diskette. When the copy is complete, you see this message: Copy another - Epson Apex 200 | User Manual - Page 106
is completely full, and about 34 1.2MB diskettes to back up a full 40MB hard disk. See your MS-DOS Reference Manual for complete instructions on using BACKUP. Using HELP The Epson HELP program provides online information about MS-DOS commands and programs. You can use HELP in either of two ways: You - Epson Apex 200 | User Manual - Page 107
To bypass the HELP menu and get information about one command, follow these steps: 1. At the command prompt, type HELP, followed by the name of the MS-DOS command you want information about, and press Enter. For example, to see help information for the COPY command, type the following and press - Epson Apex 200 | User Manual - Page 108
Using MENU Your computer comes with a program provided by Epson called MENU. With this program you can display a menu of commands and select the one you need. MENU is easy to use because it lets - Epson Apex 200 | User Manual - Page 109
DOS Command Lets you run other MS-DOS commands without leaving the MENU program. For step-by-step instructions on using each MENU option, see your MS-DOS Reference Manual. Using the XTREE Utility Epson has included the XTREE program with MS-DOS to make it easier for you to manage files and - Epson Apex 200 | User Manual - Page 110
Make new directories, rename directories, delete empty directories, and change from one directory to another Display data in both ASCII and hexadecimal format Execute programs without leaving the XTREE program Display how much space is available on your disks. Running XTREE To run XTREE, log onto - Epson Apex 200 | User Manual - Page 111
This menu provides the following information: Path: Shows the pathname for the current directory. A single backslash identifies the root directory. LOS The directory structure illustrated under the backslash reflects the organization of the directories on the disk. In this case, the DOS - Epson Apex 200 | User Manual - Page 112
Use the cursor keys to move the highlighted bar. To select a file or directory, use the arrow keys to highlight the name of the file or directory. Press Enter to move the highlighted bar from the directory (top) window to the file (bottom) window. Press Enter to expand the file window, and then - Epson Apex 200 | User Manual - Page 113
file, you must first remove its protection. (See your MS-DOS Reference Manual for details about the ATTRIB command.) XTREE is limited in the number of files can do is shown on the screen display. See your MS-DOS Reference Manual for a complete description of XTREE. Using an AUTOEXEC.BAT File You may - Epson Apex 200 | User Manual - Page 114
file that sets a path to all the MS-DOS commands and changes the command prompt to show the current directory. See your MS-DOS Reference Manual for instructions on using the PATH command, the PROMPT command, and any other commands you want to include in your AUTOEXEC.BAT file. Also see the - Epson Apex 200 | User Manual - Page 115
The first line changes the MS-DOS command prompt so that it displays your current directory. The second line tells MS-DOS to look for programs or batch files in the DOS directory. This way you can run programs in that directory without having to specify pathnames in the commands. Note The AUTOEXEC. - Epson Apex 200 | User Manual - Page 116
need to change anything in the AUTOEXEC.BAT file later, you can use the same procedure to modify the commands. See your MS-DOS Reference Manual for instructions. Using HDCACHE for the Hard Disk You can use the MS-DOS program HDCACHE to enhance the performance of your hard disk. This program - Epson Apex 200 | User Manual - Page 117
disk controller occupies another slot. In addition, one slot is always occupied by the video card that operates your monitor. Option cards are made by Epson as well as other vendors. In addition, multifunction boards allow you to add more than one feature per slot. This chapter describes how to - Epson Apex 200 | User Manual - Page 118
1. If the monitor is on top of the computer, disconnect it and move it to one side. Disconnect the keyboard and any peripherals and set them out of the way too. Turn the computer around so that the back panel faces you. 2. As shown below, the top cover is secured by five screws on the back panel and - Epson Apex 200 | User Manual - Page 119
You can separate the sides of the cover from the bottom ledge of the computer by pulling them outward slightly, as shown below. 4. When the back edge of the cover is a few inches away from the back panel, you can lift the cover off, Set the cover aside carefully. Installing Option Cards 5-3 - Epson Apex 200 | User Manual - Page 120
Most option cards can be placed into any of the option slots. Some cards, however, must be installed in a specific slot. Check the option card manual to see if your option card must go in a specific slot. If you are installing a new video card, you may remove the MGA card that - Epson Apex 200 | User Manual - Page 121
card. Keep the screw and washer. You use them to secure the option card to the computer. 2. Unpack the option card and read all the instructions that come with it. If necessary, adjust switches or jumper connections on the card. Installing Option Cards 5-5 - Epson Apex 200 | User Manual - Page 122
Note Pay specific attention to warnings in your option card instructions. Some devices have delicate CMOS chips that you should not touch. When you handle the card, be careful not to touch any of the contacts - Epson Apex 200 | User Manual - Page 123
not change any of them unless you are sure the option card you are installing requires different settings. If you have any questions, ask your Epson Customer Care Center service representative. Installing Option Cards 5-7 - Epson Apex 200 | User Manual - Page 124
jumper functions and locations for each card are described separately. All the instructions assume you have already removed the cover from the computer. Changing a on the memory card. Be sure to check your memory card instructions to see if this is necessary. EPROM size. You can change the EPROM size - Epson Apex 200 | User Manual - Page 125
The table below shows the functions for the jumpers on the memory card. Memory card jumper settings Jumper number 1 2 3 A A B A B B A B l Default setting Function 640KB * 512KB (disable upper 128KB) 256KB (disable upper 384KB) Select EPROM size 27128* Select EPROM size 27256 To access the memory - Epson Apex 200 | User Manual - Page 126
of wait states (1 or 2) used by the EPROM. Selectable wait states are available only when your computer is running at 12 MHz. Please consult your Epson Customer Care Center for assistance. Number of wait states for 16-bit device access. If necessary, you can change the number of wait states - Epson Apex 200 | User Manual - Page 127
it is easy to damage a math coprocessor, you should have your Epson Customer Care Center install it for you. In addition to checking the jumper System Diagnostics program. See Chapter 2 for instructions on running Setup. See Appendix C for instructions on testing the math coprocessor. The table - Epson Apex 200 | User Manual - Page 128
When you finish changing the jumpers, carefully replace the memory card in its slot and secure it with the retaining screw. Multi-function Card Jumpers The jumpers on the multi-function card control the parallel port address and the serial port address. You normally address the parallel and serial - Epson Apex 200 | User Manual - Page 129
Multi-function card jumper settings for parallel port Jumper number 3 4 10 A A A A B B B A A B B * Default Setting Function Enable built-in port as primary * Enable built-in port as secondary Enable compatibility with IBM monochrome display/printer adapter Disable built-in port The table below - Epson Apex 200 | User Manual - Page 130
To access the multi-function card jumpers, you need to remove the card from the computer: 1. Unplug the disk drive cable from the card as shown below. Pull it straight up and out, then lay it to one side. 2. Remove the retaining screw from the multi-function card at the back panel of the computer, - Epson Apex 200 | User Manual - Page 131
3. Remove the card from the slot (pull it straight up) and set it on a soft surface with the components facing up. The location of the jumpers is shown below. Change them as needed and then reverse the three steps above to reinstall it. Removing an Option Card If you need to remove an option card, - Epson Apex 200 | User Manual - Page 132
Replacing the Cover With the option card properly installed or removed, the last step is to replace the cover of the computer: 1. Facing the front of the computer, position the cover on the computer as shown below. - Epson Apex 200 | User Manual - Page 133
2. Pull the sides of the cover outward slightly and lower the cover over the computer. Guide the curved edge on the bottom of the cover along the bottom of the computer. 3. Slide the cover straight back until the front panel is - Epson Apex 200 | User Manual - Page 134
additional drive. See Chapter 2 of this guide for information on the Setup program. You may also need to add some commands in the configuration files on your system disk as well. See the description of CONFIG.SYS in your MS-DOS Reference Manual for instructions. When you finish installing an option - Epson Apex 200 | User Manual - Page 135
a software procedure, or resetting the computer. If you still have a problem after trying the recommended solution, consult your Epson Customer Care Center. (For the location of the center nearest you, call the Epson Consumer Information Center number: 1-800-922-8911.) When you contact your - Epson Apex 200 | User Manual - Page 136
all the connections are secure but your computer still won't start, call your Epson Customer Care Center. Note If the computer starts but you can't see anything on the monitor, check the section below on Monitor Problems. The Computer Does Not Respond If your computer locks up and does not respond - Epson Apex 200 | User Manual - Page 137
. Follow the instructions in Chapter 3 for resetting your computer. 5. If resetting the computer does not solve the problem, turn it off diskette in drive A before turning on the computer. Keyboard Problems If you are having trouble with the keyboard, check the following: 1. If a Troubleshooting 6-3 - Epson Apex 200 | User Manual - Page 138
Problems the Monitor" in Chapter 1 for more details. Also check the monitor manual for directions on connecting it to the computer. 5. If you are using is on the back. See "Connecting the Monitor" in Chapter 1 for instructions. Note Many monitors display in only one color (such as green or amber - Epson Apex 200 | User Manual - Page 139
program requires a monitor that supports graphics but you have a manual. If the diagnostics program indicates an error, contact the place where you bought the monitor. If you are using an Apex monitor, call your Epson Customer Care Center for assistance. Diskette Problems If you have trouble - Epson Apex 200 | User Manual - Page 140
program manual. 5. problem if the diskette was not seated properly in the drive. If the error message still occurs, you probably have a defective diskette. Use the MS-DOS COPY command to copy the files from the diskette onto another diskette. See "Copying Files" in Chapter 4 for instructions - Epson Apex 200 | User Manual - Page 141
or diskettes that may be defective. See your MS-DOS Reference Manual for instructions on using RECOVER. WARNING RECOVER renames all files on the incorrectly. This is probably the case if you have one of these problems: Part of a file is missing A file includes parts of other Troubleshooting 6-7 - Epson Apex 200 | User Manual - Page 142
use the /F switch in the command like this: CHKDSK A: /F See the description of CHKDSK in your MS-DOS Reference Manual before making corrections to the diskette. Diskette Drive Problems Follow these steps if you are having difficulty with a diskette drive: 1. If the diskette is not turning or the - Epson Apex 200 | User Manual - Page 143
problems with your hard disk, try the following steps: 1. If the drive is making loud noises, or not functioning at all, do not attempt any further examination of it. Instead, contact your nearest Epson (See your MS-DOS Reference Manual for instructions on using COMPARE.) If the Troubleshooting 6-9 - Epson Apex 200 | User Manual - Page 144
MS-DOS partition. See your MS-DOS Reference Manual for instructions on using FDISK. If your hard disk does problems with it, try running the Hard Disk Drive and Controller diagnostics check, as described in Appendix C of this manual. If the diagnostics program indicates an error, contact your Epson - Epson Apex 200 | User Manual - Page 145
(described in the MS-DOS manual). Follow the instructions in Appendix D to perform a low-level format. Follow the instructions in Appendix E to prepare the disk. (See Appendix D for instructions.) Software Problems If you are having trouble with an application program, try the Troubleshooting 6-11 - Epson Apex 200 | User Manual - Page 146
keyboard, you can reset it. Follow the instructions under "Resetting the Computer" in Chapter 3. Printer Problems Below are some general steps to follow connected to the computer. Check Chapter 1 of this manual or your printer manual for instructions on how to connect your printer to the computer. - Epson Apex 200 | User Manual - Page 147
the MENU utility. See your printer manual and the MS-DOS Reference Manual for more information. 4. Many application instructions that come with the option card. The most common problem with option cards is a loose connection. Make sure the option card is well-seated in its slot. Troubleshooting - Epson Apex 200 | User Manual - Page 148
. 4. Did you perform the correct setup procedures for the software you are using with the option card? If necessary, see your software manual for instructions on running the software setup procedure. 5. Some option cards work at only one speed. Your computer can run at either 8 MHz or 12 MHz - Epson Apex 200 | User Manual - Page 149
to 15.5MB maximum with expansion cards 32KB, expandable to 64KB, selectable alternate ROM for custom use 80287 (8 MHz) support (optional) Controllers Diskette Hard disk Supports up to two drives available in any of four formats: double-density (360KB), double-density (720KB), high-density (1.2MB - Epson Apex 200 | User Manual - Page 150
Interfaces Serial Printer Option slots Speaker Clock/calendar RAM Power Supply Mass Storage Standard RS-232C, programmable, asynchronous, DB-9P male connector Standard 8-bit parallel, DB-25S female connector Six IBM PC/AT-compatible input/output expansion slots (three 8-bit and three 16-bit): one - Epson Apex 200 | User Manual - Page 151
Hard disk drive Optional Optional Optional Optional Optional 3 ½-inch or 5 ¼-inch, half-height internal hard disk; 20MB or 40MB storage capacity; ST 506/412 interface 5 ¼-inch, half-height diskette drive; double-sided, high-density, 1.2MB storage capacity 5 ¼-inch, half-height diskette drive; - Epson Apex 200 | User Manual - Page 152
: 10% to 90%, non-condensing Physical Characteristics (CPU only) Width 15.7" (400 mm) Depth 16.5" (420 mm) Height 6.1" (155 mm) Weight Apex 200\20: 27.5 lbs (12.5 kg) Apex 200\40: 28 lbs (12.8 kg) Power Requirements 115/230 VAC ± 20%, 50/60 Hz, 5 amps 140W output capacity (peak) Video and - Epson Apex 200 | User Manual - Page 153
, 720 x 348 Supports Epson- and IBM PC- compatible color graphics monitor: 40-character x 25-line display (low-resolution text), 80-character x 25-line display (highresolution text), 640 x 200 (highresolution graphics), 320 x 200, four colors; 160 x 200, eight colors Other Apex - Epson Apex 200 | User Manual - Page 154
T-750 L-1000 L-750 ActionPrinter accessories 9-pin, 136-column, dot-matrix printer; 240 cps draft/48 cps near letter quality (CO2001 1) Black ribbon (8755) Single bin cut sheet feeder (8348) 24-pin, 80-column, dot-matrix printer; 180 cps draft/60 cps letter quality (CO1901 1) Black ribbon (7753) - Epson Apex 200 | User Manual - Page 155
Computer accessories Intelligent serial interface board (8148) Intelligent IEEE-488 interface board (8165) Internal 300/1200 baud modem card (C203A-B) External 300/1200 baud modem (C202A-B) Parallel Port Pin Assignments Pin no. 1 2 3 4 5 6 7 8 9 10 11 12 13 14 15 16 17 18-25 I = Input Signal - Epson Apex 200 | User Manual - Page 156
Serial Port Pin Assignments Pin no. 1 2 3 4 5 6 7 8 9 I = Input Signal name DCD RX TX DTR GND DSR RTS CTS RI O = output Direction I I O O - I O I I Description Data carrier detect Receive data Transmit data Data terminal ready Signal ground Data set ready Request to send Clear to send Ring - Epson Apex 200 | User Manual - Page 157
Parallel Port Loop-back Connector Pin Assignments Output signal name Strobe Data bit 0 Auto feed Init. printer Select input Pin no. Pin no. 1 - 13 2 - 15 14 - 12 16 - 10 17 - 11 Input signal name Select Error P.END (out of paper) Acknowledge Busy Serial Port Loop-back Connector Pin Assignments - Epson Apex 200 | User Manual - Page 158
- Epson Apex 200 | User Manual - Page 159
Appendix B Power-On Diagnostics The built-in memory (ROM) of your computer contains a series of diagnostics programs, which your computer runs automatically every time you turn on the power. These programs check internal devices such as ROM, RAM, the timer, the keyboard controller, and the diskette - Epson Apex 200 | User Manual - Page 160
) The information stored in the CMOS RAM must be corrected. To do this, run the Setup program provided on the Reference diskette. See Chapter 2 for instructions. - Epson Apex 200 | User Manual - Page 161
the error message and number to your Customer Care Center. Keyboard Controller and Keyboard Check Next, the computer checks the keyboard controller and keyboard for problems such as failure of one of the keys to release. If there are any errors in the connection between the keyboard and the computer - Epson Apex 200 | User Manual - Page 162
Display Card Check The computer checks the color or monochrome display card that is installed in the system. An error number and message appear if any faults are found in the display adapter card. Number 401 represents an error in the monochrome display card, and 501 represents an error in the color - Epson Apex 200 | User Manual - Page 163
Hard Disk Controller and Hard Disk Check The computer next checks the hard disk controller and drive unit. If a malfunction is found in the hard disk controller card, you see this error number and message: 1782-Disk controller failure If an error is found in the hard disk drive unit, the screen - Epson Apex 200 | User Manual - Page 164
- Epson Apex 200 | User Manual - Page 165
is performing correctly. The table at the end of this appendix lists the error messages you may see during testing. If these instructions tell you to contact your Epson Customer Care Center, call 1-800-922-8911 for the location of the nearest Customer Care Center. You can test the following devices - Epson Apex 200 | User Manual - Page 166
To start the system diagnostics program, follow these steps: 1. Insert the Reference diskette in drive A. 2. Turn on or reset the computer. The OPERATION MENU appears. 3. Press 4 reset System diagnostics and then press Enter. When you start the system diagnostics, the computer checks the following: - Epson Apex 200 | User Manual - Page 167
Once you confirm the DEVICE LIST, you can test only those items. If you decide later that you need to add a device, you must return to the OPERATION MENU and re-select System diagnostics. Modifying the DEVICE LIST If an installed device is missing from the DEVICE LIST, it is important that you add - Epson Apex 200 | User Manual - Page 168
Type the number of the item you wish to add and press Enter. That item then disappears from the Additional DEVICE LIST on the screen. You can add as many devices as necessary. When you finish adding devices, press 0 followed by Enter to return to the Modify DEVICE LIST menu. Note Even if you have - Epson Apex 200 | User Manual - Page 169
Selecting a Test From the DEVICE LIST, select the device you wish to test. Type the number of the device; then press Enter. Before the test begins, you are asked how many times to perform the test. You see this menu: Number of times to test device 1 - Run test one time 2 - Run test multiple times 0 - Epson Apex 200 | User Manual - Page 170
point, and an error code and error message appear. If you want to record the problem, you can print out the message on your printer. You see this prompt: Do you correctly and enter Y, or Enter N to cancel printing. Correct the problem and press Y and Enter to continue printing, or press N and Enter - Epson Apex 200 | User Manual - Page 171
, CMOS RAM, and battery The main integrated circuits. The checks made on the 80286 CPU chip are extremely comprehensive. They ensure that the CPU instruction set is functioning correctly. If an error is reported, write down the error code and message, or print them out, and contact your Customer - Epson Apex 200 | User Manual - Page 172
Memory Check Use this option to check the computer's built-in memory. The program checks only the amount of memory that you have indicated as present in the Setup program. For this check, the program writes specific data into memory and then reads it back. The data is written and read in blocks of - Epson Apex 200 | User Manual - Page 173
sure the corresponding character is displayed on the screen. If the character displayed on the screen does not match the key you pressed, there is a problem with your keyboard. Test each key. The status of the Num Lock, Caps Lock, and Scroll Lock indicators is shown on the upper right side - Epson Apex 200 | User Manual - Page 174
can find diagrams of all the international keyboard layouts in the MS-DOS Reference Manual. If any key is incorrect, press N and Enter. Make a copy of . This test includes several checks that allow you to identify particular problems related to the monochrome display. To run this check, the color - Epson Apex 200 | User Manual - Page 175
If an error occurs during any of these tests, record the error code and message, or print them out. Then contact your Customer Care Center. When you finish running the monochrome adapter check, press 0 and Enter to return to the DEVICE LIST. Monochrome Adapter Check To check the monochrome adapter, - Epson Apex 200 | User Manual - Page 176
Character Set Check To check your character set, press 3 and then Enter. The characters that are included in the internal character generator are displayed. Check the characters displayed on your screen against this illustration: After checking the characters, respond to the prompt: Is the display - Epson Apex 200 | User Manual - Page 177
are located on your monitor. Sync Check This test is provided for service purposes only. If you accidentally select this option, press any key to monitor. This test includes several checks that allow you to identify particular problems related to the color display. To run this check, the color/mono - Epson Apex 200 | User Manual - Page 178
COLOR GRAPHICS ADAPTER AND CRT CHECK MENU 1 - Color graphics adapter check 2 - Attribute check 3 - Character set check 4 - 40-column character set check 5 - 320x200 graphics mode check 6 - 640x200 graphics mode check 7 - Screen paging check 8 - Light pen check 9 - Color video check 10 - Sync check - Epson Apex 200 | User Manual - Page 179
the controls on your display monitor. If they are still incorrect, press N and Enter. Contact your Customer Care Center if you have any monitor problems. Character Set Check To check your 80-column character set, press 3 and Enter. The characters that are included in the internal character generator - Epson Apex 200 | User Manual - Page 180
After checking the characters, respond to the prompt: Is the display correct (Y/N) ? If the characters displayed match the illustration, press Y and then Enter. If they do not match, press N and Enter to display the error message. 40-column Character Set Check To check your 40-column character set, - Epson Apex 200 | User Manual - Page 181
colors are displayed incorrectly, check the adjustment of your monitor and make sure that both ends of the cable are plugged in firmly. If a problem still exists, press N and Enter to display the error message. 640x200 Graphics Mode Check To check your 640x200 graphics mode, press 6 and Enter. The - Epson Apex 200 | User Manual - Page 182
, press Y and then Enter. If any pattern is not displayed clearly, check the adjustment of your monitor and make sure it is connected properly. If a problem still exists, press N and Enter to display the error message. Screen Paging Check To check the screen paging of your monitor, press 7 and Enter - Epson Apex 200 | User Manual - Page 183
If all eight pages are correct, press Y and Enter. If any page is filled with an incorrect number, press N and Enter to display the error message. Light Pen Check To check the function of a light pen connected to a color graphics adapter card, press 8 and then Enter. This test checks that a light - Epson Apex 200 | User Manual - Page 184
of your monitor and make sure that both ends of the cable are plugged in firmly. If a problem still exists, press N and Enter to display the error message. Sync Check This test is provided for service purposes only. If you accidentally select this option, press any key to end the test. Run - Epson Apex 200 | User Manual - Page 185
option to test the performance of the diskette drives installed in your computer. This test includes several checks that allow you to identify particular problems related to your diskette drives. Before running these tests, format a diskette to use for the tests that write data on the disk in the - Epson Apex 200 | User Manual - Page 186
time you select a test: Check which drive (A/B)? Press A or B and then Enter. If any errors occur, record the error code and message and contact your Epson Customer Care Center. Sequential Seek Check This test checks the ability of the read/write heads to locate any part of the diskette. This action - Epson Apex 200 | User Manual - Page 187
Write, Read Check This test checks the ability of the selected disk drive to read and write data from a diskette. The test writes to and reads from each cylinder on the diskette, starting at the center. Note This test destroys all data on the diskette in the selected drive. Select option 3 from the - Epson Apex 200 | User Manual - Page 188
The computer spins the diskette for a few seconds and then displays a message like this: The disk rotation, speed is now 360.5 rpm. The diskette continues to spin and the message listing the rotation speed is updated every few seconds. To stop the test, press any key; the program returns to the menu - Epson Apex 200 | User Manual - Page 189
Re-insert the diskette and secure the lock. If no errors occur, the menu reappears. An error occurs if the drive is malfunctioning, or if you do not remove or replace the diskette within a certain time. Run All Above Checks To run all the tests on the menu in sequence, press 6 and then Enter. When - Epson Apex 200 | User Manual - Page 190
To perform the test, you must insert a special loop-back connector into the parallel port so that the computer can check the individual pins of the port. Contact your Customer Care Center if you need a loop-back connector (or see Appendix A for signal/pin assignments to make your own loopback - Epson Apex 200 | User Manual - Page 191
Serial Port (RS-232C) Check Use this option to test the functions of the primary serial communications (RS-232C) port. To perform the test, you must insert a special loop-back connector into the RS-232C port so that the computer can check the individual pins of the port. Contact your Customer Care - Epson Apex 200 | User Manual - Page 192
The final test is an echo back check during which the port sends data to itself at 9600 baud, using various data formats. At the start of the test, you see these messages: RS232C echo back check - with various data formats Current data format: 5 data bits, 1 stop bits, parity - NONE Current - Epson Apex 200 | User Manual - Page 193
printed characters may not be what you expect with certain software. The bit-image data is sent to the printer using a command (ESC K) compatible with Epson and IBM printers. If this pattern is printed correctly, you can use the MS-DOS GRAPHICS program to print out copies of graphics screens. Note - Epson Apex 200 | User Manual - Page 194
Use this option to test the performance of the hard disk drive installed in your computer. If any errors occur, have the drive checked and serviced by your Customer Care Center. When you select option 17 from the DEVICE LIST, you see this menu: HARD DISK DRIVE(S) AND CONTROLLER CHECK MENU - Epson Apex 200 | User Manual - Page 195
Non-destructive surface analysis (option 4 on the HARD DISK FORMAT MENU) to check the condition of the hard disk. If this analysis shows no other problems with the disk, follow these steps: 1. Back up all the files on your hard disk with the BACKUP command, described in your MS-DOS Reference - Epson Apex 200 | User Manual - Page 196
disk, on the OPERATION MENU. See Appendix D for instructions. 3. Prepare the hard disk for use with FDISK and SELECT. See Appendix E for instructions. Head Select Check This test checks whether each head all your files, and have the drive serviced immediately. (The drive may be corrupting your data.) - Epson Apex 200 | User Manual - Page 197
Read, Verify Check This test reads and verifies data from all tracks of the disk, checking each cylinder and using both heads. Select option 4 from the menu to start this test. The program displays the number of each cylinder it finds. For example, with a 20MB hard disk, the first message you see - Epson Apex 200 | User Manual - Page 198
COMMAND ERROR 109 8259 INTERRUPT CONTROLLER ERROR 110 146818 CMOS SHUTDOWN BYTE ERROR 111 146818 CMOS BATTERY ERROR 112 146818 CMOS CHECKSUM ERROR 113 80286 INSTRUCTION ERROR 114 80286 PROTECT MODE ERROR 1 115 80286 PROTECT MODE ERROR 2 Memory 201 MEMORY/PARITY ERROR - Epson Apex 200 | User Manual - Page 199
Error code Keyboard 301 301 302 303 Message 8042 ERROR KEYBOARD ERROR KEYBOARD IS NON-STANDARD OR DEFECTIVE KEYBOARD LOCKING ERROR Monochrome display adapter and CRT 401 V-RAM ERROR 402 VIDEO SIGNAL ERROR 403 ATTRIBUTE ERROR 404 CHARACTER SET ERROR Color graphics adapter and CRT 501 V- - Epson Apex 200 | User Manual - Page 200
Error code Message Parallel port 901 ERROR PIN p Serial port (RS-232C) 1101 control signal ALWAYS LOW 1101 control signal ALWAYS HIGH 1102 TIMEOUT ERROR 1103 VERIFY ERROR Alternate serial port 1201 control signal ALWAYS LOW 1201 control signal ALWAYS HIGH 1202 TIMEOUT ERROR 1203 - Epson Apex 200 | User Manual - Page 201
hard disk is producing numerous read/write errors or you are having other serious problems with the disk. Sometimes, after a hard disk has been used for a the disk or you are unsure if formatting is necessary, contact your Epson Customer Care Center first. Someone there can advise you on the best - Epson Apex 200 | User Manual - Page 202
reformatting a used disk, after physically formatting it, you need to run FDISK and SELECT to prepare the hard disk for use. Follow the instructions in Appendix E. Formatting and Checking Options To perform a physical format or to determine if a hard disk needs to be physically reformatted, follow - Epson Apex 200 | User Manual - Page 203
Destructive surface analysis tests a formatted hard disk for bad tracks and updates the bad track table. Because this option writes and reads data on the disk, it destroys all data on any track that produces an error. You cannot run the Destructive surface analysis on a disk that has never been - Epson Apex 200 | User Manual - Page 204
any bad tracks, go on to step 2. 2. Cancel the Conditional format and run the Unconditional format to format the disk and flag the bad tracks manually. Starting the Formatting Process To begin formatting, type the number of the option you want and press Enter. - Epson Apex 200 | User Manual - Page 205
Note If you have more than one hard disk drive, you see this prompt: Enter drive letter (C/D)? Press C or D and then Enter. Conditional Format (Normal) Use this option to format the hard disk. All flagged tracks are marked so that they are never used. To start the Conditional format, press 1 and - Epson Apex 200 | User Manual - Page 206
The program then displays a warning about the consequences of proceeding with formatting: WARNING! ALL DATA WILL BE DESTROYED IN ALL PARTITIONS OF HARD DISK, NOT JUST IN MS-DOS PARTITION! Do you want to start formatting (Y/N)? If there are no tracks with other errors, and you are absolutely sure - Epson Apex 200 | User Manual - Page 207
Flagged tracks are identified by xxxx and yy. At this point, press Enter to return to the HARD DISK FORMAT MENU. If there are any tracks with other errors, scanning stops and you see this message: Scanning cancelled. Warning: This drive has an unflagged error(s), or is unformatted. Press ENTER to - Epson Apex 200 | User Manual - Page 208
If you are formatting a disk that has never been formatted, check the list of bad tracks that came with the disk. This list identifies each defect by the head and cylinder number, which are required for the Unconditional format. To start the Unconditional format routine, press 2 and then Enter. You - Epson Apex 200 | User Manual - Page 209
Some of the messages change if the table is full or empty. However, the way that you add a bad track or make a correction is the same. To add a bad track, follow these steps: 1. Press A. You see this prompt: Enter cylinder number (1 - xxxx): 2. Type the number of the cylinder containing the bad - Epson Apex 200 | User Manual - Page 210
, all data on the track that produces the error is destroyed. For this reason, if you think that an unflagged bad track is causing trouble, first run option 4, Non-destructive surface analysis, to check the disk surface. This test operates by a complex process of writing, reading, and verifying - Epson Apex 200 | User Manual - Page 211
If the program finds one bad track that is not flagged, the summary would show one track with a write, read error. The report is then followed by a table like this: Cylinder Head ==W==r=i=t=e=, =R==e=a=d==E=r=r=o=r==T=r=a=c=k=s== Cylinder Head Cylinder Head Cylinder Head 237 2 Confirm to - Epson Apex 200 | User Manual - Page 212
When the analysis is complete, the program displays a summary of the status of the disk. This summary lists the following: Flagged bad tracks Tracks with read, verify errors Good tracks. If no errors occur, you see this message: No read, verify error was detected. If errors are found, the program - Epson Apex 200 | User Manual - Page 213
MS-DOS partition Use FDISK to create an extended MS-DOS partition on the Apex 200\40 Use SELECT to format the partition for MS-DOS and install MS-DOS and you should not need to do this yourself. If you are using an Epson drive, it has already been formatted. However, you may need to perform a low - Epson Apex 200 | User Manual - Page 214
. If your disk contains data, use the BACKUP command to copy all the data before completing the steps described here. See your MS-DOS Reference Manual for instructions on using BACKUP. Partitioning the Hard Disk You need to partition the hard disk so it can run the MS-DOS operating system. The - Epson Apex 200 | User Manual - Page 215
a primary partition of 32MB if you have the Apex 200\40. Create an extended partition on the Apex 200\40 of 8MB. If you prefer to create a primary and extended partition of different sizes, see the instructions for FDISK in your MS-DOS Reference Manual. Creating the MS-DOS Partition Follow the steps - Epson Apex 200 | User Manual - Page 216
need to install MS-DOS on this drive with the SELECT command before you can use it. For instructions, see "Formatting the Primary Partition" below. Creating the Extended Partition If you have the Apex 200\40, you still have 8MB of disk space left over after creating the primary MS-DOS partition - Epson Apex 200 | User Manual - Page 217
3. Press 2 to select the Create Extended DOS partition option and press Enter. The screen displays the following prompt: Total disk space is 1021 cylinders. Maximum space available for partition is 252 cylinders. Enter partition size ........ [252] 4. Press Enter to accept the partition size. The - Epson Apex 200 | User Manual - Page 218
8. Press any key to restart the system (the MS-DOS Startup diskette is already in drive A). Your computer reloads MS-DOS, displaying the preliminary copyright information and the date prompt. 9. Press Enter twice to accept the date and time shown. The system now recognizes the MS-DOS partition as - Epson Apex 200 | User Manual - Page 219
code and keyboard code, respectively, for the United States. If you want to substitute codes for a different country, see your MS-DOS Reference Manual. The screen displays this message and prompt: SELECT is used to install DOS the first time. SELECT erases everything on the specified target and - Epson Apex 200 | User Manual - Page 220
The screen first displays disk space information and then displays the following message: Reading source file(s)... SELECT copies the rest of the files from the Startup diskette to the hard disk. When all the files are copied, the A> prompt reappears. The partition on the hard disk is now formatted. - Epson Apex 200 | User Manual - Page 221
FORMAT command. For example, to format drive E, type the following and press Enter: FORMAT E: /V Copying the Remaining Files to the Hard Disk Follow the instructions below to copy the files on your other MS-DOS diskettes and the Reference diskette to drive C, the primary partition on the hard disk - Epson Apex 200 | User Manual - Page 222
You may, however, prefer to more time of these commands in other subdirectories. For information on creating subdirectories, ice Chapter 4 of net year MS-DOS Reference Manual. The file COMMAND.COM (which is included on the Startup and Operating 1 diskettes) must remain in the root directory of drive - Epson Apex 200 | User Manual - Page 223
can either not create one at all or create one that is different. For a description of AUTOEXEC.BAT, see Chapter 4; or see your MS-DOS manual for more detailed information. Follow these steps: 1. Type C : and press Enter to log onto the hard disk. 2. Type the following and press Enter: COPY CON - Epson Apex 200 | User Manual - Page 224
- Epson Apex 200 | User Manual - Page 225
Appendix F Types of Hard Disk Drives This appendix lists the numbers you need to identify a hard disk drive. Refer to this table and the documentation supplied with your hard disk to find the correct number for the type of drive you are installing. You use this drive type number when you run the - Epson Apex 200 | User Manual - Page 226
- Epson Apex 200 | User Manual - Page 227
Glossary Absolute pathname A pathname that begins with the backslash character. An absolute pathname tells MS-DOS how to find its way to a given directory, starting at the root directory. See also Relative pathname. Application program A software program designed to perform a specific task, such as - Epson Apex 200 | User Manual - Page 228
that can generate up to 25 lines of text with 80 characters on each line, or monochrome graphics with a 640 x 200 resolution and four color graphics at 320 x 200 resolution. Character Anything that can print in a single space on the page or the screen. Includes numbers, letters, punctuation marks - Epson Apex 200 | User Manual - Page 229
) to direct your computer to perform a specific function. Command prompt The symbol or message that tells you MS-DOS is loaded and ready to receive instructions. The default command prompt in MS-DOS also displays the current operating drive; if it is drive C, the command prompt looks like, this - Epson Apex 200 | User Manual - Page 230
Current directory The directory you are logged onto and working in. Also known as the default directory. Cursor The highlighted marker that shows your position on the screen. Cylinders See Tracks. Data Information such as text or graphics stored or processed by a computer. Data diskette A formatted - Epson Apex 200 | User Manual - Page 231
Default drive The disk drive from which MS-DOS executes your next command, unless you tell it to do otherwise (by including a drive designator with the command). Also known as the current drive. Delimiter A character or space used to separate different parts of an MS-DOS command. Device A piece of - Epson Apex 200 | User Manual - Page 232
Disk drive The physical device that allows the computer to read from and write to a disk. A diskette drive has a disk slot into which you insert a diskette. A hard disk is sealed inside a protective unit. Diskette A flat piece of flexible plastic coated with magnetic material and used to store data - Epson Apex 200 | User Manual - Page 233
file A file containing program instructions, as opposed to data created with an application program. An executable file has the extension.BAT, .COM, or .EXE. Execution speed The speed at which the central processing unit can execute commands. Also called operating speed. The Apex can run at 8 MHz - Epson Apex 200 | User Manual - Page 234
Filename A name of up to eight characters that MS-DOS uses to identify a file. Floppy disk See Diskette. Format To prepare a new disk (or an old one you want to reuse) so that it can store information. Formatting divides a disk into tracks and sectors and creates addressable locations on it. - Epson Apex 200 | User Manual - Page 235
Input/output (I/O) port See Port. Interface A physical or software connection used to transmit data between equipment or programs. Internal command An MS-DOS command that is stored in the command processor of the operating system; it is not a separate program file. This means that you can execute an - Epson Apex 200 | User Manual - Page 236
bytes. Megahertz (MHz) A unit used to measure oscillation frequency (of a computer's internal timing clock). A megahertz is one million cycles per second. The Apex operates at 8 MHz or 12 MHz. Memory The area where your computer stores data. Memory contents can be permanent and inalterable (ROM) or - Epson Apex 200 | User Manual - Page 237
to the right of the keyboard. Operating speed The speed at which the central processing unit can execute commands. Also called execution speed. The Apex can run at 8 MHz or 12 MHz. Operating system A collection of programs (such as MS-DOS) that manages a computer's operations. The operating system - Epson Apex 200 | User Manual - Page 238
Parallel The type of interface that transmits data in groups of bits. See Interface and SeriaI. Parameter A qualifier added to a command that tells the computer what particular conditions to look for. Parent directory The directory immediately above a given directory in the directory tree. In - Epson Apex 200 | User Manual - Page 239
configuration each time you turn it on. Primary partition The MS-DOS partition from which the operating system starts. Program A disk file that contains coded instructions and tells a computer what to do and how to do it. Prompt A message displayed on the screen that tells you what action you need - Epson Apex 200 | User Manual - Page 240
Relative pathname A pathname that does not begin with the backslash character. A relative pathname tells MS-DOS how to find its way to a given directory, starting at the current default directory. See also Absolute pathname. Reset To reload a computer's operating system so you can retry a task or - Epson Apex 200 | User Manual - Page 241
Serial The type of interface that transmits data one bit at a time. See Interface and Parallel. Software The programs that enable your computer to perform the tasks and functions you indicate. Source diskette The diskette that you are reading or copying data from during a copy or backup operation. - Epson Apex 200 | User Manual - Page 242
monochrome text and graphics at up to 720 x 400 resolution, 16-color graphics at up to 640 x 480 resolution, or 256-color graphics at 320 x 200 resolution. Video card The display adapter card that is installed in one of the computer's option slots. The video card provides the interface to which - Epson Apex 200 | User Manual - Page 243
Write-protect To protect the data on a diskette from being changed by placing a write-protect tab over the notch on the side of a 5 ¼-inch diskette or by setting the write-protect switch on a 3 ½-inch diskette. When a diskette is write-protected, you cannot erase, change, or record over its contents - Epson Apex 200 | User Manual - Page 244
- Epson Apex 200 | User Manual - Page 245
Index A Absolute pathname, 4-19-20 Alternate serial port check, C-28 APPEND, 4-22 Application program, starting, 4-3 AUTOEXEC.BAT, 4-41-44, E-10-11 B Back panel monitor switch, 1-5-7 Backing up, 4-29-34 with BACKUP, 4-33-34 with DISKCOPY, 4-29-33 BACKUP, 4-33-34 Batch files, 4-10 AUTOEXEC.BAT, 4-41- - Epson Apex 200 | User Manual - Page 246
3-9-10 drive and controller check, c-21-25 inserting diskettes, 3-12-13 problems, 6-8 protector cards, 1-3 removing, 2-7-8 removing diskettes, 3-12-14 single Enhanced graphics adapter, see Video cards Environmental requirements, A-4 Epson Consumer Information number, Intro-3 ERASE, 4.15 Error codes - Epson Apex 200 | User Manual - Page 247
, 3-12 preparing for moving, 3-18-19 preparing for use, E-1-11 problems, 6-9-11 removing, 2-7-8 types, F-1 HDCACHE, 4-44 HDSIT, 3-19 connecting, 1-7 Monitors, back panel monitor switch, 1-5-7 connecting, 1-5-7 problems, 6-4-5 selecting type, 1-5-7 Monochrome Display Adapter and CRT Check, C- - Epson Apex 200 | User Manual - Page 248
from hard disk, 1-17 N Nondestructive surface analysis, D-1 1-12 O Operation menu, 2-2, C-2-3 Option cards, 5-1-18 configuring 5-18 installing, 5-1-18 problems, 6-13-14 removing, 5-15 testing, 5-18 Option slots, 5-7, A-2 Options, installing, 5-1-18 P Parallel, cable, 1-8-9 Parallel, interface - Epson Apex 200 | User Manual - Page 249
coprocessor, 2-6 memory, 2-3-4 real-time clock, 2-8-10 Software problems, 6-11-12 Speaker, A-2 Special keys, 3-2-3 Specifications, , 2-8-10 Timer and CMOS RAM Check, B-2 Tracks, 3-7 TREE, 4-24-25 Troubleshooting, 6-1-14 Turning off computer, 3-6 Turning on computer, 1-15-16 U Unconditional format - Epson Apex 200 | User Manual - Page 250
Write-protecting diskettes, 3-14-15 X XCOPY, 4-29 XTREE, 4-37-41 - Epson Apex 200 | User Manual - Page 251
-
 1
1 -
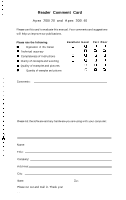 2
2 -
 3
3 -
 4
4 -
 5
5 -
 6
6 -
 7
7 -
8
-
9
-
10
-
11
-
12
-
13
-
14
-
15
-
16
-
17
-
18
-
19
-
20
-
21
-
22
-
23
-
24
-
25
-
26
-
27
-
28
-
29
-
30
-
31
-
32
-
33
-
34
-
35
-
36
-
37
-
38
-
39
-
40
-
41
-
42
-
43
-
44
-
45
-
46
-
47
-
48
-
49
-
50
-
51
-
52
-
53
-
54
-
55
-
56
-
57
-
58
-
59
-
60
-
61
-
62
-
63
-
64
-
65
-
66
-
67
-
68
-
69
-
70
-
71
-
72
-
73
-
74
-
75
-
76
-
77
-
78
-
79
-
80
-
81
-
82
-
83
-
84
-
85
-
86
-
87
-
88
-
89
-
90
-
91
-
92
-
93
-
94
-
95
-
96
-
97
-
98
-
99
-
100
-
101
-
102
-
103
-
104
-
105
-
106
-
107
-
108
-
109
-
110
-
111
-
112
-
113
-
114
-
115
-
116
-
117
-
118
-
119
-
120
-
121
-
122
-
123
-
124
-
125
-
126
-
127
-
128
-
129
-
130
-
131
-
132
-
133
-
134
-
135
-
136
-
137
-
138
-
139
-
140
-
141
-
142
-
143
-
144
-
145
-
146
-
147
-
148
-
149
-
150
-
151
-
152
-
153
-
154
-
155
-
156
-
157
-
158
-
159
-
160
-
161
-
162
-
163
-
164
-
165
-
166
-
167
-
168
-
169
-
170
-
171
-
172
-
173
-
174
-
175
-
176
-
177
-
178
-
179
-
180
-
181
-
182
-
183
-
184
-
185
-
186
-
187
-
188
-
189
-
190
-
191
-
192
-
193
-
194
-
195
-
196
-
197
-
198
-
199
-
200
-
201
-
202
-
203
-
204
-
205
-
206
-
207
-
208
-
209
-
210
-
211
-
212
-
213
-
214
-
215
-
216
-
217
-
218
-
219
-
220
-
221
-
222
-
223
-
224
-
225
-
226
-
227
-
228
-
229
-
230
-
231
-
232
-
233
-
234
-
235
-
236
-
237
-
238
-
239
-
240
-
241
-
242
-
243
-
244
-
245
-
246
-
247
-
248
-
249
-
250
-
251
 |
 |