HP 3310 User Guide - Page 150
Print a self-test report, Empty Ink, HP Image Zone Help, Printer Toolbox, Setup, Tools - cartridge
 |
UPC - 829160970424
View all HP 3310 manuals
Add to My Manuals
Save this manual to your list of manuals |
Page 150 highlights
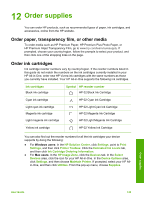
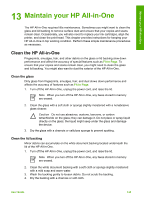
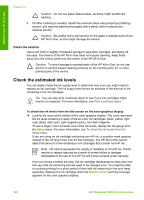
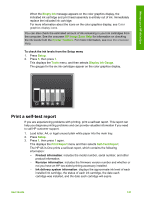
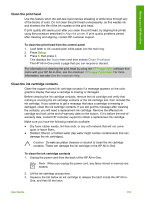
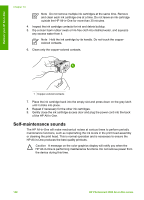
Maintain your HP All-in-One When the Empty Ink message appears on the color graphics display, the indicated ink cartridge and print head assembly is entirely out of ink. Immediately replace the indicated ink cartridge. For more information about the icons on the color graphics display, see Color graphics display icons. You can also check the estimated amount of ink remaining in your ink cartridges from the computer. See the onscreen HP Image Zone Help for information on checking the ink levels from the Printer Toolbox. For more information, see Use the onscreen Help. To check the ink levels from the Setup menu 1. Press Setup. 2. Press 5, then press 1. This displays the Tools menu, and then selects Display Ink Gauge. The gauges for the six ink cartridges appear on the color graphics display. Print a self-test report If you are experiencing problems with printing, print a self-test report. This report can help you diagnose printing problems and can provide valuable information if you need to call HP customer support. 1. Load letter, A4, or legal unused plain white paper into the main tray. 2. Press Setup. 3. Press 1, then press 1 again. This displays the Print Report menu and then selects Self-Test Report. The HP All-in-One prints a self-test report, which contains the following information: - Product information: includes the model number, serial number, and other product information. - Revision information: includes the firmware version number and whether or not you have an HP two-sided printing accessory installed. - Ink delivery system information: displays the approximate ink level of each installed ink cartridge, the status of each ink cartridge, the date each cartridge was installed, and the date each cartridge will expire. User Guide 147
-
 1
1 -
2
-
3
-
4
-
5
-
6
-
7
-
8
-
9
-
10
-
11
-
12
-
13
-
14
-
15
-
16
-
17
-
18
-
19
-
20
-
21
-
22
-
23
-
24
-
25
-
26
-
27
-
28
-
29
-
30
-
31
-
32
-
33
-
34
-
35
-
36
-
37
-
38
-
39
-
40
-
41
-
42
-
43
-
44
-
45
-
46
-
47
-
48
-
49
-
50
-
51
-
52
-
53
-
54
-
55
-
56
-
57
-
58
-
59
-
60
-
61
-
62
-
63
-
64
-
65
-
66
-
67
-
68
-
69
-
70
-
71
-
72
-
73
-
74
-
75
-
76
-
77
-
78
-
79
-
80
-
81
-
82
-
83
-
84
-
85
-
86
-
87
-
88
-
89
-
90
-
91
-
92
-
93
-
94
-
95
-
96
-
97
-
98
-
99
-
100
-
101
-
102
-
103
-
104
-
105
-
106
-
107
-
108
-
109
-
110
-
111
-
112
-
113
-
114
-
115
-
116
-
117
-
118
-
119
-
120
-
121
-
122
-
123
-
124
-
125
-
126
-
127
-
128
-
129
-
130
-
131
-
132
-
133
-
134
-
135
-
136
-
137
-
138
-
139
-
140
-
141
-
142
-
143
-
144
-
 145
145 -
 146
146 -
 147
147 -
 148
148 -
 149
149 -
 150
150 -
 151
151 -
 152
152 -
 153
153 -
 154
154 -
 155
155 -
156
-
157
-
158
-
159
-
160
-
161
-
162
-
163
-
164
-
165
-
166
-
167
-
168
-
169
-
170
-
171
-
172
-
173
-
174
-
175
-
176
-
177
-
178
-
179
-
180
-
181
-
182
-
183
-
184
-
185
-
186
-
187
-
188
-
189
-
190
-
191
-
192
-
193
-
194
-
195
-
196
-
197
-
198
-
199
-
200
-
201
-
202
-
203
-
204
-
205
-
206
-
207
-
208
-
209
-
210
-
211
-
212
 |
 |
