HP Scitex LX600 HP Scitex LX Printer Family - User's guide - Page 45
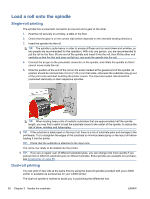
Carriage beam position, Move to highest position, provided to absorb the impacts.
 |
View all HP Scitex LX600 manuals
Add to My Manuals
Save this manual to your list of manuals |
Page 45 highlights
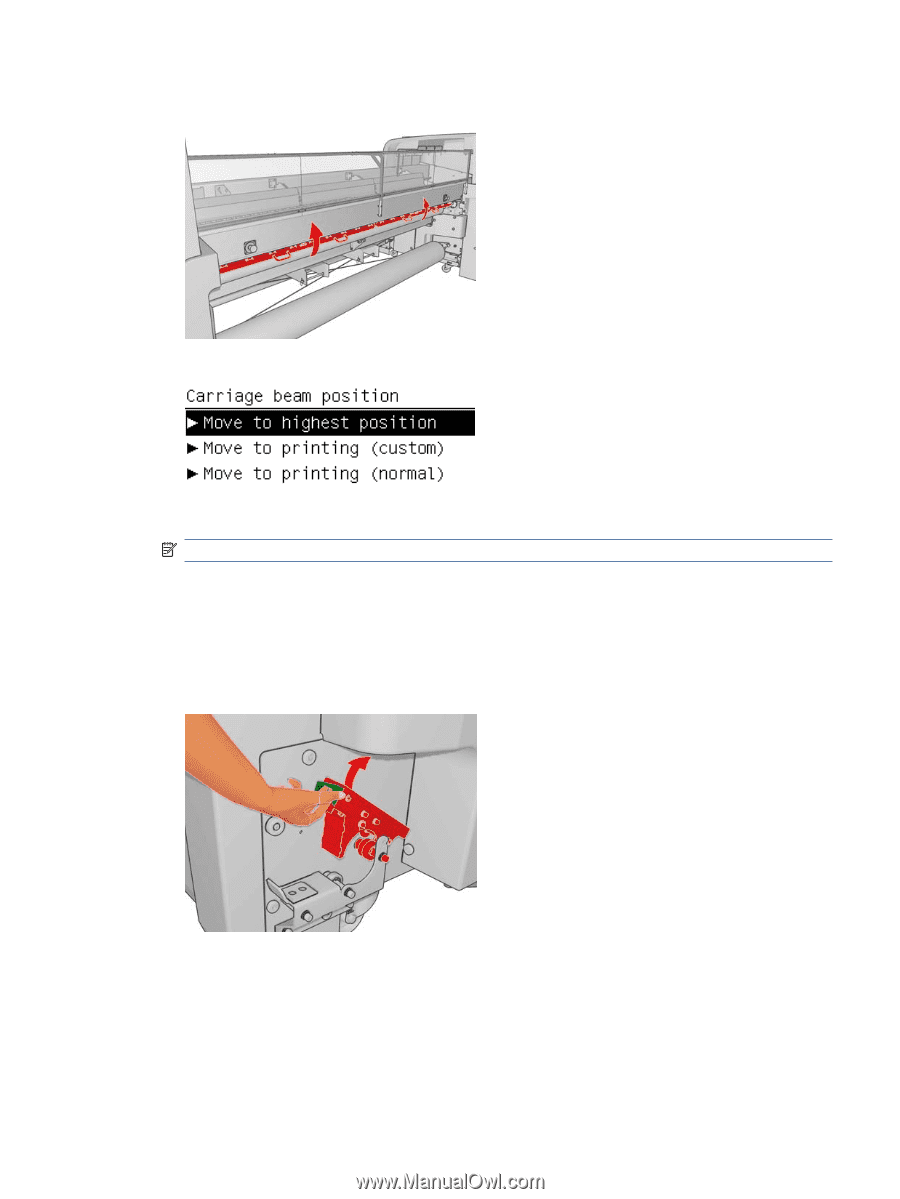
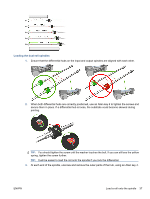
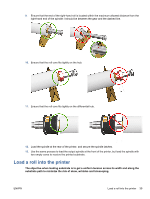
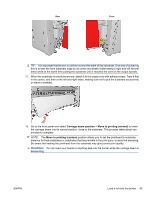
3. Lift the substrate pressure handles at the rear of the printer. 4. Go to the front panel and select Carriage beam position > Move to highest position. The printer raises the carriage beam, making it easy to insert the substrate. This process takes about two minutes to complete. During this period, you can load the input and output rolls. NOTE: While the carriage beam is rising, you can stop it by pressing the Cancel key. 5. Bring the new roll on its spindle to the rear of the printer, with the geared end of the spindle on the left. 6. Rest the ends of the spindle on the platforms provided at the rear of the printer; plastic pads are provided to absorb the impacts. 7. Open the latches at both ends of the spindle (if they were closed) and push the roll on its spindle into the printer. ENWW Load a roll into the printer 41
-
 1
1 -
2
-
3
-
4
-
5
-
6
-
7
-
8
-
9
-
10
-
11
-
12
-
13
-
14
-
15
-
16
-
17
-
18
-
19
-
20
-
21
-
22
-
23
-
24
-
25
-
26
-
27
-
28
-
29
-
30
-
31
-
32
-
33
-
34
-
35
-
36
-
37
-
38
-
39
-
 40
40 -
 41
41 -
 42
42 -
 43
43 -
 44
44 -
 45
45 -
 46
46 -
 47
47 -
 48
48 -
 49
49 -
 50
50 -
51
-
52
-
53
-
54
-
55
-
56
-
57
-
58
-
59
-
60
-
61
-
62
-
63
-
64
-
65
-
66
-
67
-
68
-
69
-
70
-
71
-
72
-
73
-
74
-
75
-
76
-
77
-
78
-
79
-
80
-
81
-
82
-
83
-
84
-
85
-
86
-
87
-
88
-
89
-
90
-
91
-
92
-
93
-
94
-
95
-
96
-
97
-
98
-
99
-
100
-
101
 |
 |