HP Scitex LX600 HP Scitex LX Printer Family - User's guide - Page 60
Enable collector, Outwards, Inwards, Go to the HP Internal Print Server and press
 |
View all HP Scitex LX600 manuals
Add to My Manuals
Save this manual to your list of manuals |
Page 60 highlights
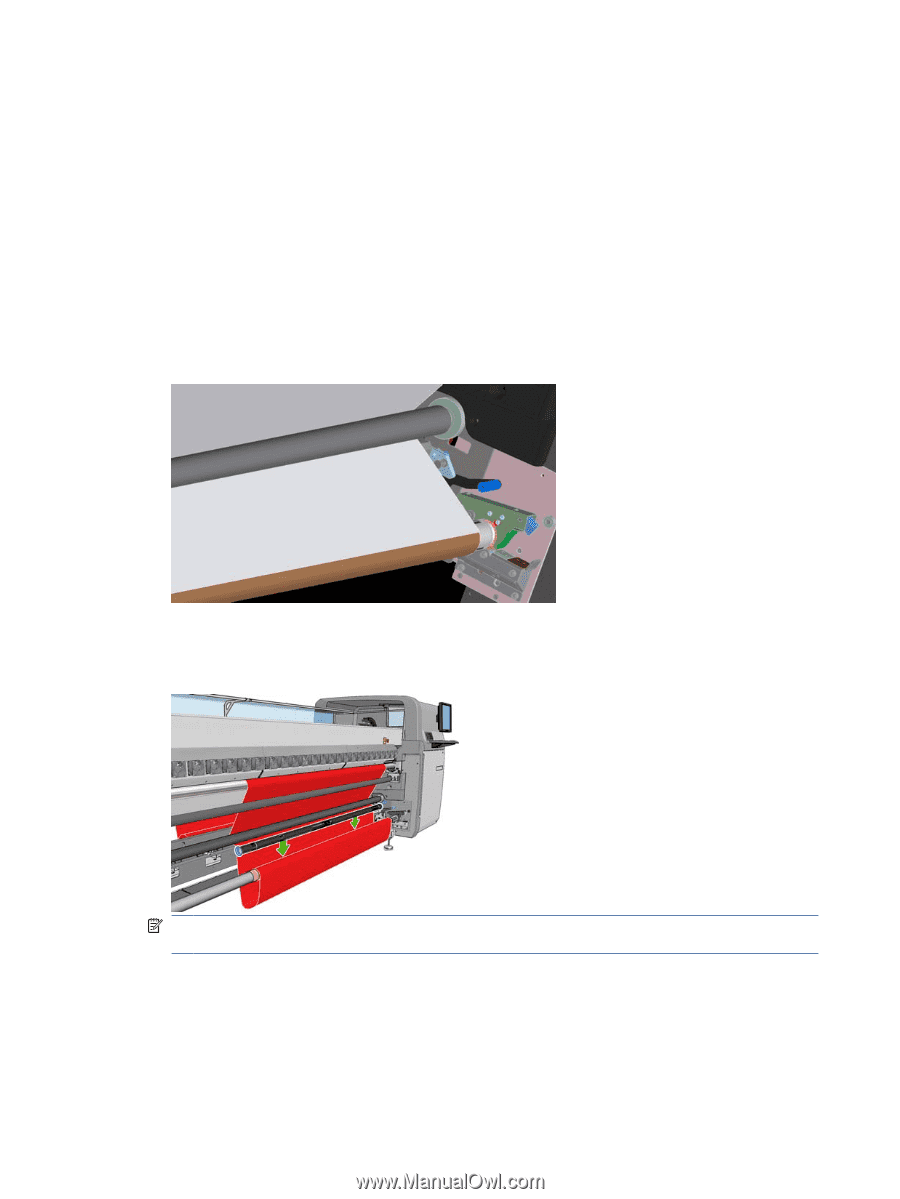
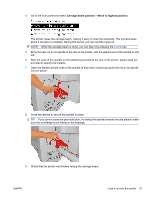
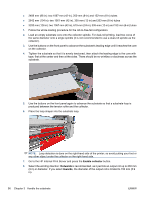
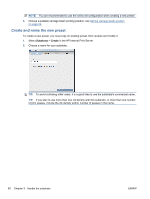
● 2489 mm (98 in): two 1067-mm (42-in), 203-mm (8-in) and 152-mm (6-in) tubes ● 2642 mm (104 in): two 1067-mm (42-in), 305-mm (12-in) and 203-mm (8-in) tubes ● 3200 mm (126 in): two 1067-mm (42-in), 610-mm (24-in), 305-mm (12-in) and 152-mm (6-in) tubes 1. Follow the whole loading procedure for the roll-to-free-fall configuration. 2. Load an empty substrate core onto the collector spindle. For dual-roll printing, load two cores of the same diameter onto a single spindle (it is not recommended to use a dual-roll spindle as the collector). 3. Use the buttons on the front panel to advance the substrate's leading edge until it reaches the core on the collector. 4. Tighten the substrate so that it is evenly tensioned, then attach the leading edge to the core with tape, first at the center and then at the sides. There should be no wrinkles or slackness across the substrate. 5. Use the buttons on the front panel again to advance the substrate so that a substrate loop is produced between the tension roller and the collector. 6. Place the loop shaper into the substrate loop. NOTE: Loop detection is done on the right-hand side of the printer; so avoid putting your foot or any other object under the collector on the right-hand side. 7. Go to the HP Internal Print Server and press the Enable collector button. 8. Select the winding direction: Outwards is recommended, as it permits an output roll up to 230 mm (9 in) in diameter. If you select Inwards, the diameter of the output roll is limited to 150 mm (5.9 in). 56 Chapter 3 Handle the substrate ENWW
-
 1
1 -
2
-
3
-
4
-
5
-
6
-
7
-
8
-
9
-
10
-
11
-
12
-
13
-
14
-
15
-
16
-
17
-
18
-
19
-
20
-
21
-
22
-
23
-
24
-
25
-
26
-
27
-
28
-
29
-
30
-
31
-
32
-
33
-
34
-
35
-
36
-
37
-
38
-
39
-
40
-
41
-
42
-
43
-
44
-
45
-
46
-
47
-
48
-
49
-
50
-
51
-
52
-
53
-
54
-
 55
55 -
 56
56 -
 57
57 -
 58
58 -
 59
59 -
 60
60 -
 61
61 -
 62
62 -
 63
63 -
 64
64 -
 65
65 -
66
-
67
-
68
-
69
-
70
-
71
-
72
-
73
-
74
-
75
-
76
-
77
-
78
-
79
-
80
-
81
-
82
-
83
-
84
-
85
-
86
-
87
-
88
-
89
-
90
-
91
-
92
-
93
-
94
-
95
-
96
-
97
-
98
-
99
-
100
-
101
 |
 |