HP Scitex LX600 HP Scitex LX Printer Family - User's guide - Page 47
Carriage beam position, Move to printing normal, WARNING
 |
View all HP Scitex LX600 manuals
Add to My Manuals
Save this manual to your list of manuals |
Page 47 highlights
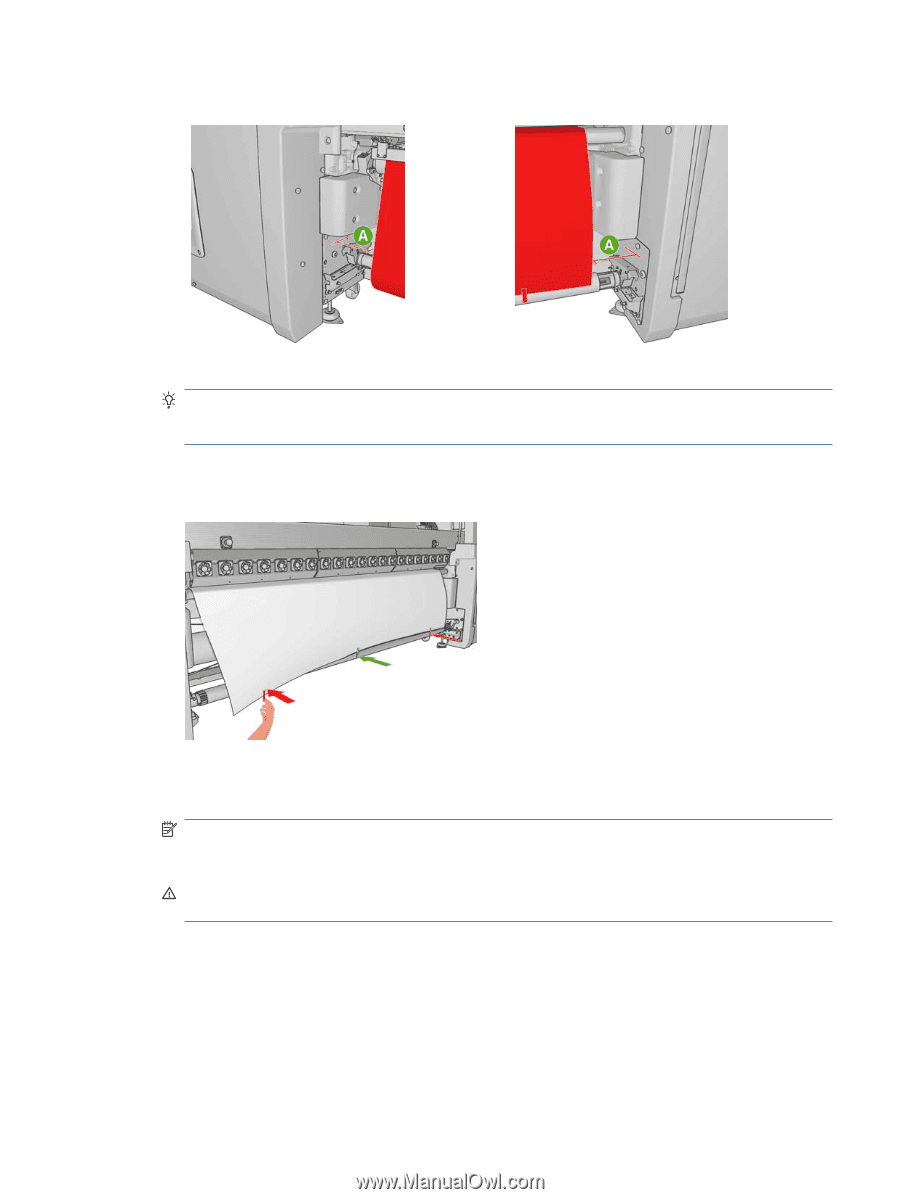
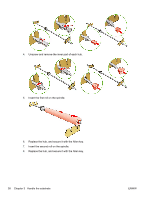
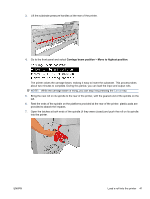
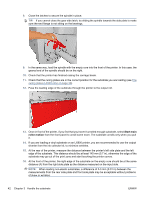
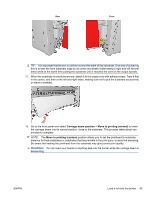
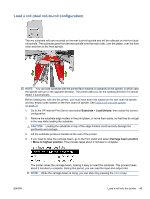
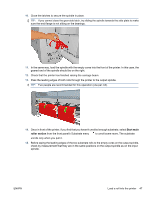
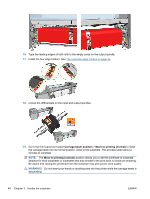
Rear Front TIP: It is important that tension is uniform across the width of the substrate. One way of achieving this is to take the front substrate edge by its center and shake it alternately to right and left several times while at the same time pulling the substrate until it reaches the core on the output spindle. 17. When the substrate is evenly tensioned, attach it to the empty core with adhesive tape. Tape it first in the center, and then at the left and right sides, making sure not to pull the substrate excessively or leave it wrinkled. 18. Go to the front panel and select Carriage beam position > Move to printing (normal) to lower the carriage beam into its normal position, close to the substrate. This process takes about two minutes to complete. NOTE: The Move to printing (custom) position allows you to set the printhead-to-substrate distance for thick substrates or substrates that may wrinkle in the print zone, to avoid ink smearing. Be aware that raising the printhead from the substrate may give poorer print quality. WARNING! Do not insert your hands or anything else into the printer while the carriage beam is descending. ENWW Load a roll into the printer 43
-
 1
1 -
2
-
3
-
4
-
5
-
6
-
7
-
8
-
9
-
10
-
11
-
12
-
13
-
14
-
15
-
16
-
17
-
18
-
19
-
20
-
21
-
22
-
23
-
24
-
25
-
26
-
27
-
28
-
29
-
30
-
31
-
32
-
33
-
34
-
35
-
36
-
37
-
38
-
39
-
40
-
41
-
 42
42 -
 43
43 -
 44
44 -
 45
45 -
 46
46 -
 47
47 -
 48
48 -
 49
49 -
 50
50 -
 51
51 -
 52
52 -
53
-
54
-
55
-
56
-
57
-
58
-
59
-
60
-
61
-
62
-
63
-
64
-
65
-
66
-
67
-
68
-
69
-
70
-
71
-
72
-
73
-
74
-
75
-
76
-
77
-
78
-
79
-
80
-
81
-
82
-
83
-
84
-
85
-
86
-
87
-
88
-
89
-
90
-
91
-
92
-
93
-
94
-
95
-
96
-
97
-
98
-
99
-
100
-
101
 |
 |